
With the Tour Te Waipounamu bikepacking race out of the way for 2022, the next outdoor adventure I had lined up was a couple of weeks in one of my favourite places on earth: the Darran mountains, in Fiordland National Park. When I am in New Zealand, getting down here during the months of February or March is always a high priority.
As you’d expect, racing the 1300km Tour Te Waipounamu left me tired, but it also pushed into the past an event I’d been obsessing about for over a year and training for for six months. Suddenly I felt like I had my life back. I figured three weeks of rest and catching up on work should restore my energy levels enough to take on a Central Darrans adventure, so in the intervening time I took it pretty easy and just tried to reintroduce my legs (and an injured, but settling, achilles) to walking. It took about five hilly walks with light loads before my legs would stop cramping hideously on every descent – such was my conversion from climber to cyclist.
I’d basically done the same thing last summer; completing TTW and then going to the Darrans for a 6-day traverse, with some summits and climbing along the way, but I’d also come out of TTW less exhausted, having had longer sleeps and over more days.
Tom Riley, who I have done a fair bit of Darrans time with over the years, made up the second half of our ‘team’. Our plan was similar to last year: do a central Darran Mountains crossing/traverse of some sort, ideally entering and exiting the mountains by routes that were new to us. Ideally we’d climb some rock and bag some summits that were new to us too.
Our ingress route this time was Cleft Creek (from the Lower Hollyford Valley) and Opportunity Spur, which is a very direct route out of the upper flats of Cleft Creek to reach slopes high on Te Wera, which we could then sidle to reach the Turner’s Eyrie rock bivouac. Opportunity Spur had only been ascended a couple of times before and is a relatively recent discovery.
We intended to egress via the Te Puoho Glacier, Rainbow Lake and Moraine Creek. Tom had been been into the Te Puoho via Moraine Creek before, but neither of us had ventured into Cleft Creek.
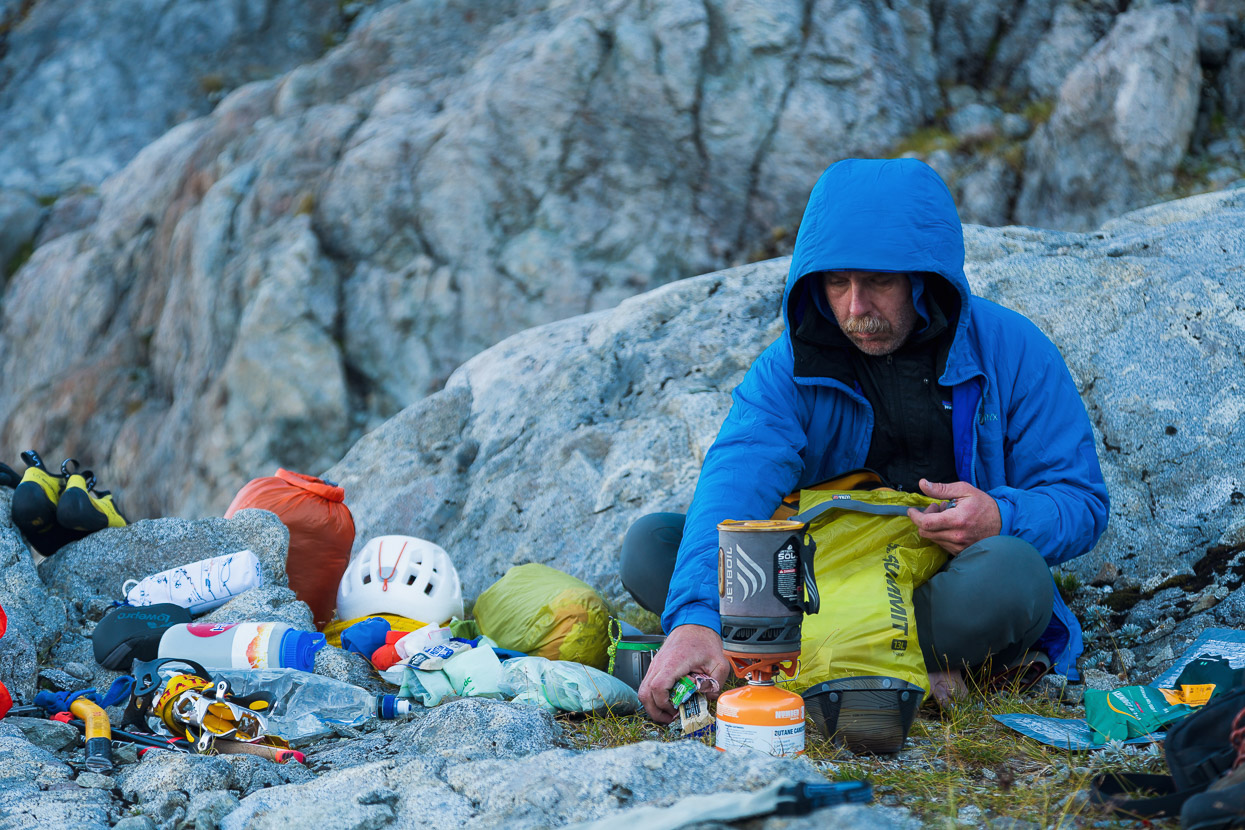
Aside from the usual lightweight tramping gear, we had rock shoes and a very light rack (3 nuts and 5 tiny-medium cams) with five quickdraws and an 8mm, 60m rope, which comprised our ‘travel’ rack. We would use our friend’s climbing gear that was stored at the Eyrie for longer climbs.
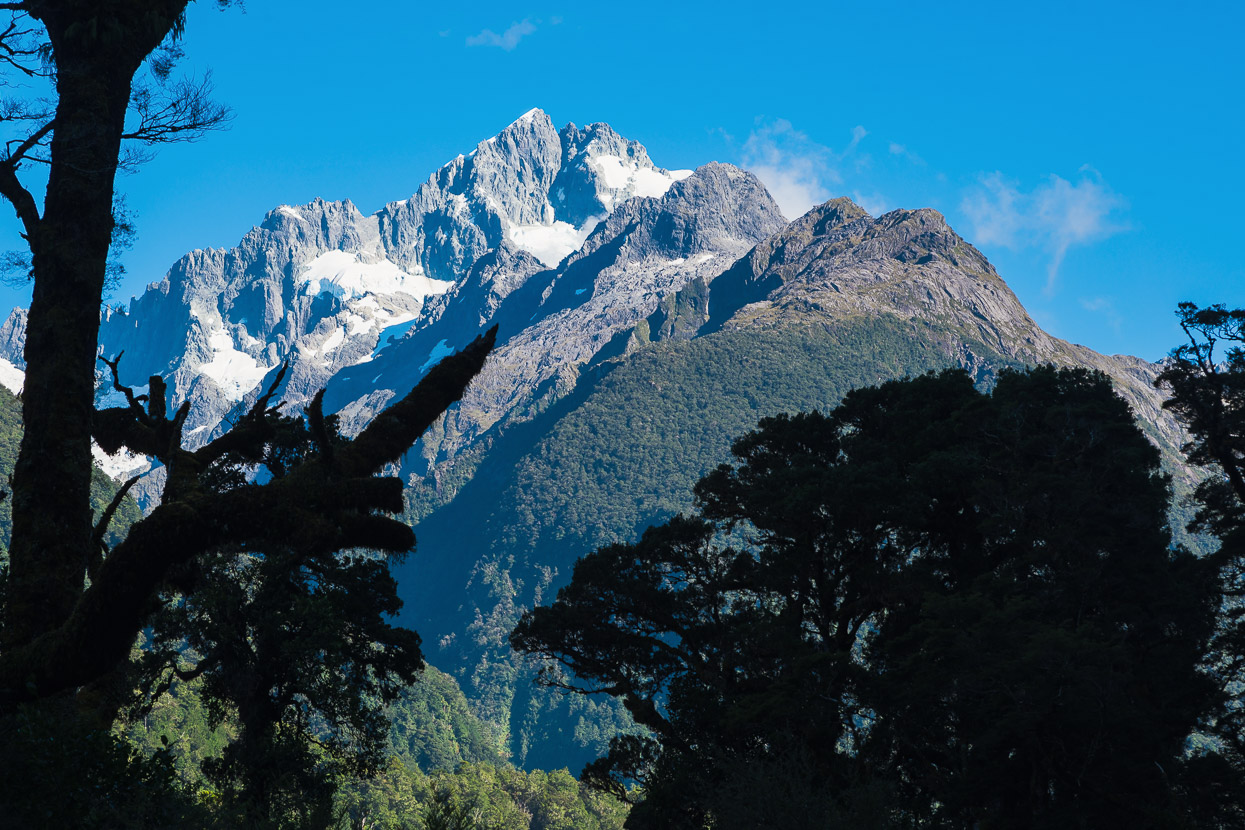
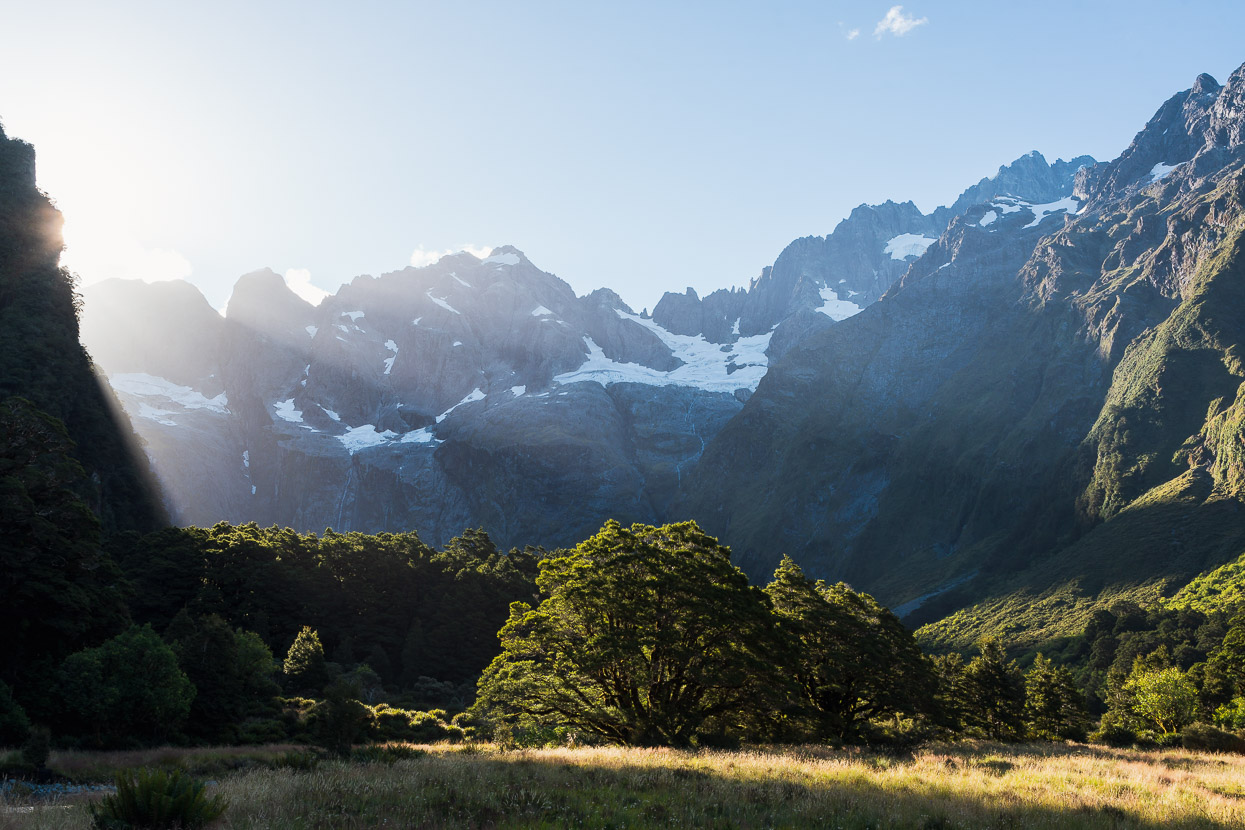
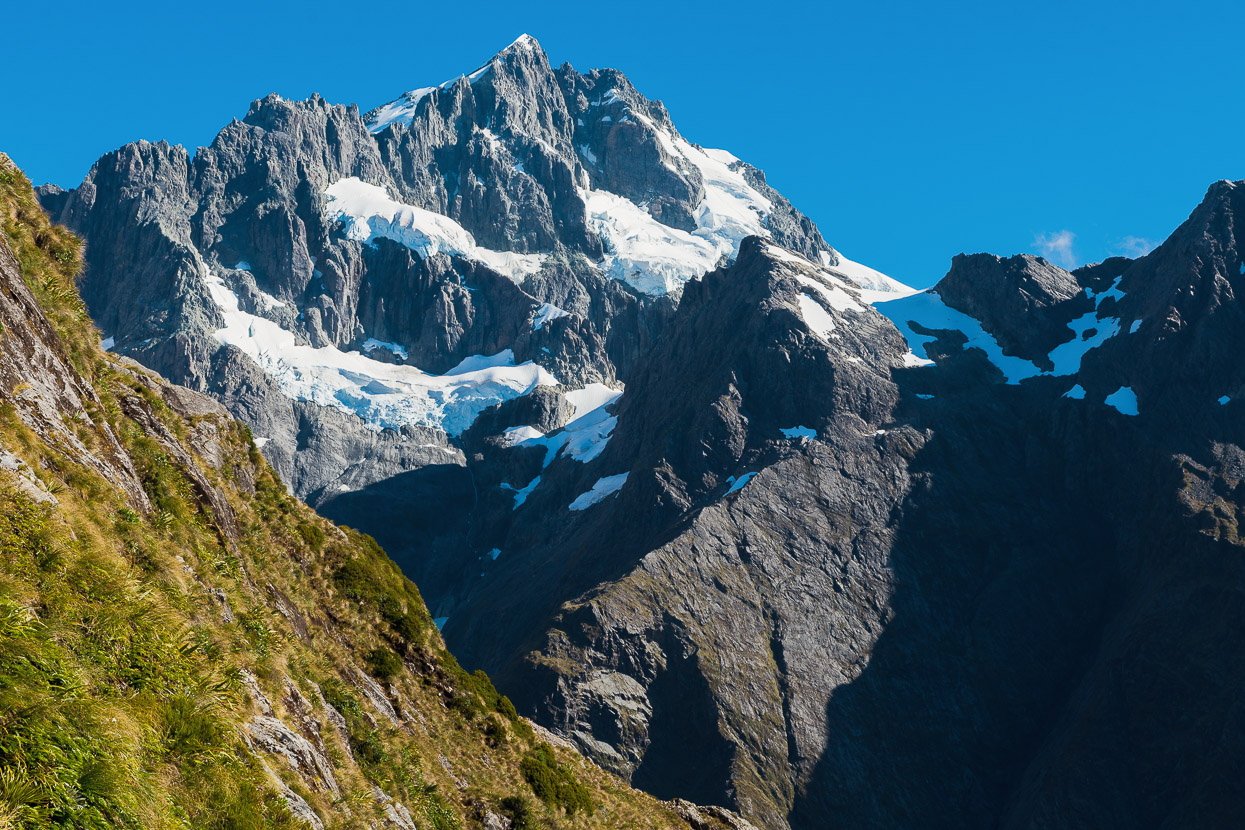
From the Hollyford Track we could catch glimpses of the section of mountains we were heading into. This photo shows Mt Madeline (second highest mountain in Fiordland) with Cleft Creek at its base (running to the left from between the tree silhouettes).
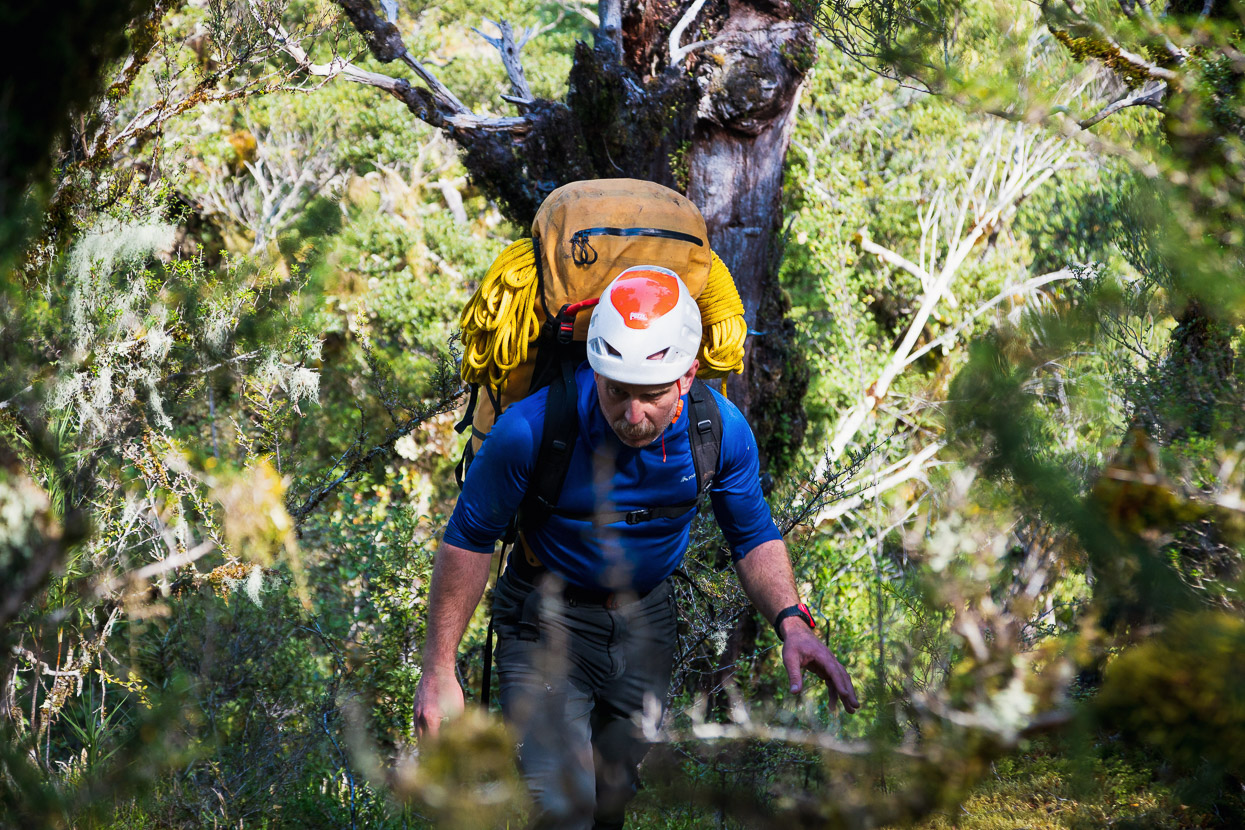
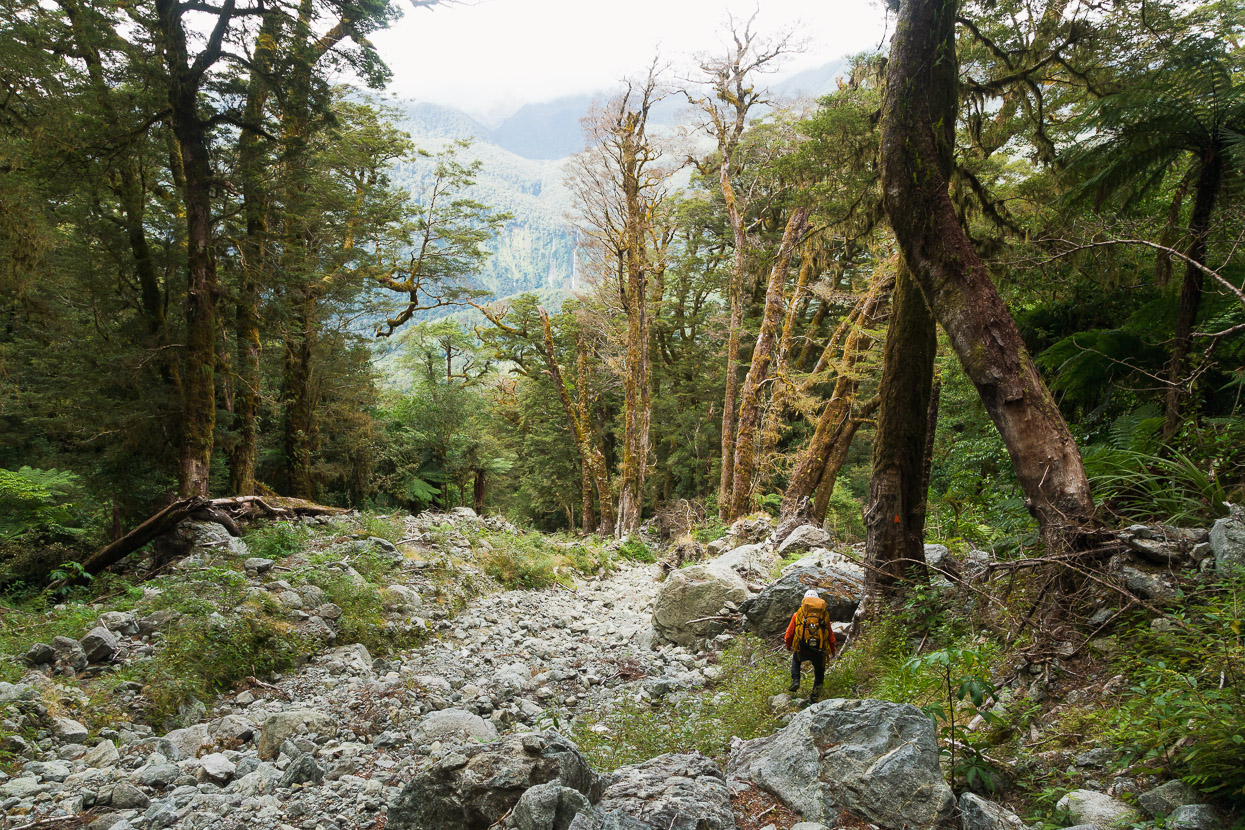
The Hollyford was about knee-deep and we easily forded it, linked together, right at the point where the track meets the river for the first time (a bit over 5km down the track). And then we took on the bush. About 1.5km of lowland beech-covered flats followed before we joined Cleft Creek, travel was not too bad (the forest is relatively open) but we did spend some time staggering through mud holes and moss covered roots and it felt a bit like we were searching for Yoda on Dagobah.

It was good to reach the actual creek, but it looked as if it had suffered the same flood blow-out that many Fiordland water courses did in the big February 2020 storm that destroyed Gunns Camp and Howden Hut. Consequently there were a lot of tangled dead trees to negotiate along with the typical boulder hopping as we worked our way up the true left.
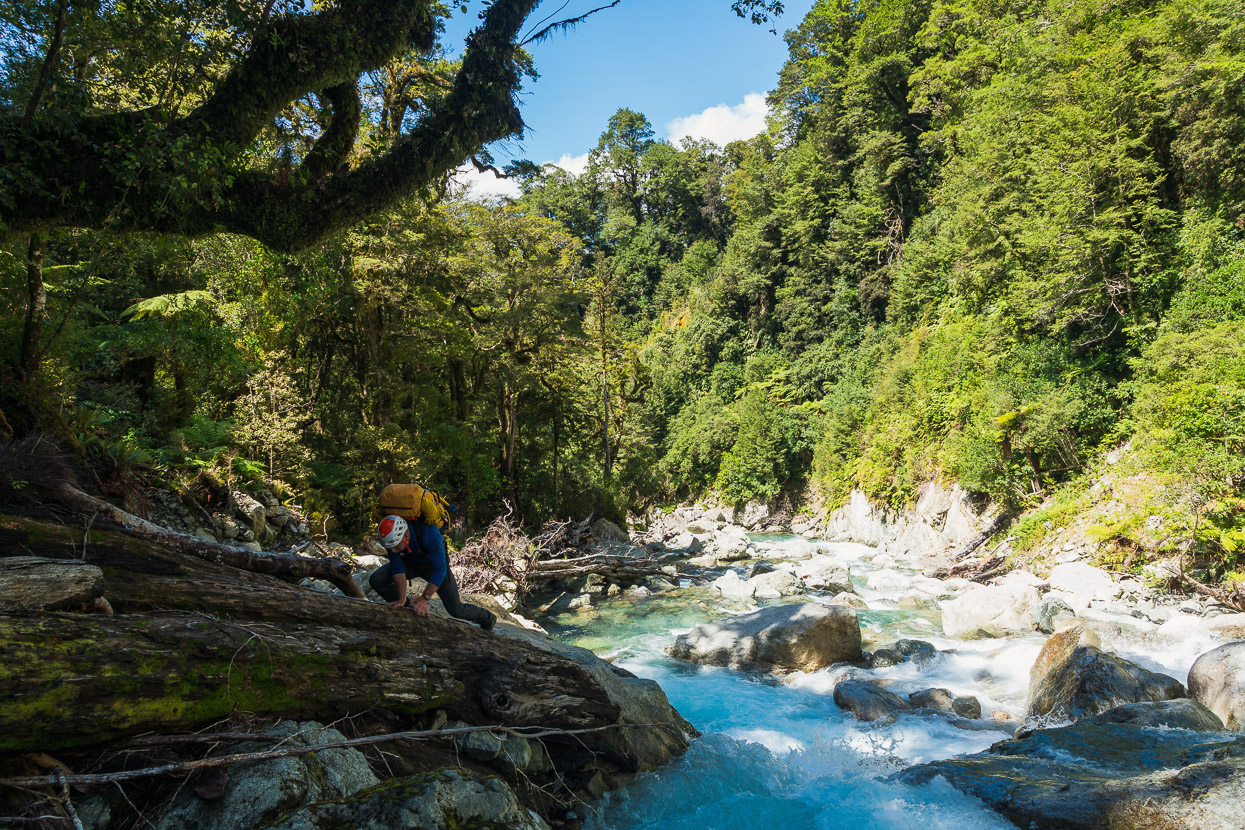
Richard Thomson had told me ‘Stay in the river as long as you can, or you’ll get fucked up, like we did’, so we did our best, but travel in, or close to, the riverbed seemed like the most logical progress anyway. We went in and out of the bush a couple of times to avoid obstacles (which was always a slow grovel). Eventually the gorge forced us out of the river so we continued in the bush, about 25-50m from the river.
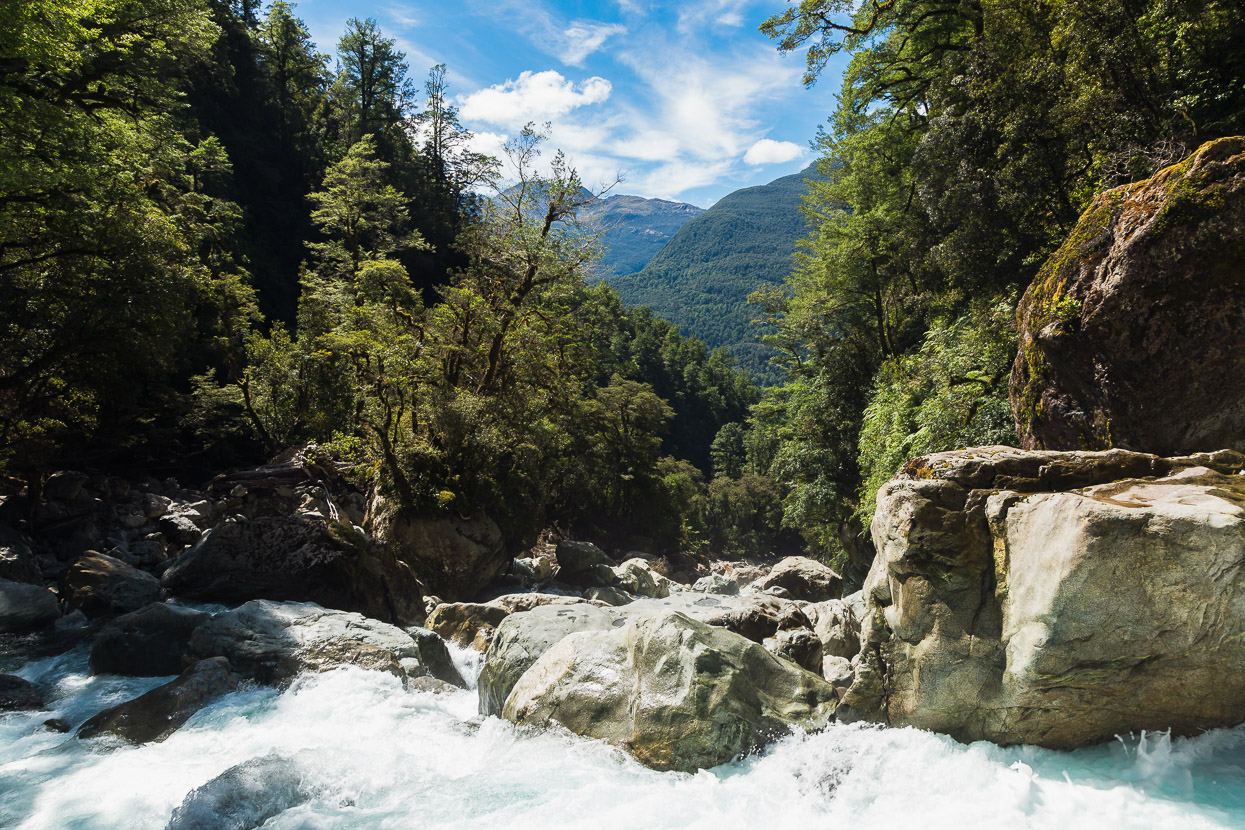
Near the 400m contour the river narrows into a chasm and we were forced further away from it, until about the 440m contour where a wall in the bush pushed us left and there we picked up an animal track that climbed a bush covered spur (mentioned in the route description). After we’d climbed the spur from tree to tree for a few metres, the ground trail became obvious.
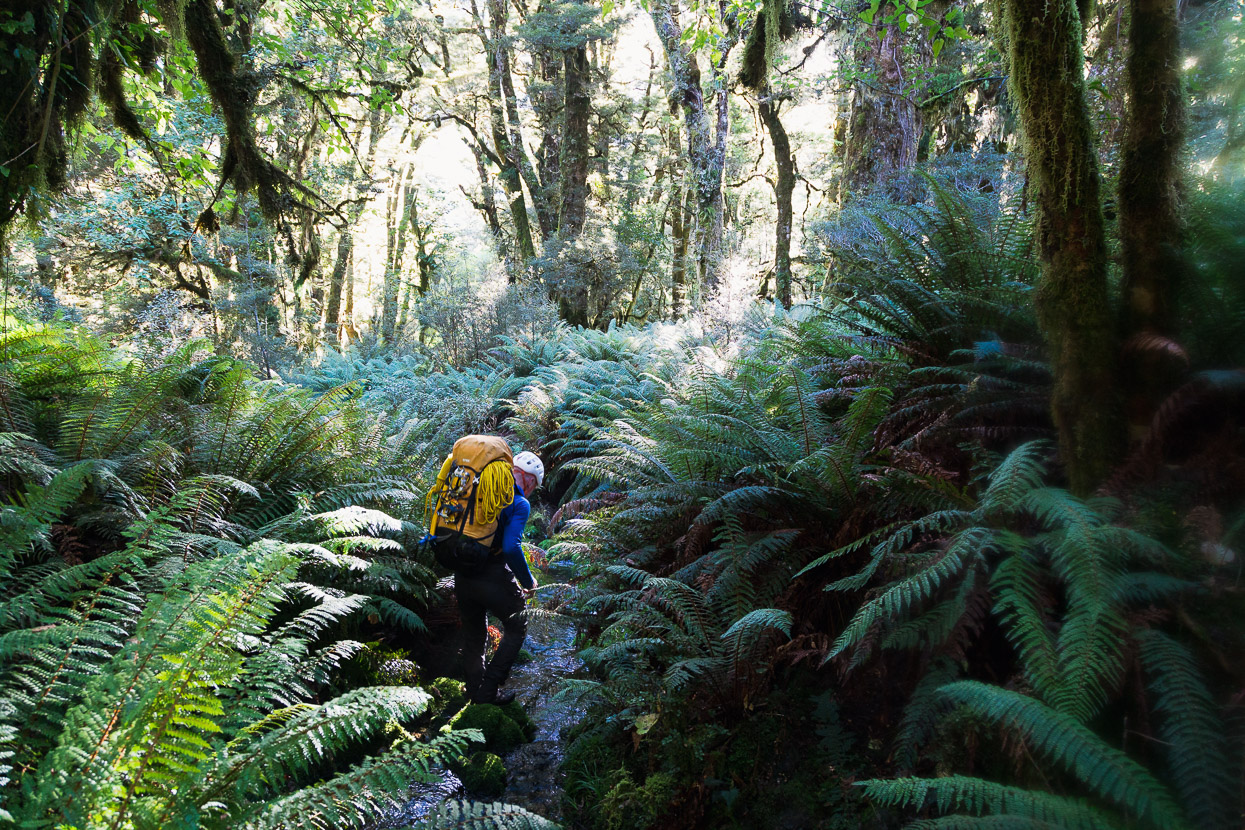
We followed the narrow spur up to the 700m contour before sidling north off it through deep crown ferns. You have to follow it to this height and then sidle north and cut back west to descend because of a cliff in the bush (you can see its shadow on the satellite map). We tried to drop down to the west earlier but after some steep down climbing it bluffed out about 20m above the valley floor and we would have had to abseil.
After the sidle and descent we ended up in a deep gully which was a chaos of hidden holes, roots, thick vegetation and bush lawyer and it seemed like a miracle neither of us broke our legs as we stumbled about blindly under heavy packs, feeling pretty exhausted.
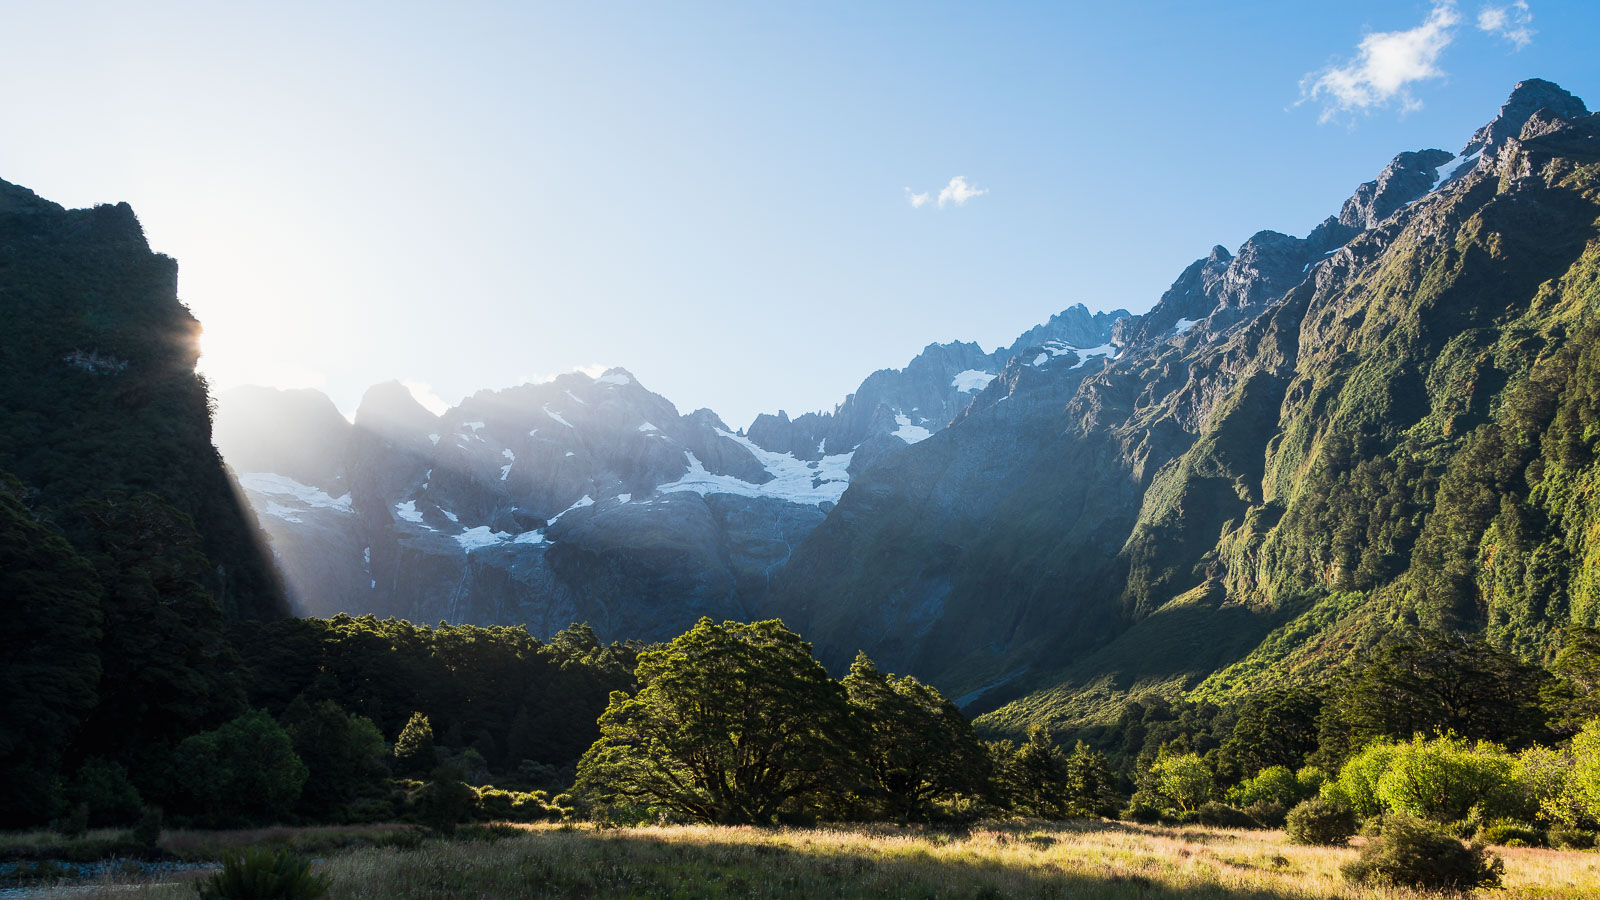
After one more short rise and an easier descent we popped out in the valley flats, which was quite a moment. The late afternoon light and open space was fantastic after the noise of the river and the dark confines of the bush. Finally we could swing our tired legs out properly in front of us to walk. That’s the toe of Opportunity Spur on the foregound left.
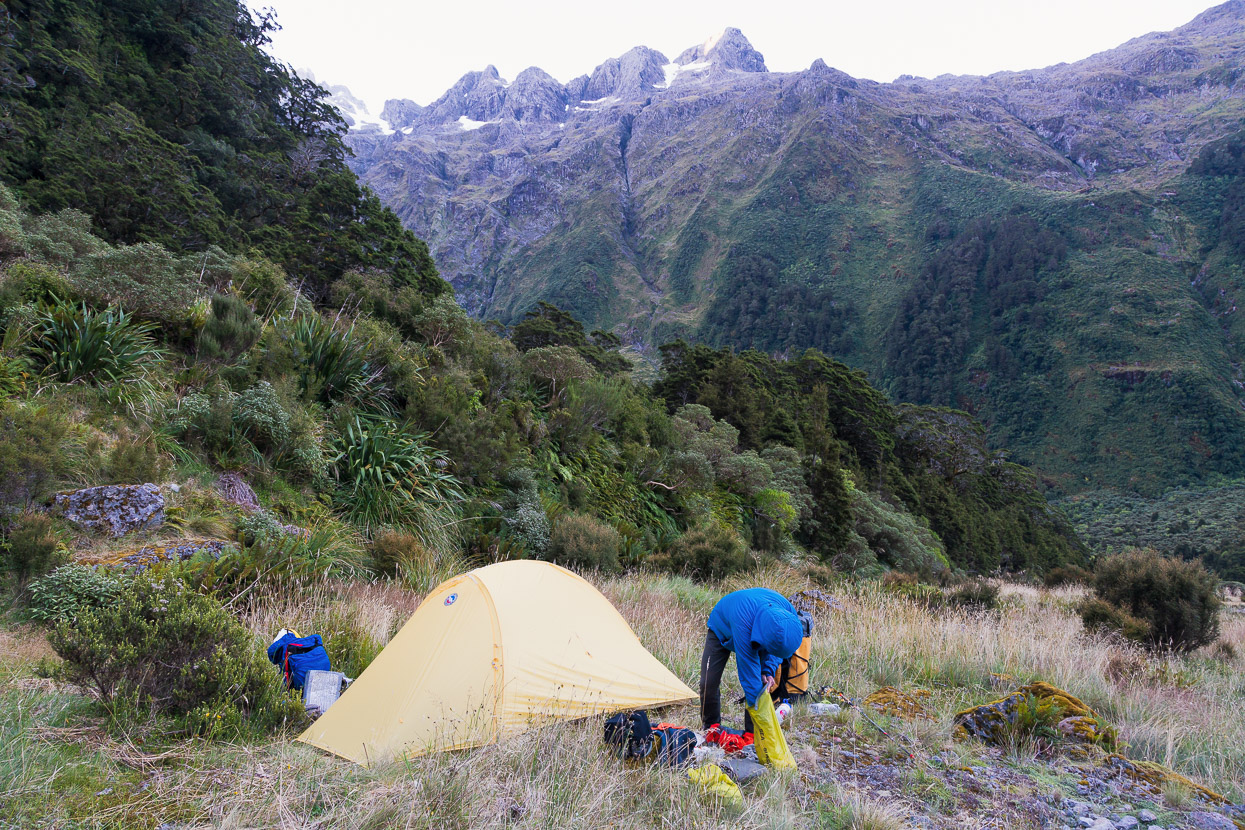
There’s a rock bivvy on the flats somewhere and as we walked towards the base of Opportunity Spur we hoped we’d stumble upon it, but it didn’t materialise and we didn’t really have the energy to explore for it. There’s a good tent site right at the bottom the spur and a creek nearby which was all we needed anyway on a warm, clear night.
All day I’d felt like I didn’t have my usual energy reserve, which I put down to not recovering completely from TTW, and the walking with a heavy pack had given my achilles a pretty hard time (despite taping it).
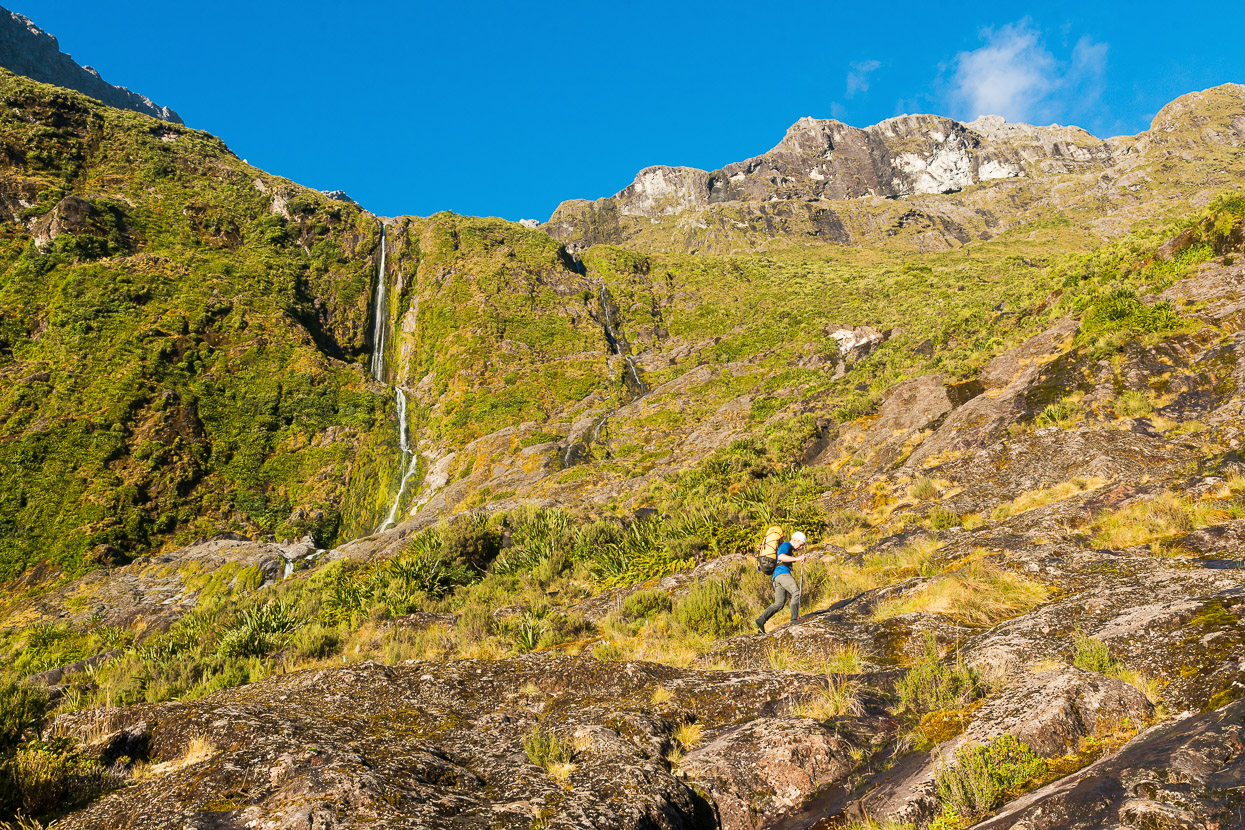
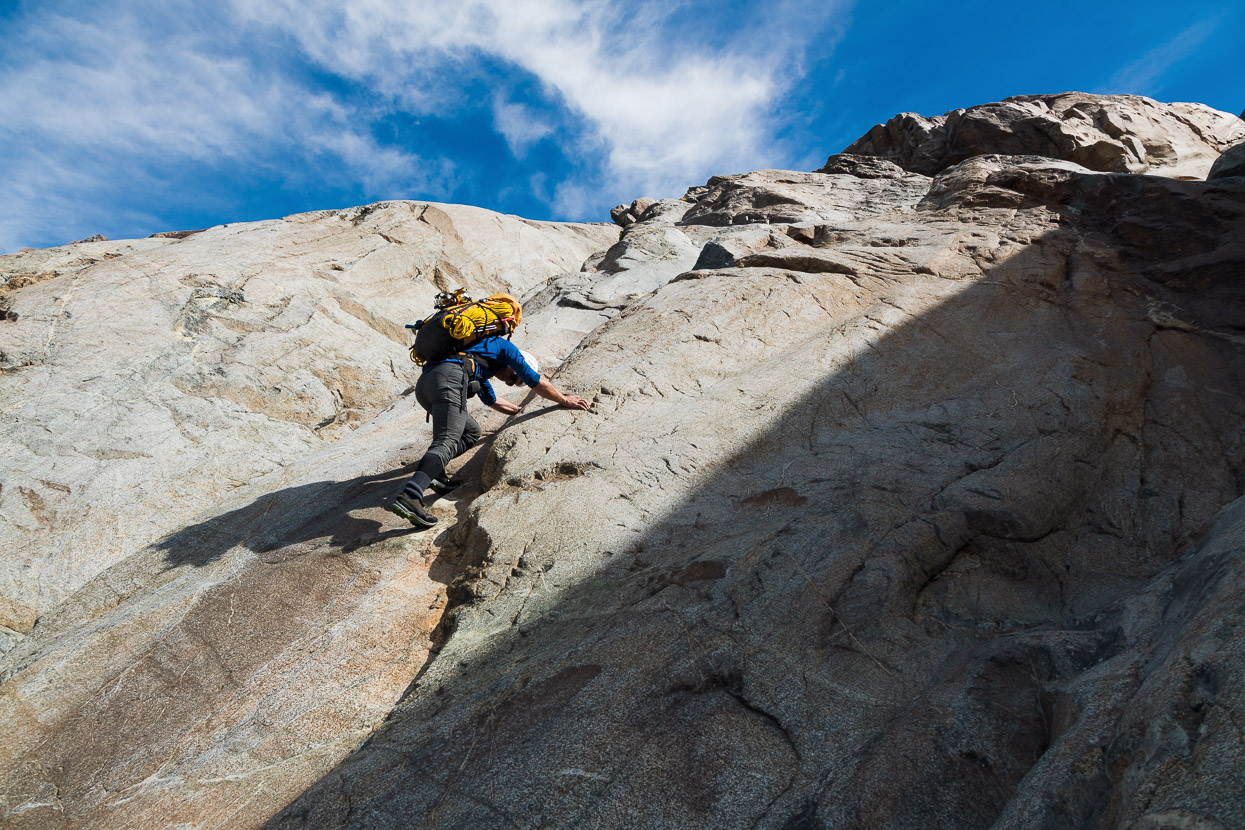
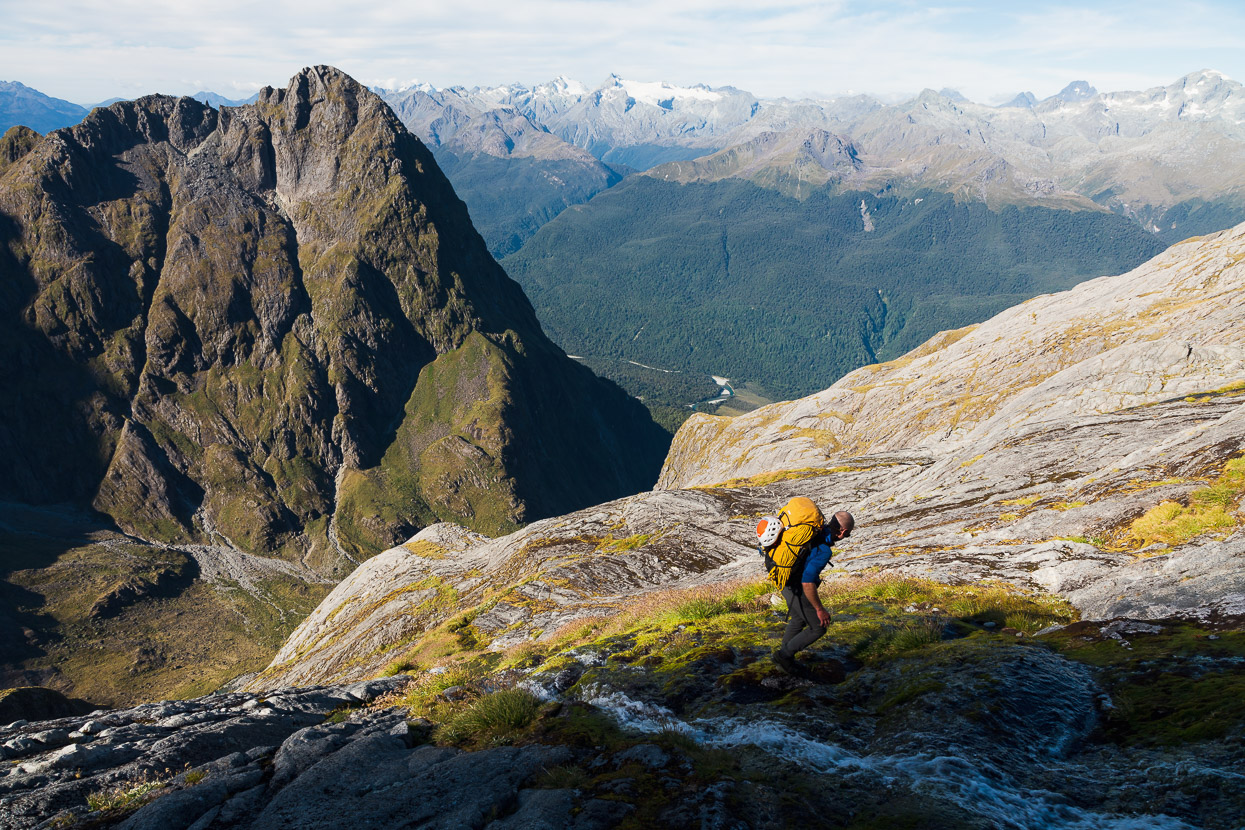
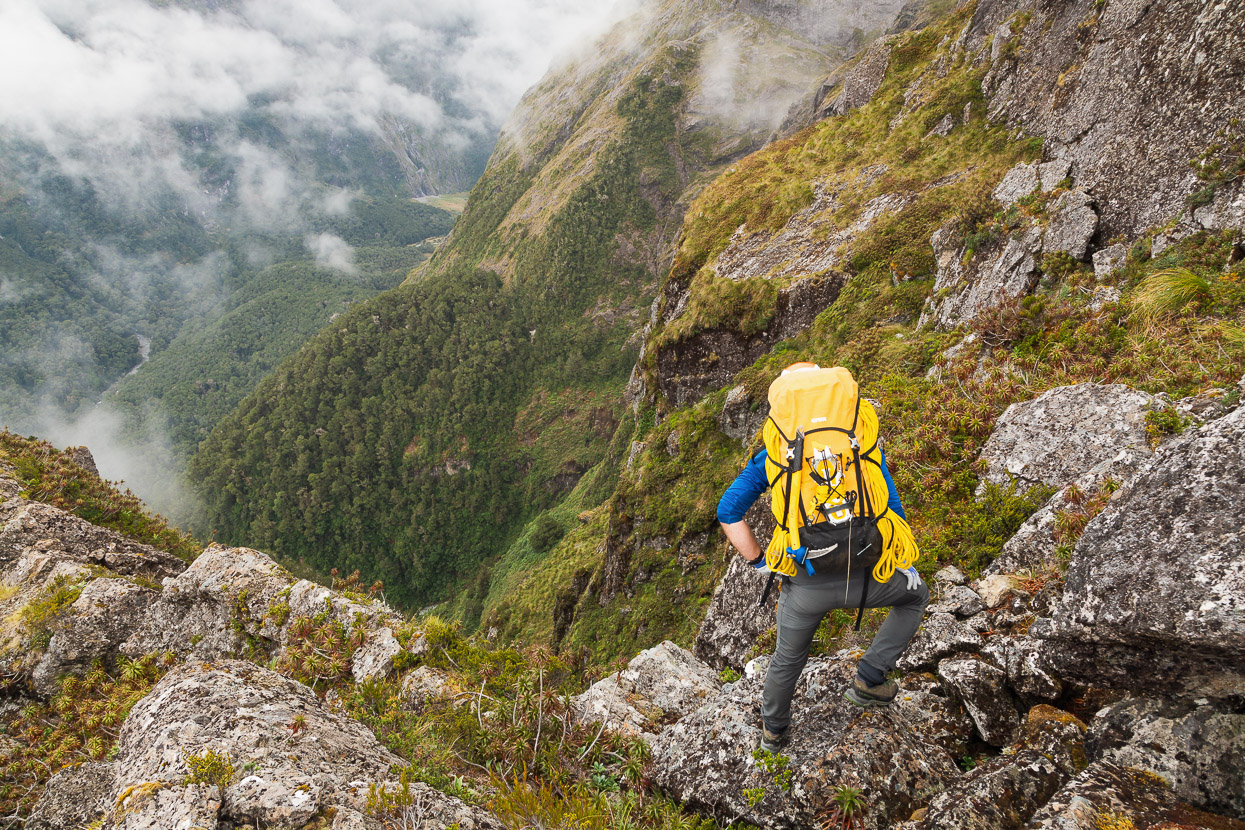
We slept well and left camp shortly after daybreak. The route up the ‘spur’ follows a broad concave face, which is a series of rock slabs and patches of vegetation and steepens gradually as it ascends until it reaches a line of bluffs about 700m vertical metres up.

To one side, huge cliffs, and the other; an expansive view out to Madeline and upper Cleft Creek.
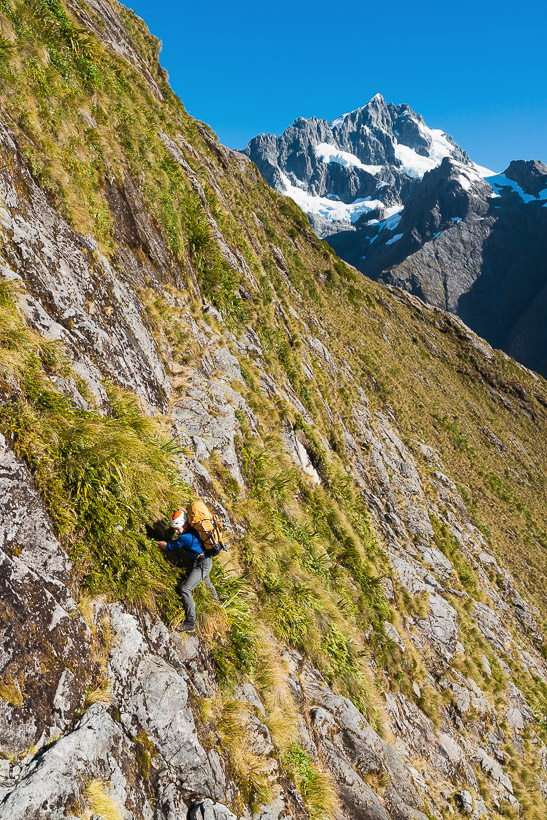
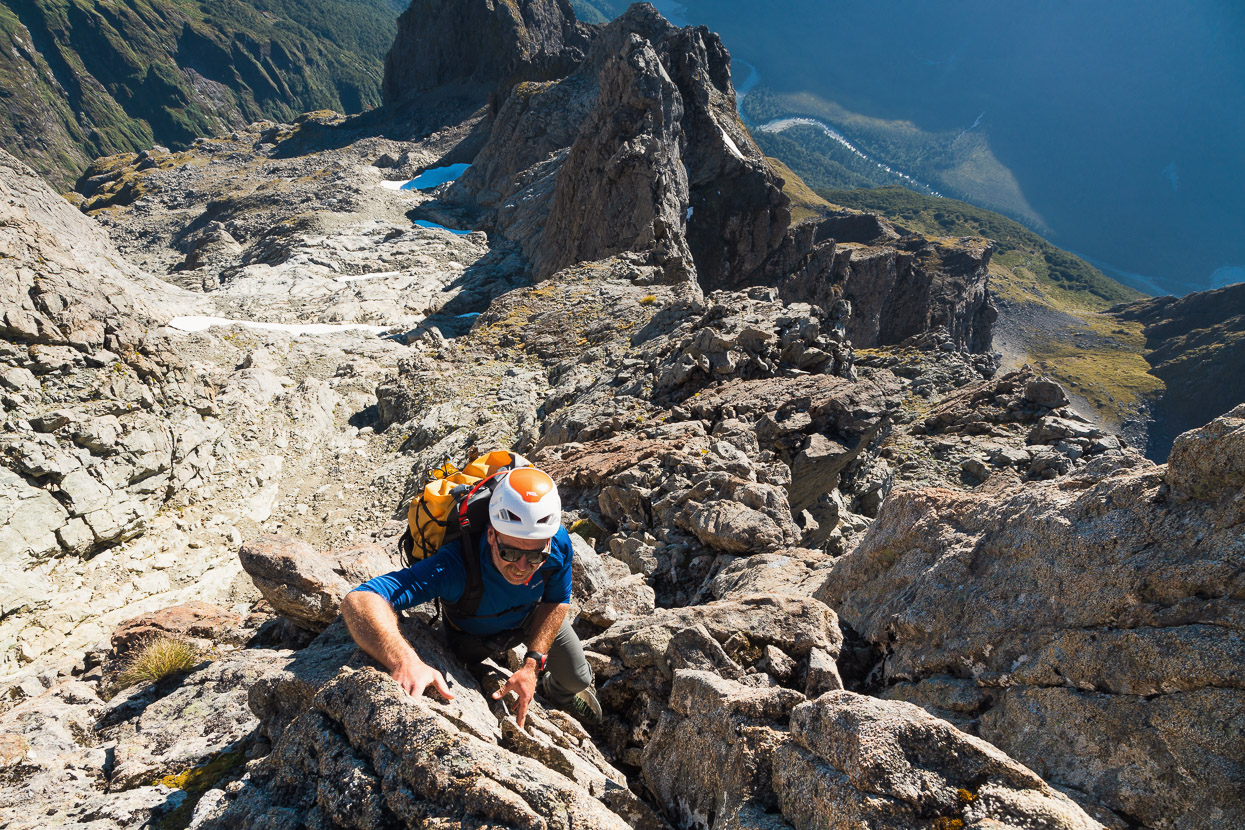
Although there are many ways you can go up the face, we enjoyed the classic problem-solving nature of travel in steep Fiordland country; decodifying the terrain to find the blend of manageable exposure and efficient travel that lets you keep moving along ropeless. Sometimes we hauled our way up with firm handfuls of flax and snow grass and others we squirmed our way up features with friction moves that we would not have liked to reverse.
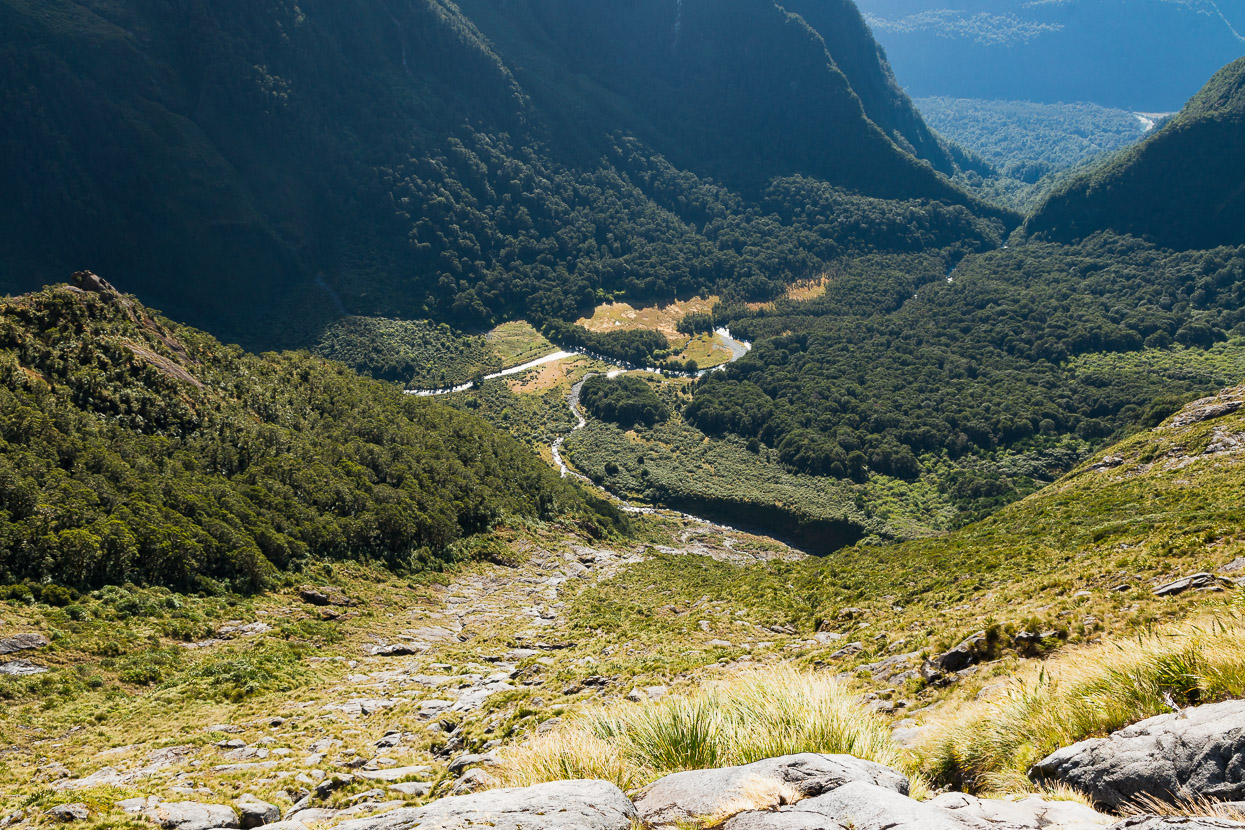
Looking back down at the Cleft Creek flats and our route in from the Hollyford. We camped at the left end of the wide shadow in the centre of the photo.
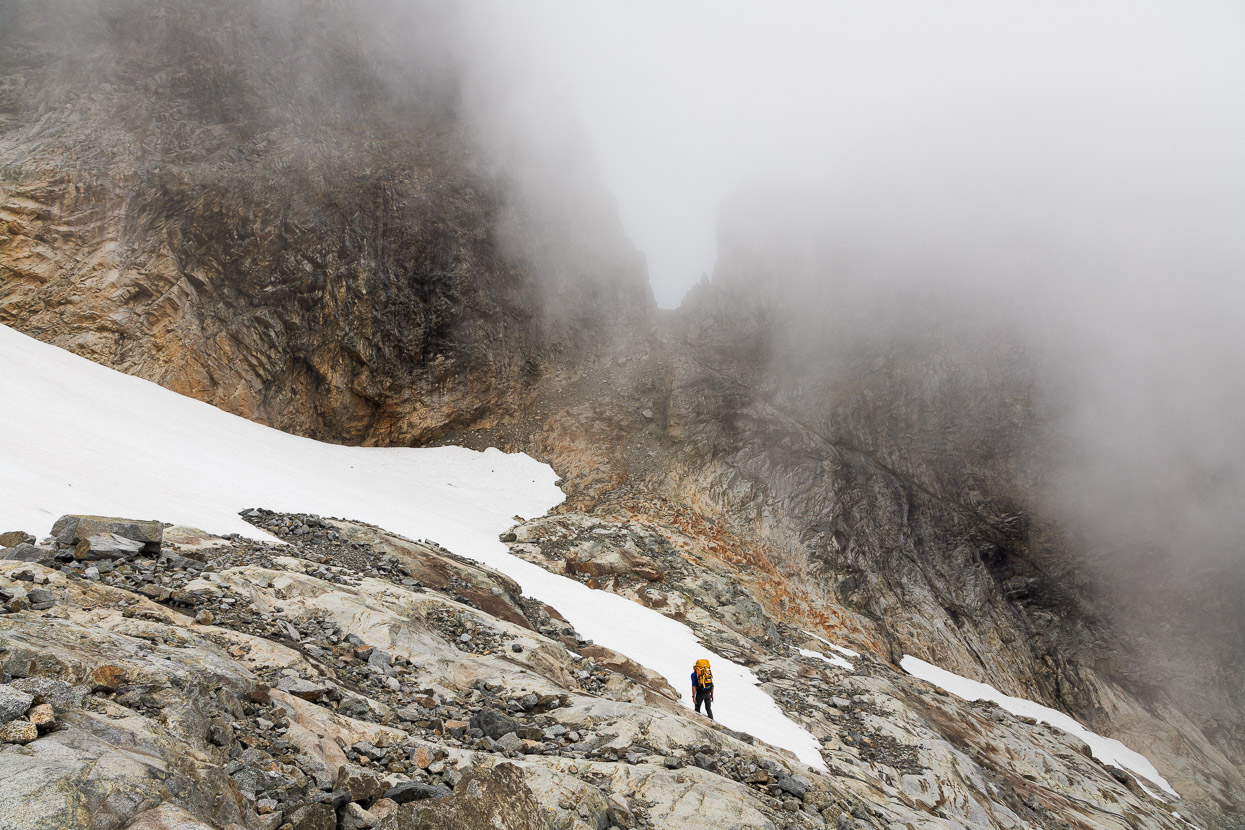
As we closed in on the bluff line we diagonalled right to what appears as a notch in the skyline from below, and what we hoped would be the weakness that would allow us a way onto the gentler slopes above, and then to a sidle under Te Wera’s summit massif. We belayed briefly up a single rock step that proved to be the key to access. It’s a prow-like short vertical wall, that the whole route falls away beneath, and while juggy and soloable we belayed in case of loose holds.
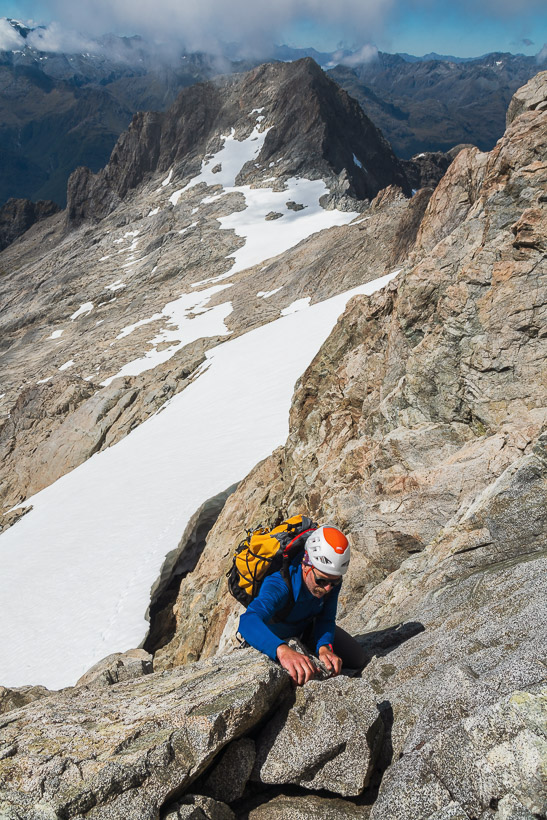
Above, the angle mellowed out and we continued to work our way up, looking for a way to get onto the snowgrass and scree slopes at about 1580m on the north side of Te Wera.
Getting into the easier slopes was a little tricky, but after probing upwards further than we expected we found a down-climbable weakness onto the snowgrass slopes.

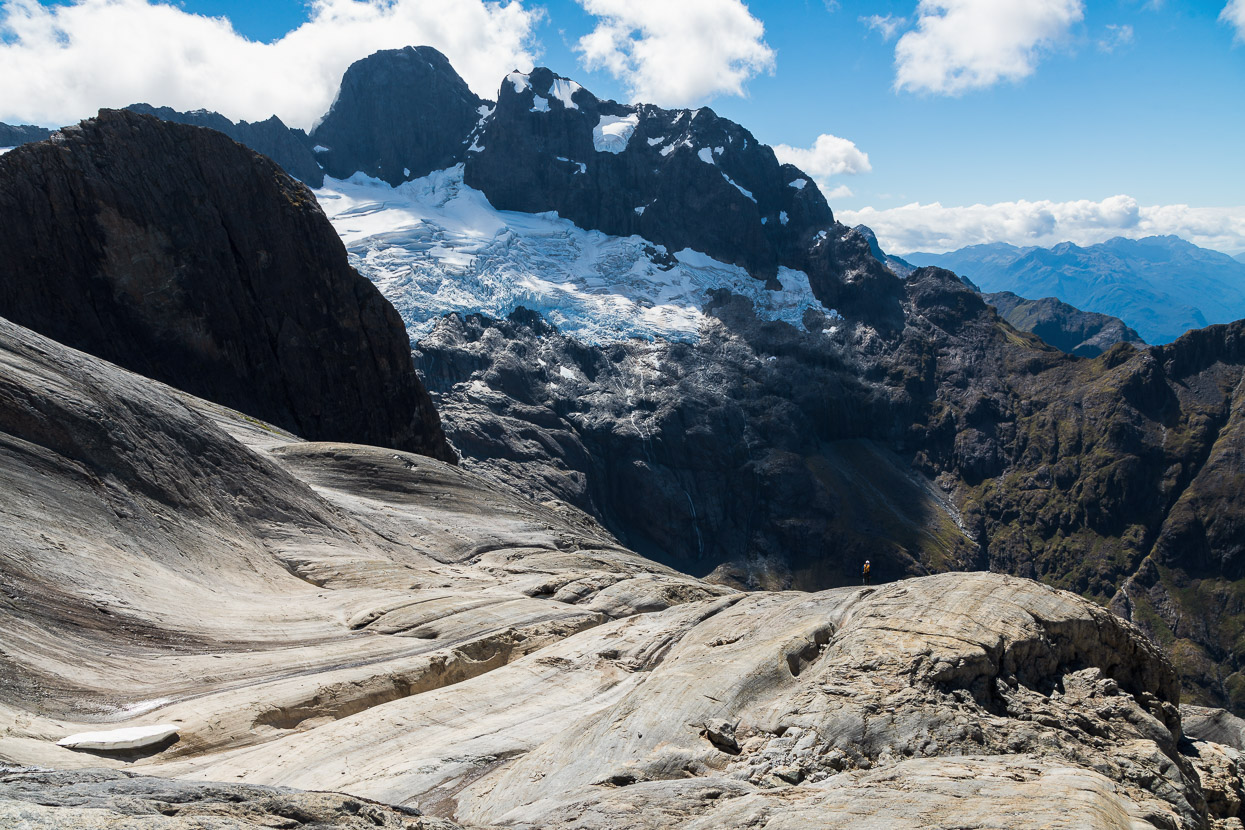
We crossed the toe of Te Wera’s north ridge, headed south, passing some impressive boulders, eroded bedrock and glacier polished slabs.
We were headed towards the prominent col in Te Wera’s West Ridge that you can see from Turners Eyrie. There’s little left of what the map indicates is an extensive snowfield.
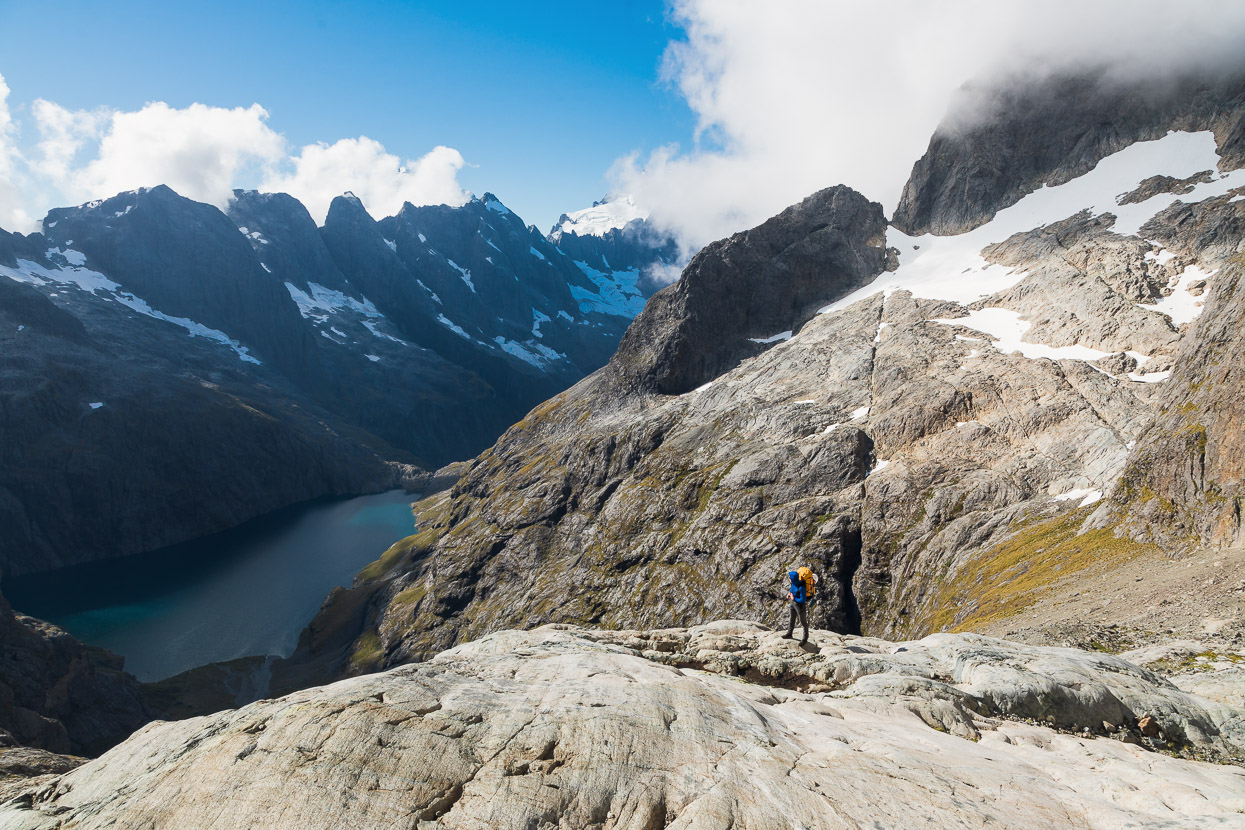
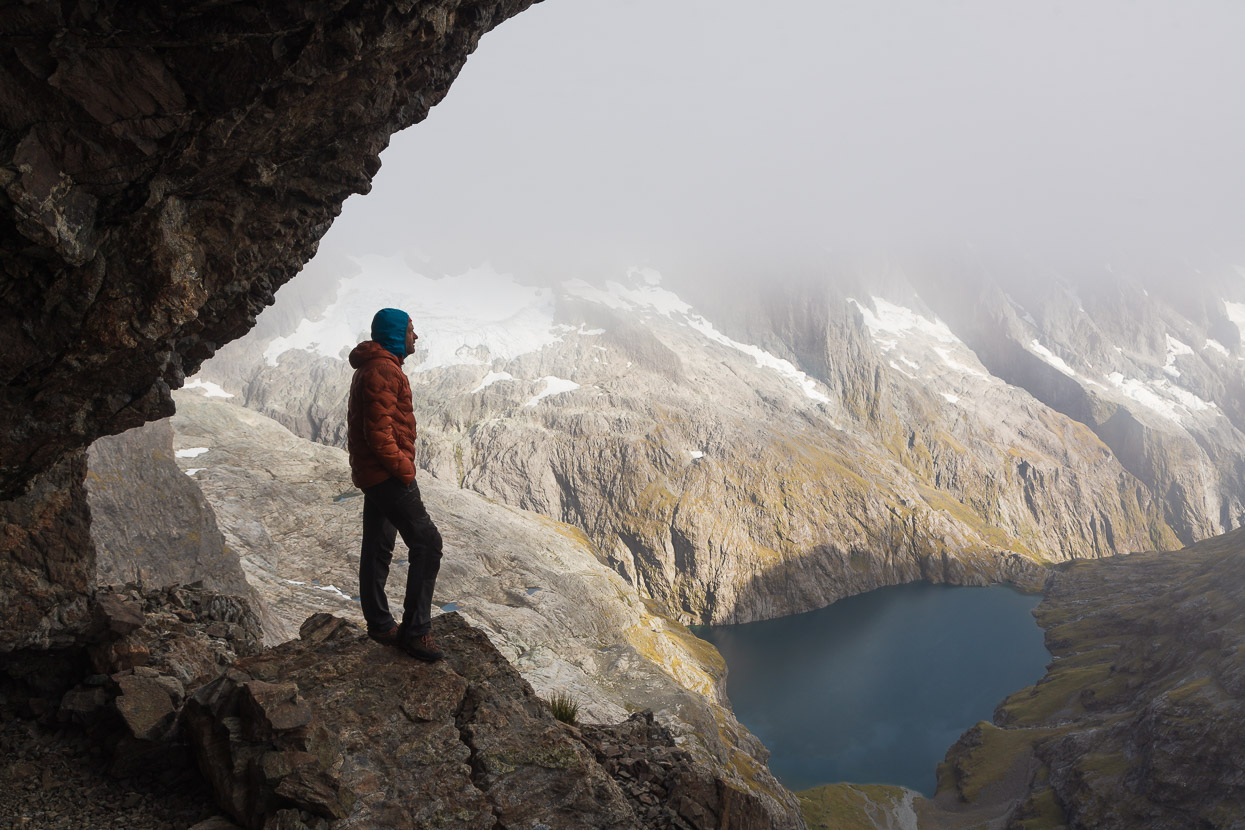
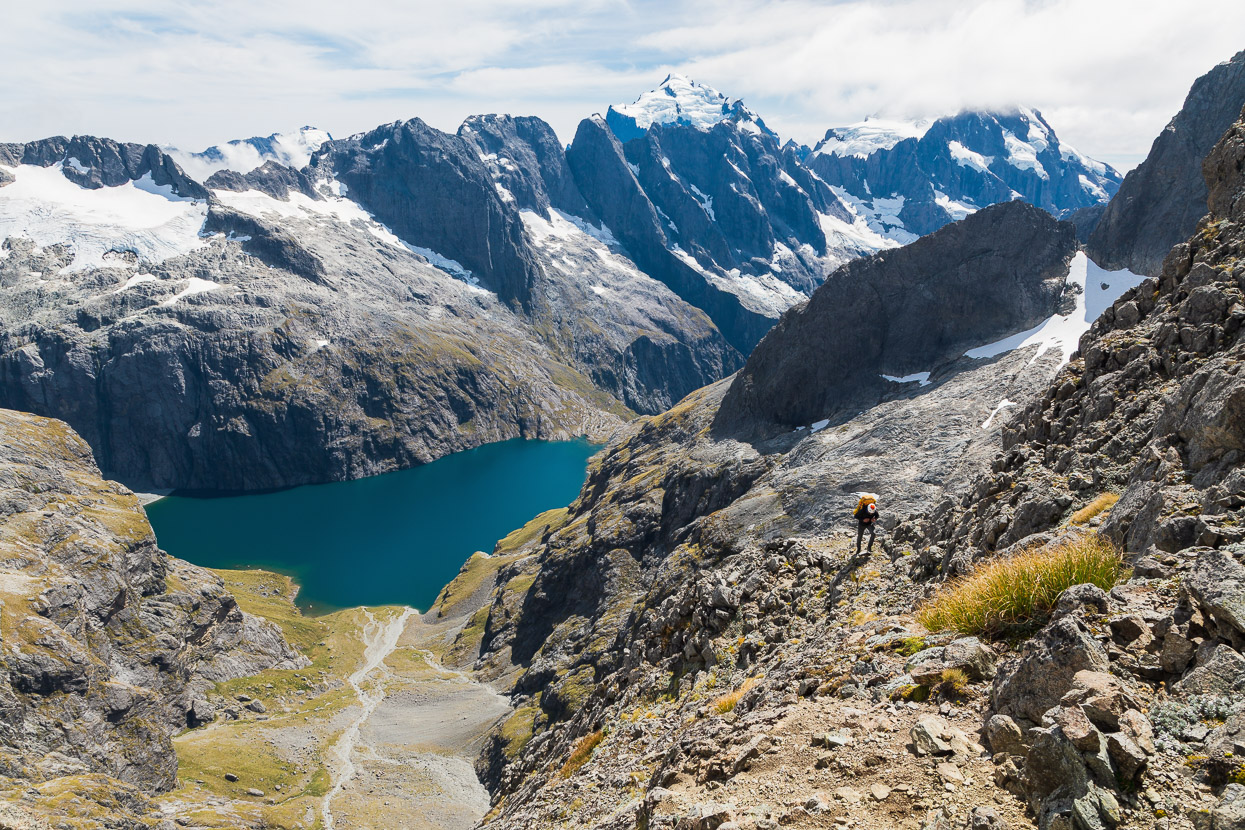
Finally we reached the slabs below Turner’s Eyrie, here looking back towards the col, above Tom, and down to Lake Turner, and below the lake, Cleft Creek.
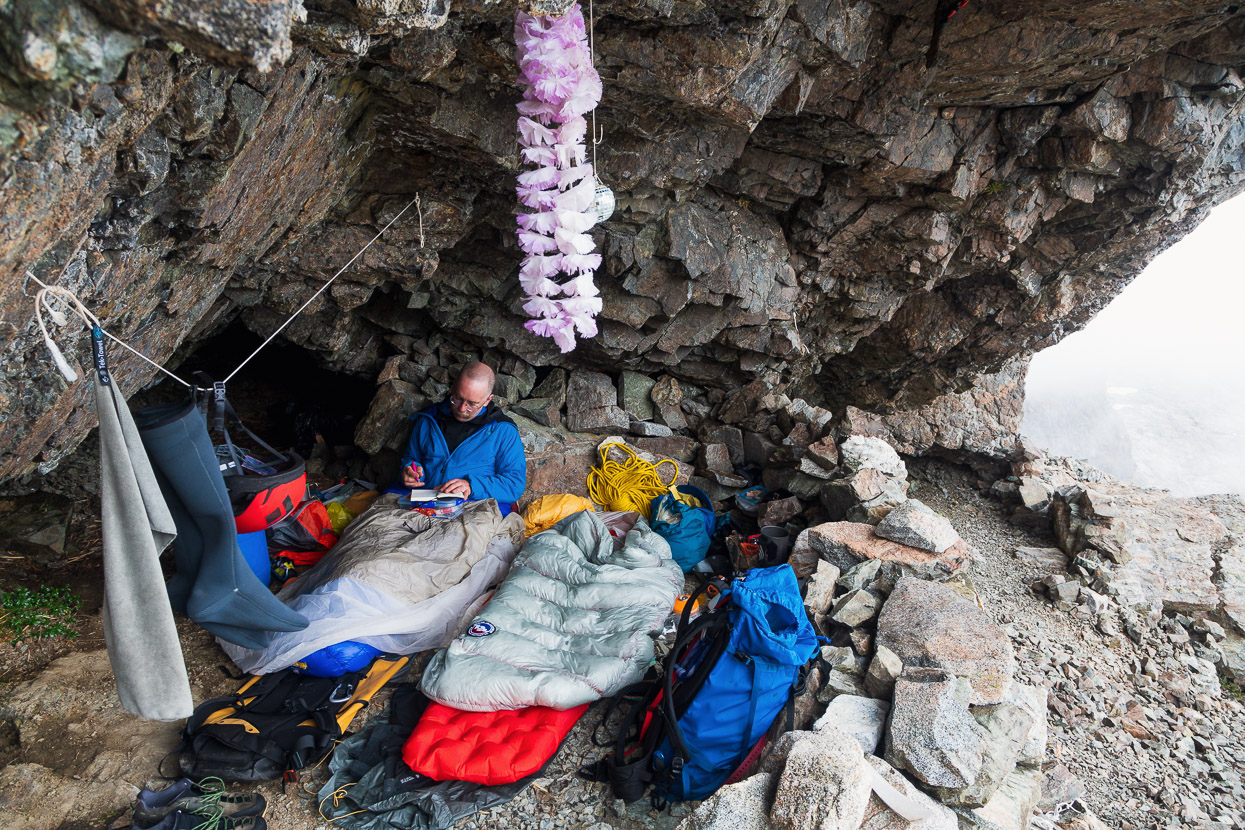
‘Home’ at last. It was my third visit to ‘the Eyrie’ and Tom’s sixth.
Not a bad view from bed… Madeline left and the South West Face of Te Wera in the centre. Lindsays Ledges, which we’d tackle the next day, diagonals up the wall from the sunlit snow to the furthest right notch in the ridge (Karetai Col).
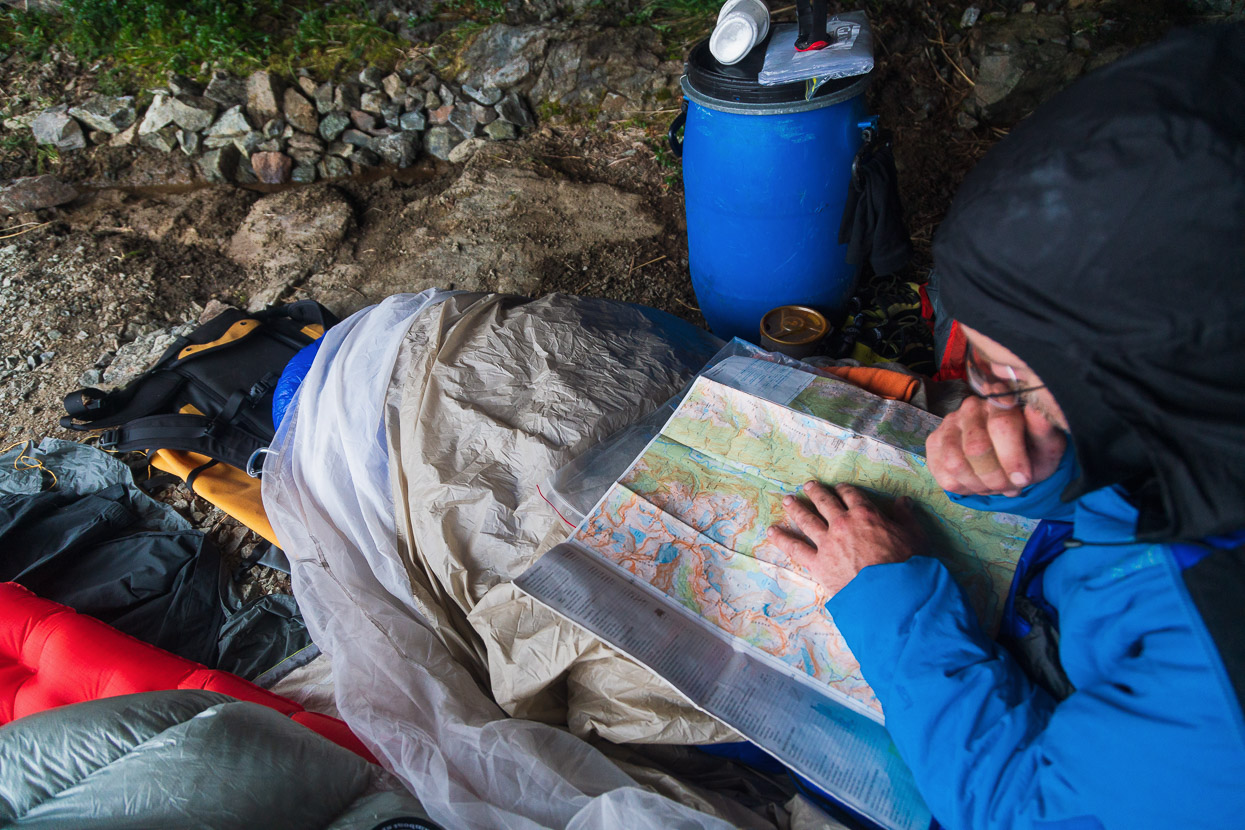
We settled in for the night. The plan was to make an early start the next day, and take Lindsays Ledges (an infamously exposed packing route I had never done before) over to the Te Puoho Glacier (another first for me) and take a look at the East Face of Karetai. Travelling light over to the Te Puoho and sussing out Lindsays was a good recce op for doing it the following day with heavier packs and possibly less visibility as some precip was in the forecast.
The classic Eyrie view: Madeline with upper Cleft Creek below, hidden by cloud.
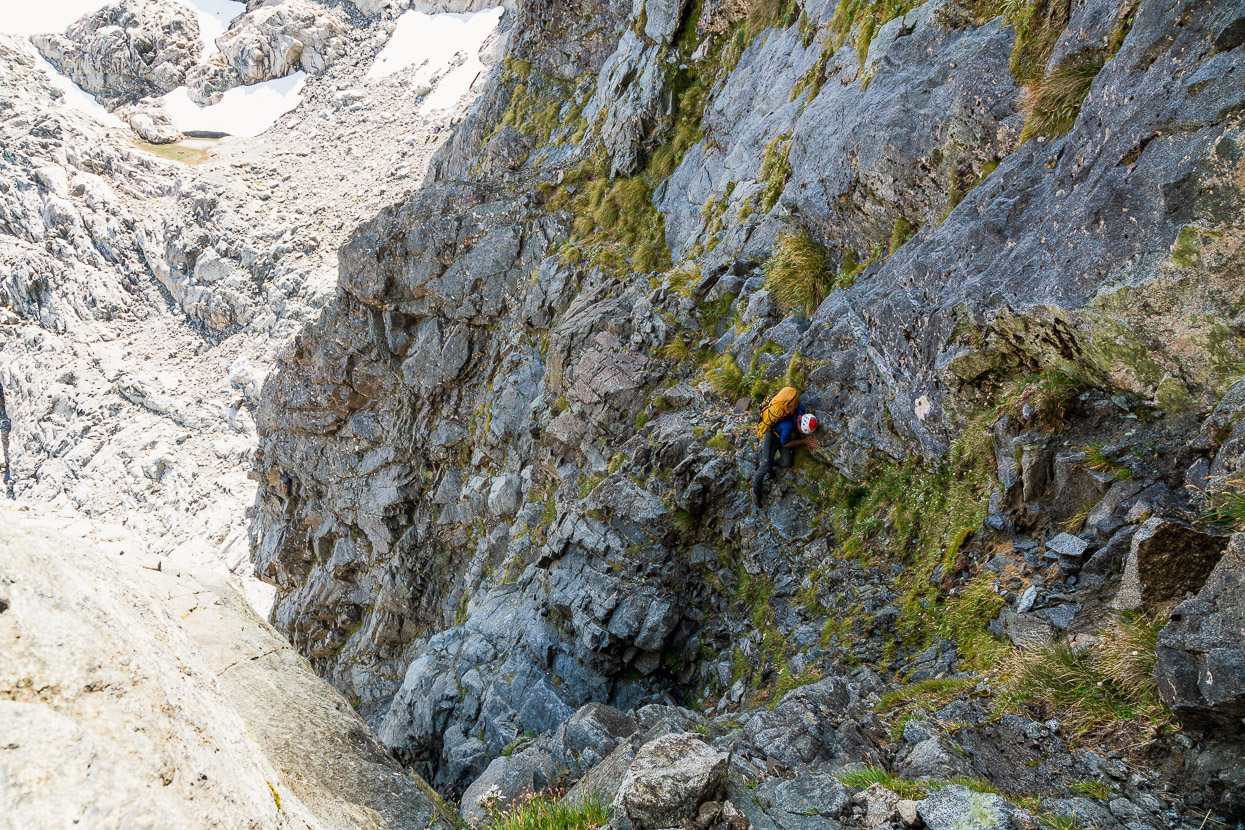
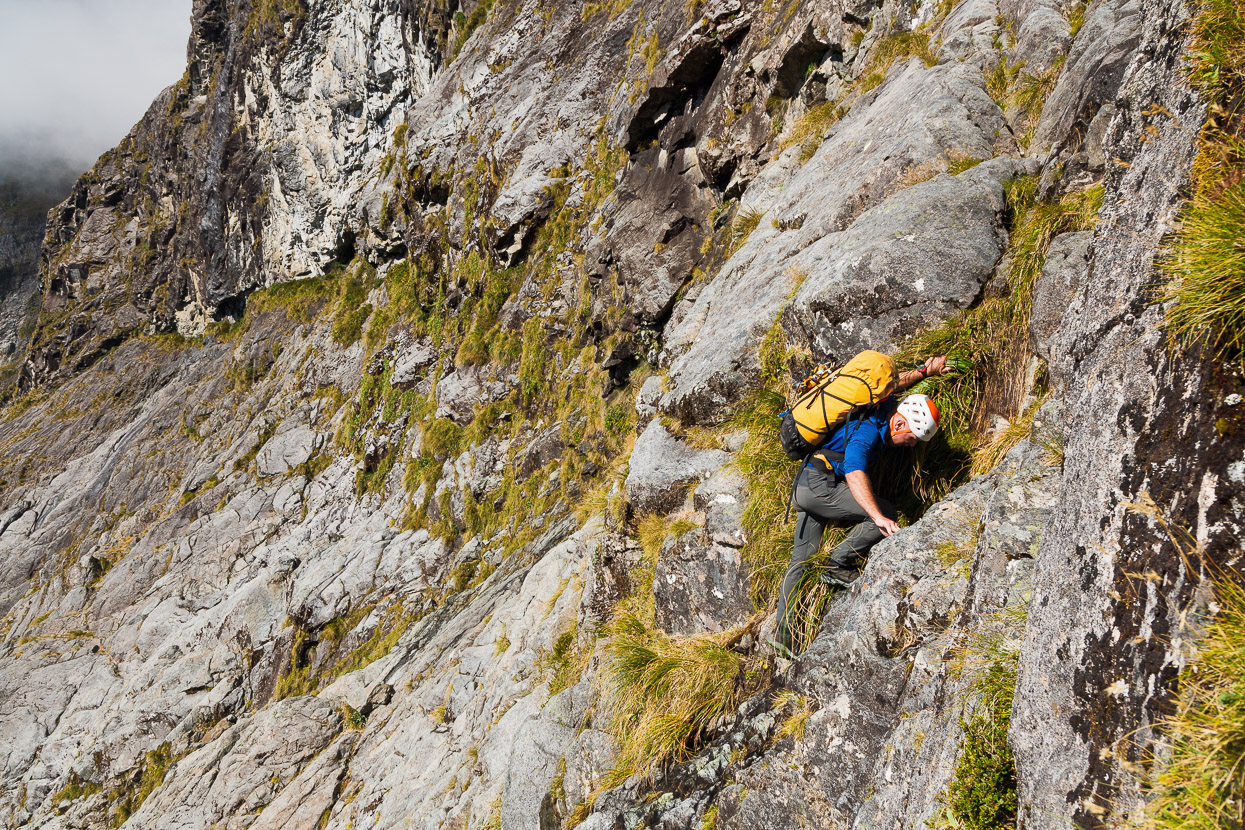
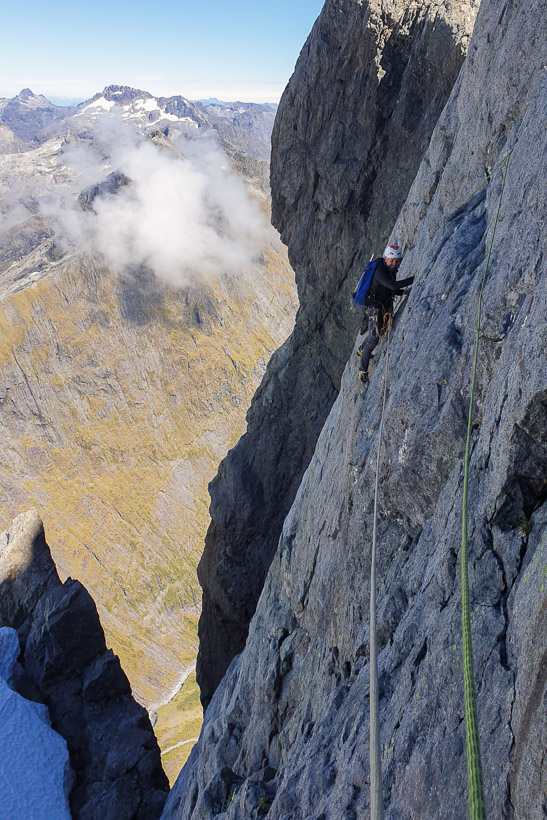
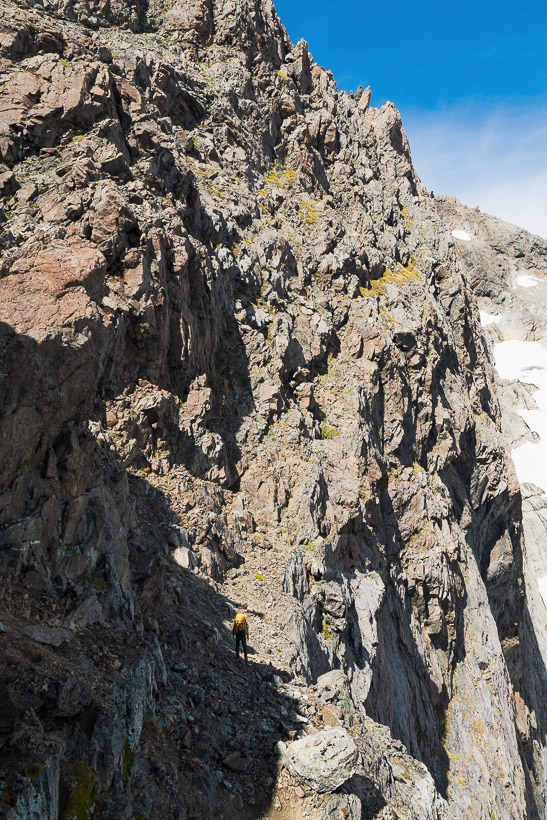
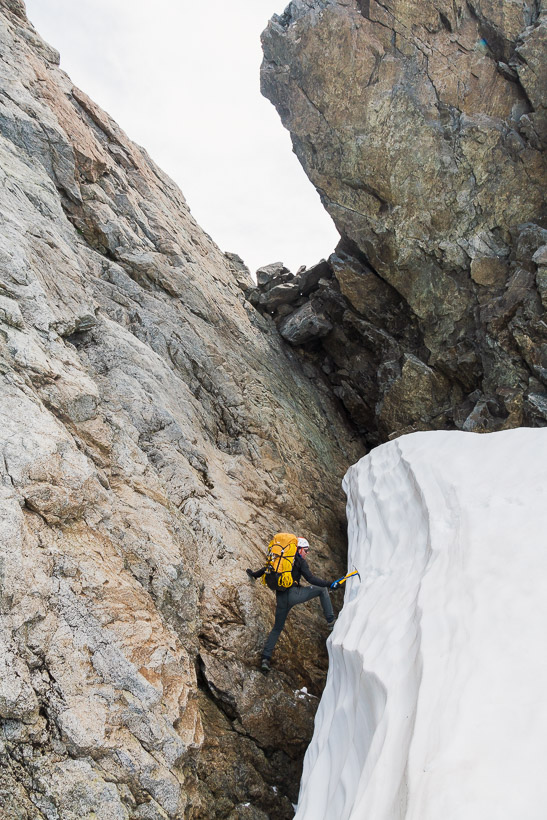
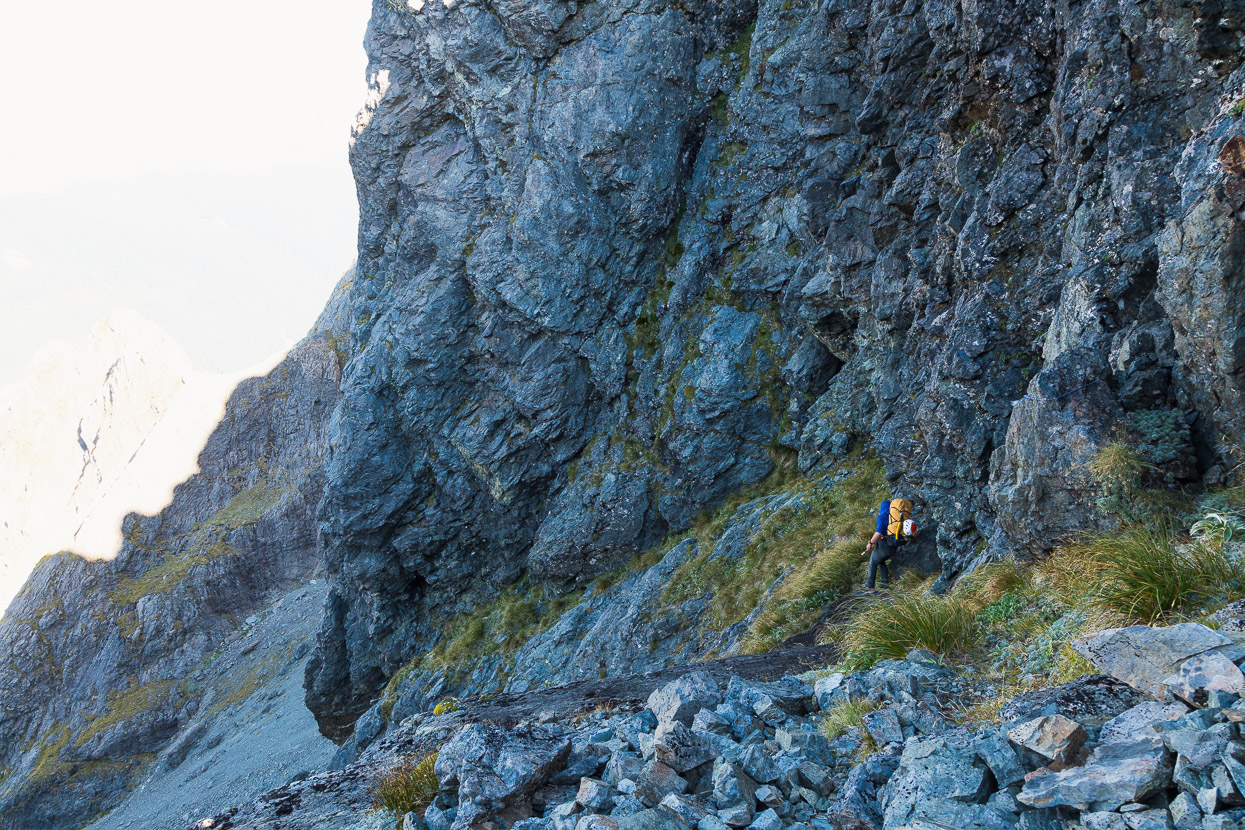
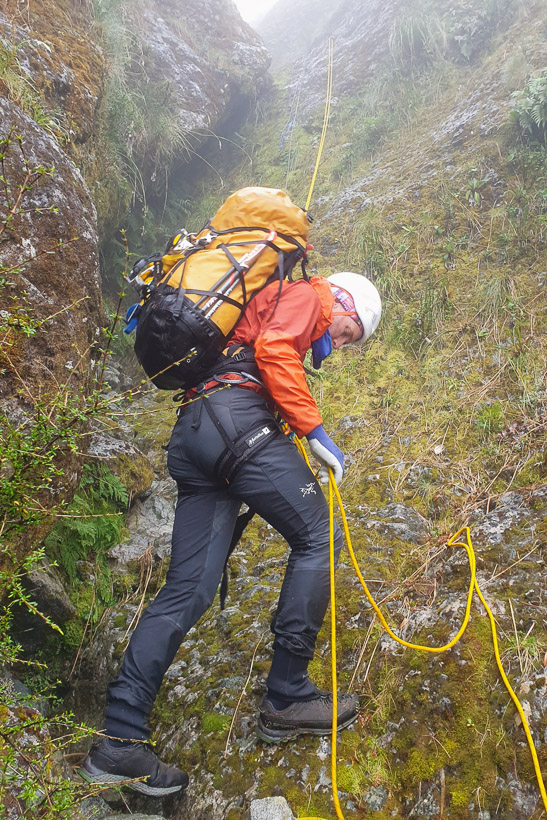
Lindsay’s Ledges was about as I expected: intimidating from afar, but once you’re up close with it the route unfolds as a series of exposed bits, with the respite of relatively casual travel between. It’s easy enough to pick up the start of it, and then a cairn indicated the way right across a particularly loose and exposed step (the crux), beyond there a slabby corner led upwards towards bigger ledges which angle up towards Karetai Col. In this picture Tom is crossing the crux step.
We collected some water from the old stainless steel tub on Karetai Col (a relic from the 1970s) and smeared our way 20m down slabs on the east side of the col until we could bridge across the void and climb up onto the névé of the glacier, and then wander along under the impressive East Face of Karetai (above).
Unlike last year, my achilles had not reacted well to the walk in and was both swollen and squeaky, so we decided to check out one of the shorter routes on the peak, the English-Fearnley, which is right around on the left of the face, close to the East Ridge.
Getting around to the left side of the face involved a bit of frigging around to cross the randkluft back onto the rock for a nice pitch on great rock that took us onto the upper section of the glacier. From there we worked our way up hard névé until we were at the bottom of the English-Fearnley. Sadly the glacier has receeded so much that the headwall was some distance from the rock, with a deep void between ice and rock. Even if we could get onto the rock, the route now began with an overhanging chimney and loose looking flakes, whereas it looked as if Merv and Dave would have started with an appealing looking open book corner with a hand crack in the back of it – that was a good 15 metres above us.
We turned our attention to the South Ridge instead. Picking up the route right off the base of the col, where we could belay off gravel and step straight onto rock. A pitch of around grade 20 got us going (there are easier starts to the right – if you can easily get onto the rock) and led to three more easier pitches up cracks and chimneys before we took off the rope and scrambled to the summit.
Despite not knocking off the route we’d wanted to, it was a great day for it. That’s Mt Revelation above and behind Tom.
Overnight the weather came in briefly with low vis and light drizzle, so we slept in for a much needed rest and waited until about mid morning to leave.
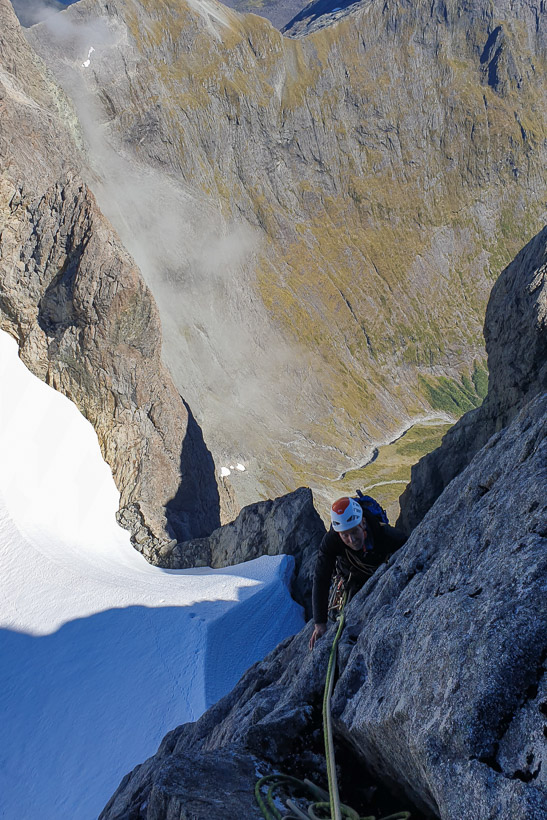
Up Lindsays Ledges we went again, with heavier packs, but knowing the way well. This photo shows some of the upper half, beyond the crux step and slabby corner.
And looking back down Lindsays from Karetai Col.
Bridging onto the névé of the Te Puoho, with Karetai Col above.
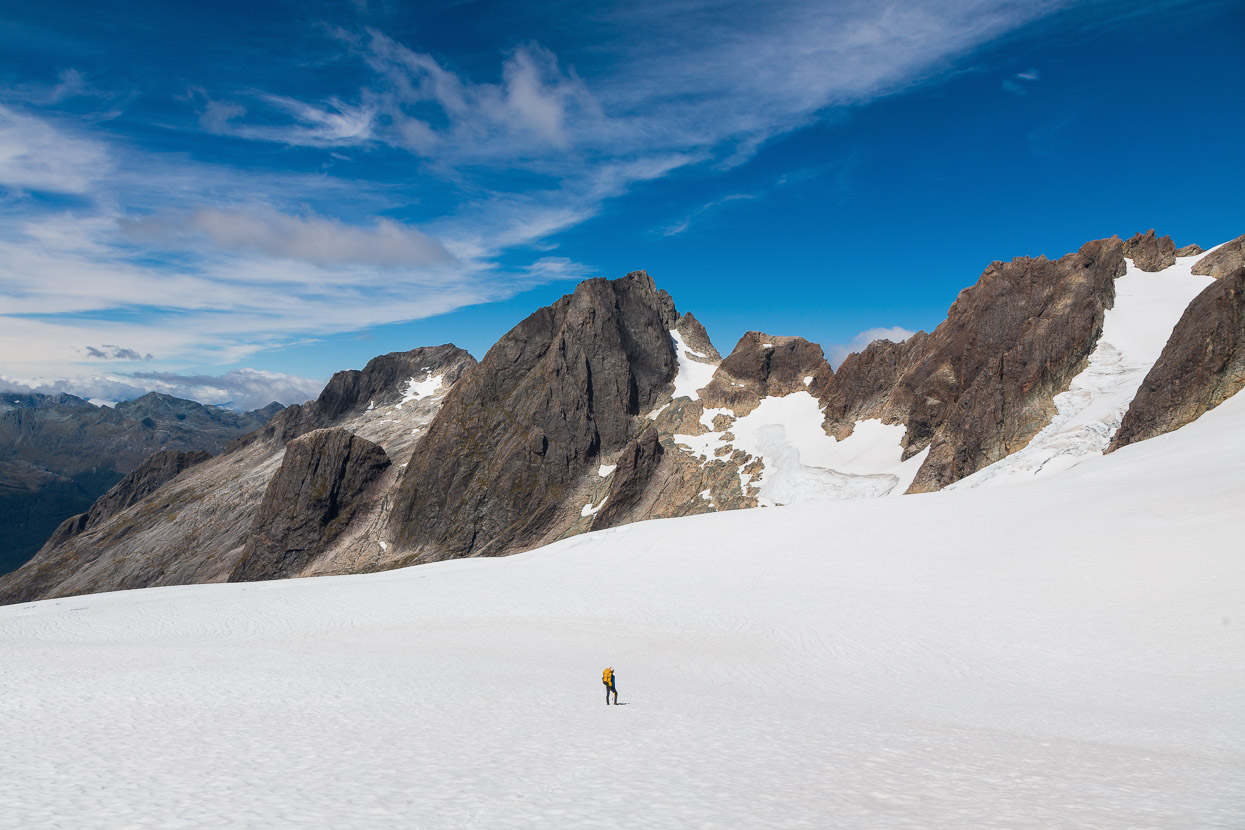
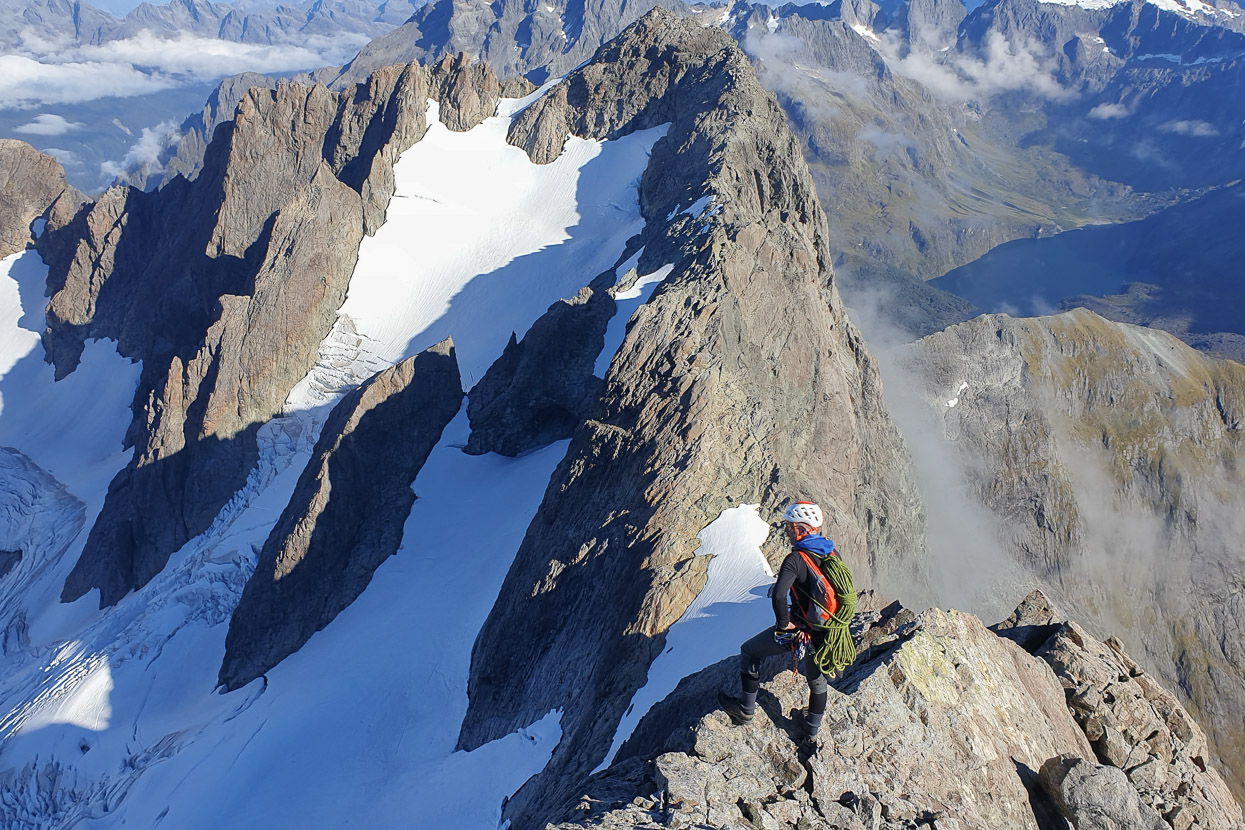
The upper Te Puoho Glacier, with Taiaroa Peak directly above Tom, and Tuhawaiki just to its left in the background.
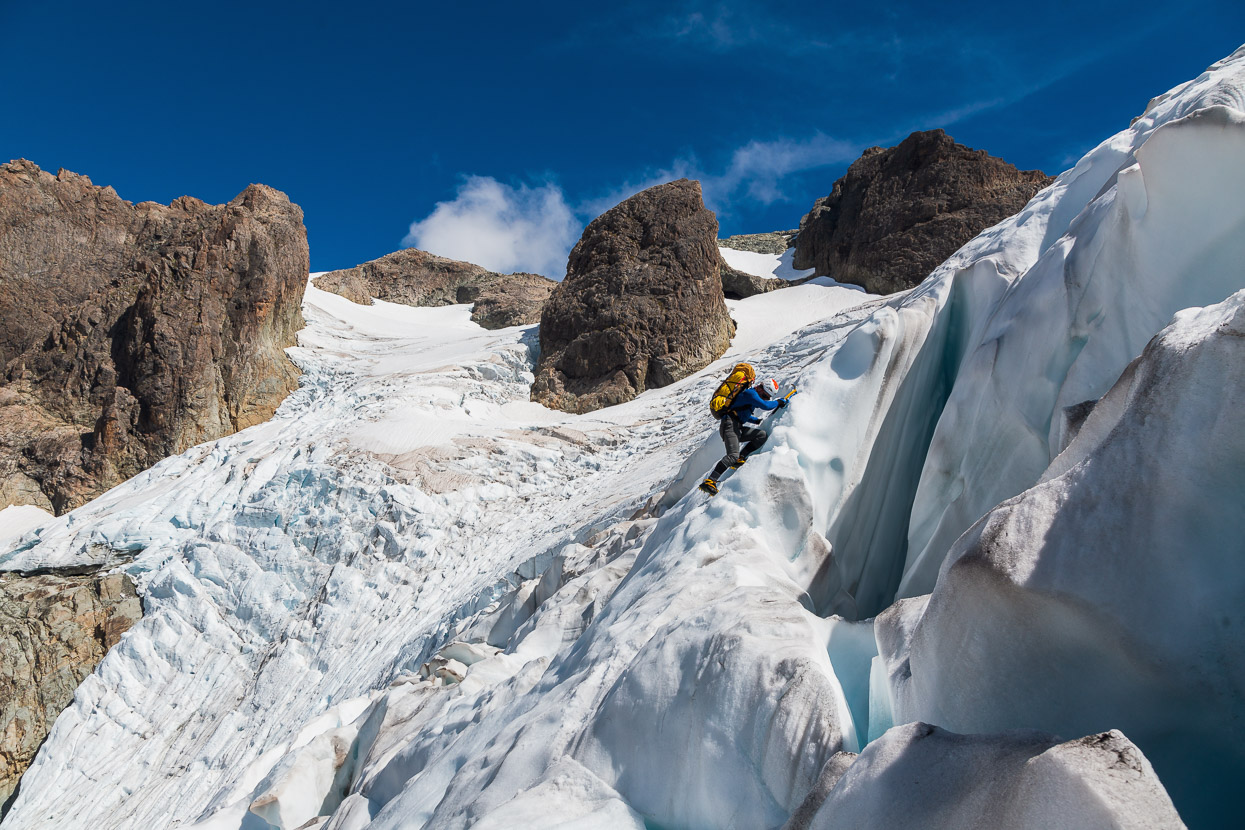
We knew that a couple of weeks prior Torea and Nia had found a good route (coming the other way) off the rock slabs below Taiaroa and up the glacier, so we hoped their route was still doable in reverse. It was, and we were able to zigzag down though the crevasses and then get onto the slabs with minimal faff.

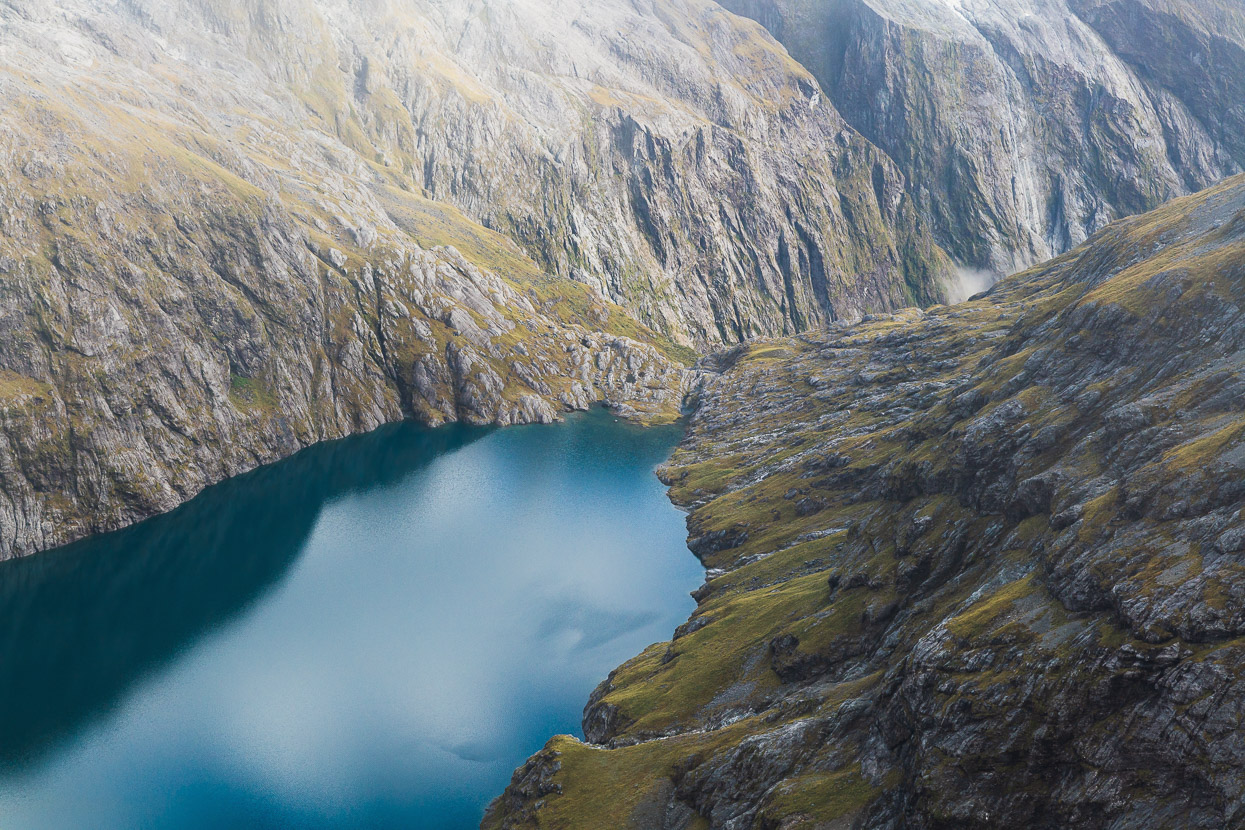
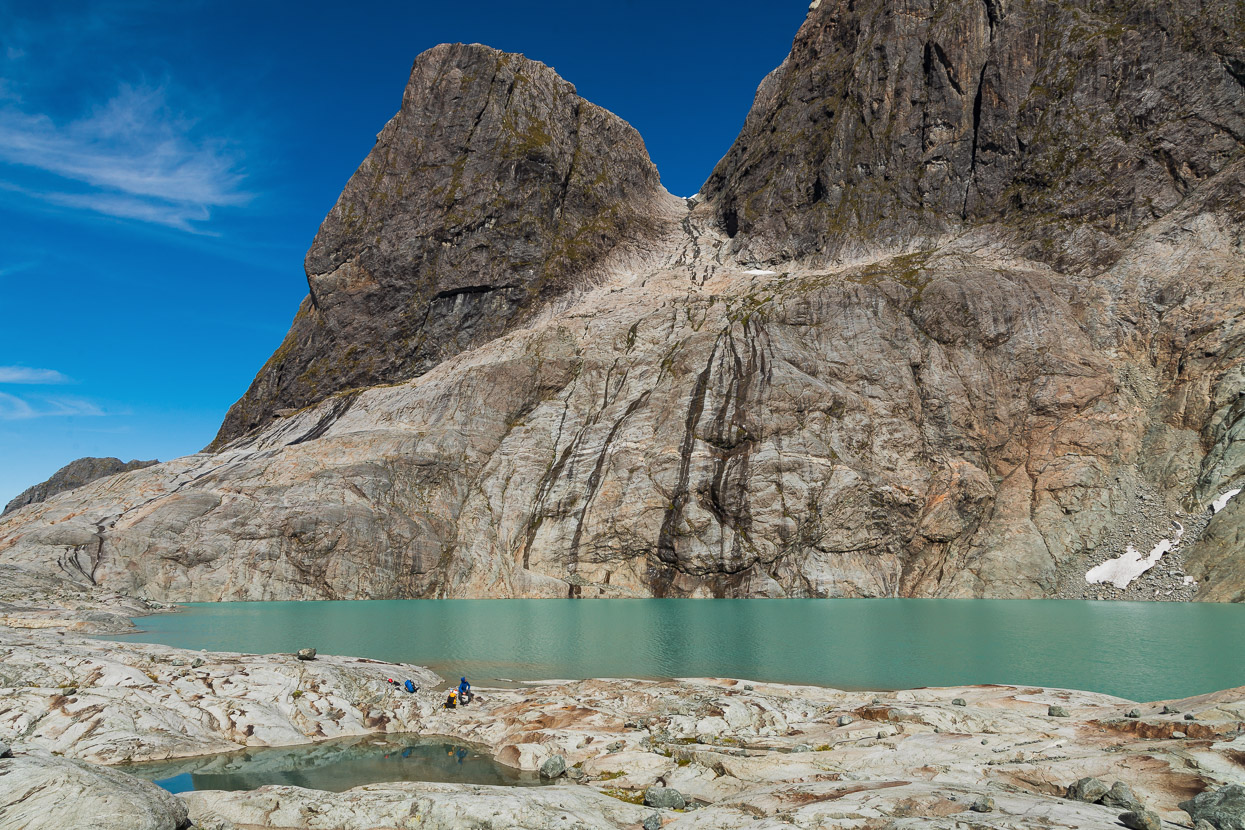
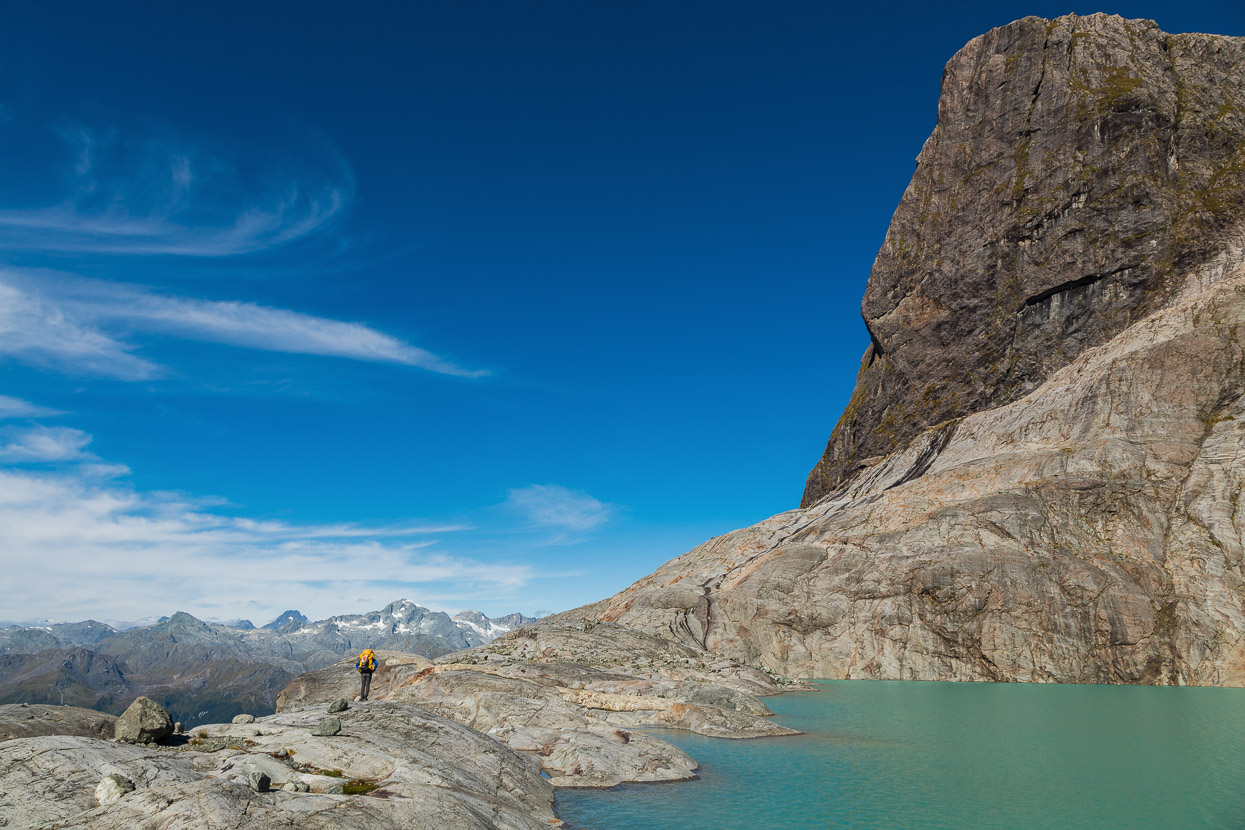
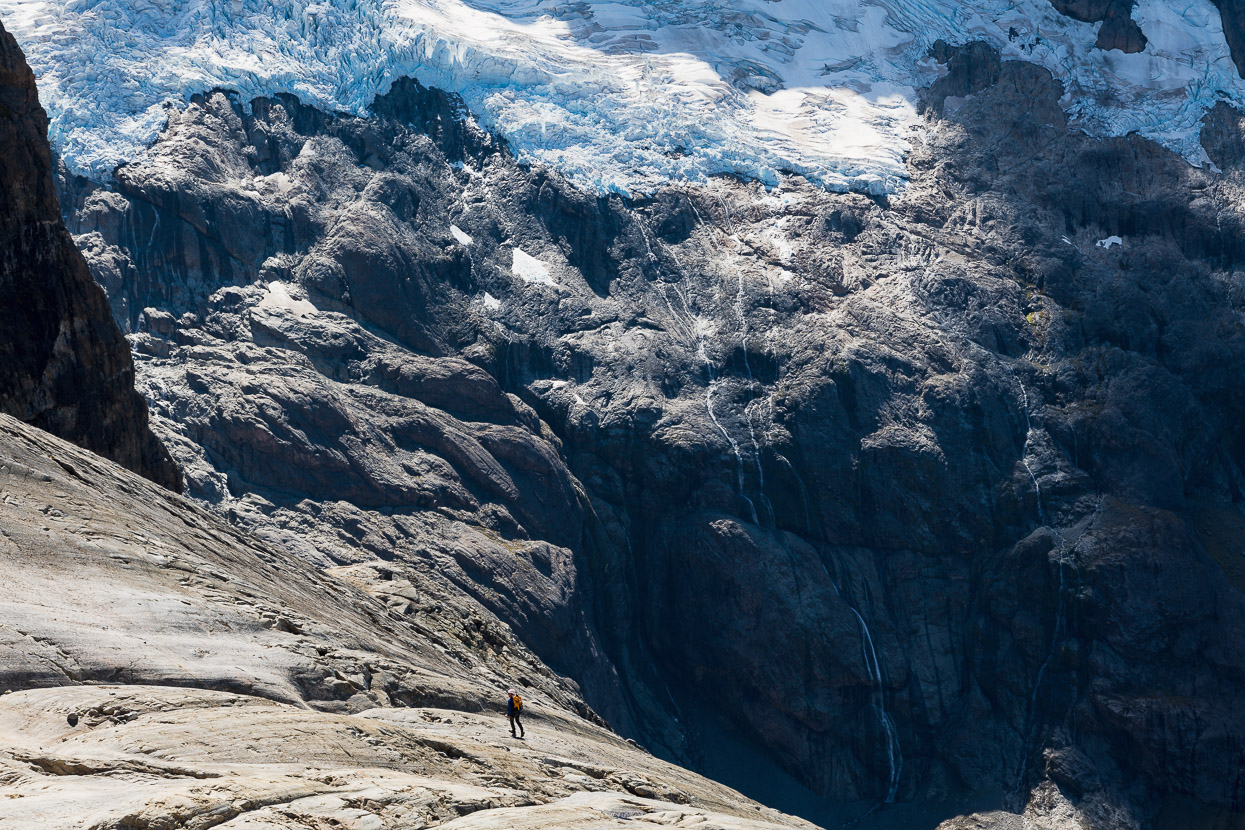
Looking back the way we’d come from the upper glacier. Even as few as ten years ago the glacier covered significantly more of the rock in this photo and used to deposit icebergs onto the lake. In another decade the lower section in this photo may well have disappeared.
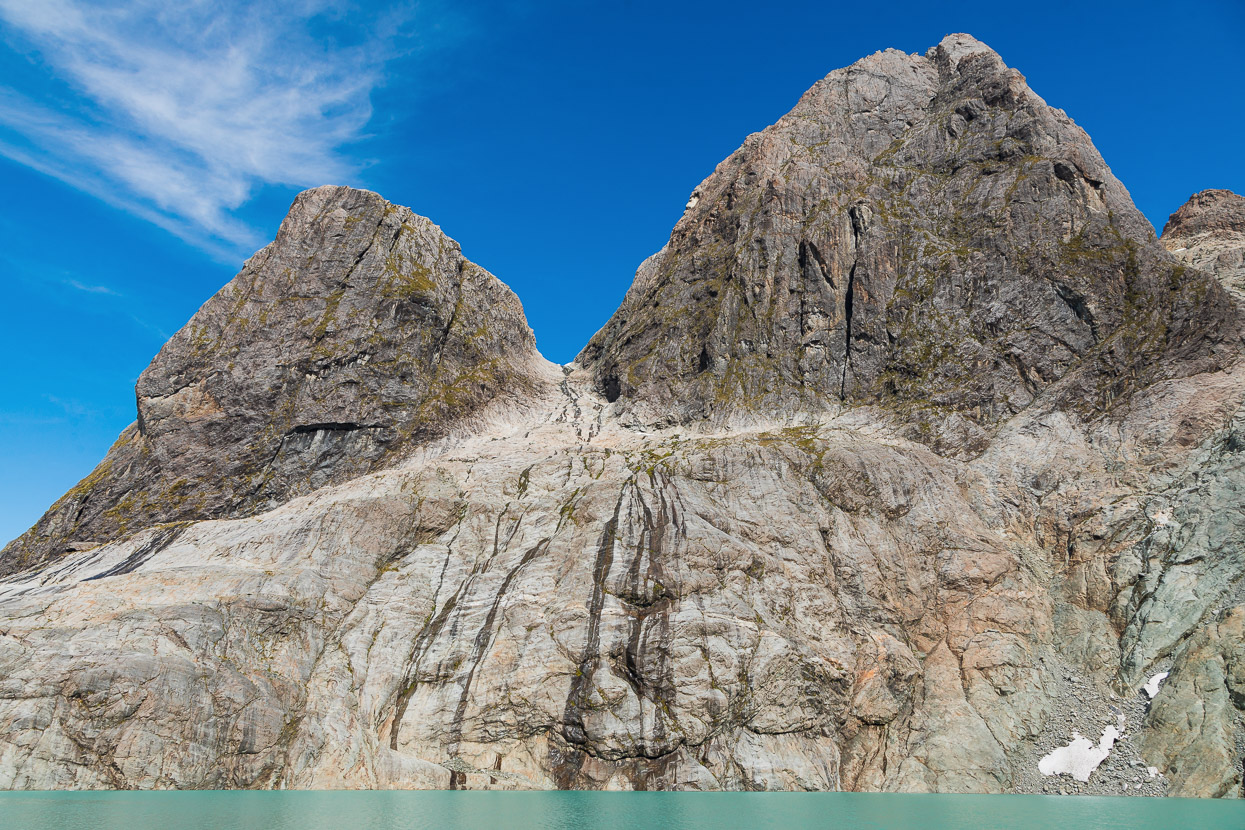
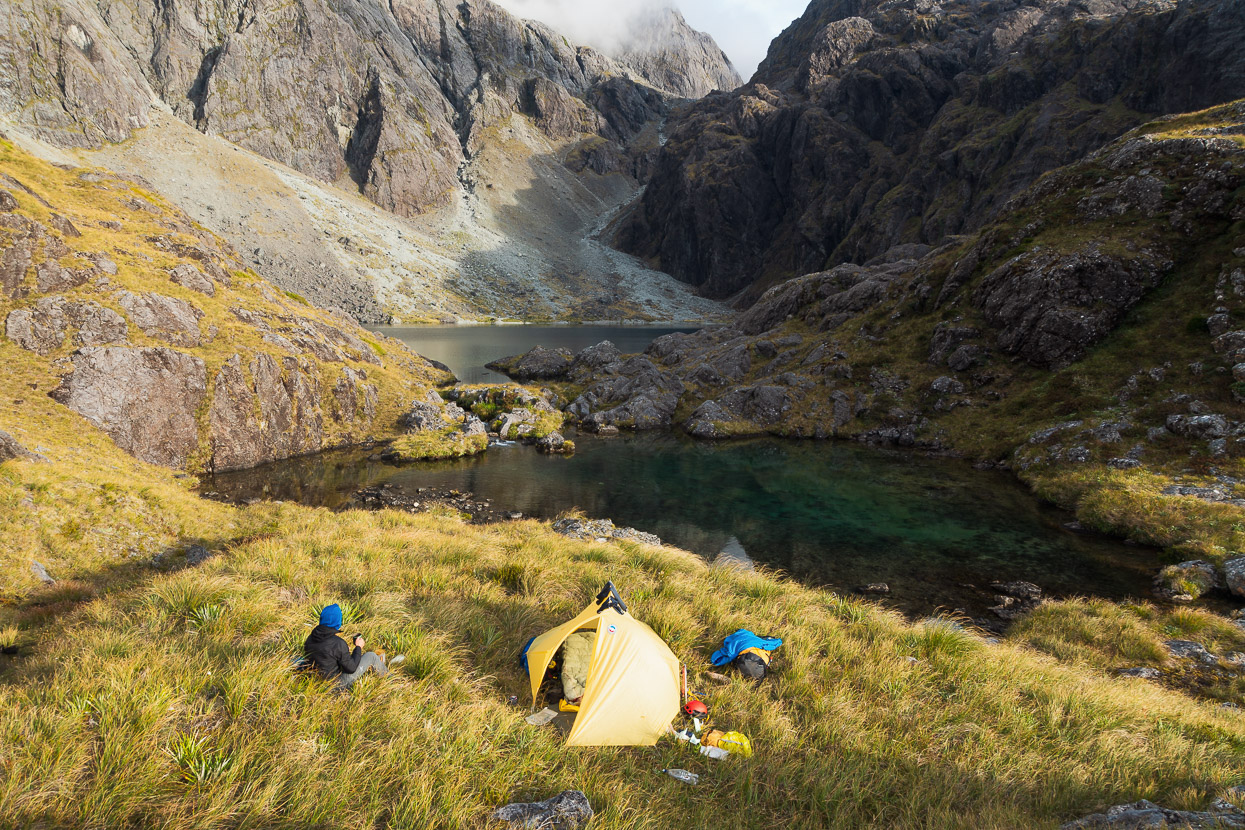
The lake is a stunning place, regardless and we hung out there for a while, absorbing the amazing view of Taiaroa (right) and its outlier peak, the Mighty Dur, towering over us.
Oh to have a full rack and another week’s food…
But onwards we went. The plan was to bivi on expansive rock slabs between Tuhawaiki and Tairoa and then climb one or both summits the following day, before heading down to Rainbow Lake to camp for the night, ahead of walking out the following day, as both our food and the fine spell were coming to an end.
We had great views into Chasm Creek and the Hollyford as we sidled around under the Mighty Dur.
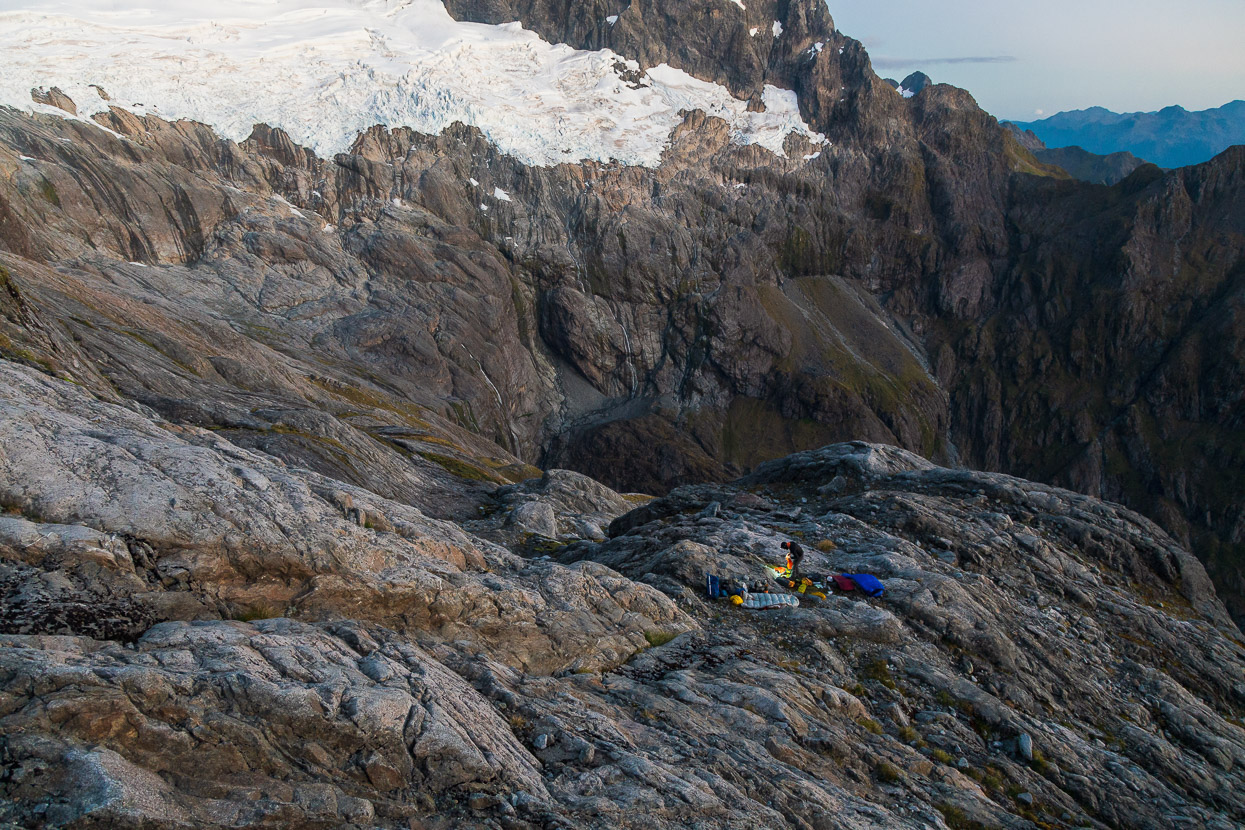
Camp for the night was about perfect: two relatively stone free spots for us each to lie, running water nearby, and epic views of the Te Puoho glacier and across the Hollyford towards Poseidon Peak.
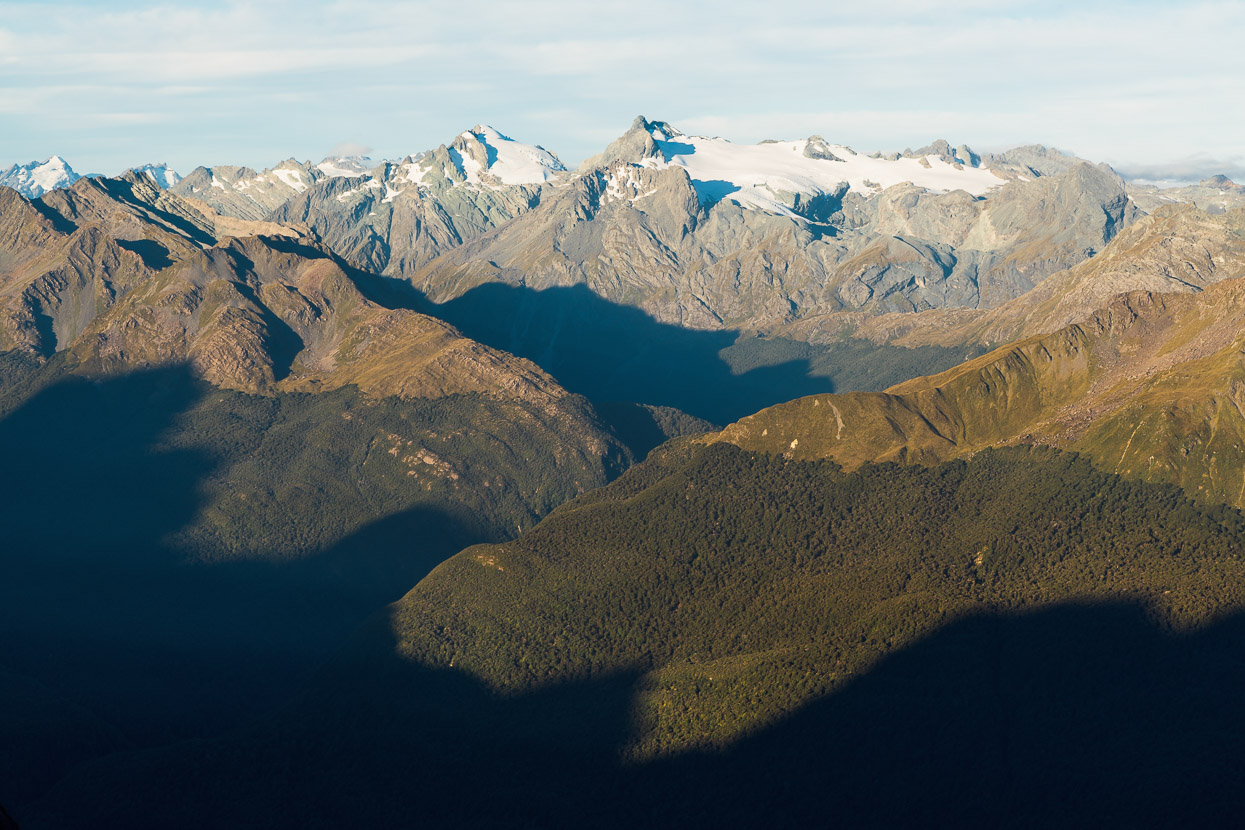
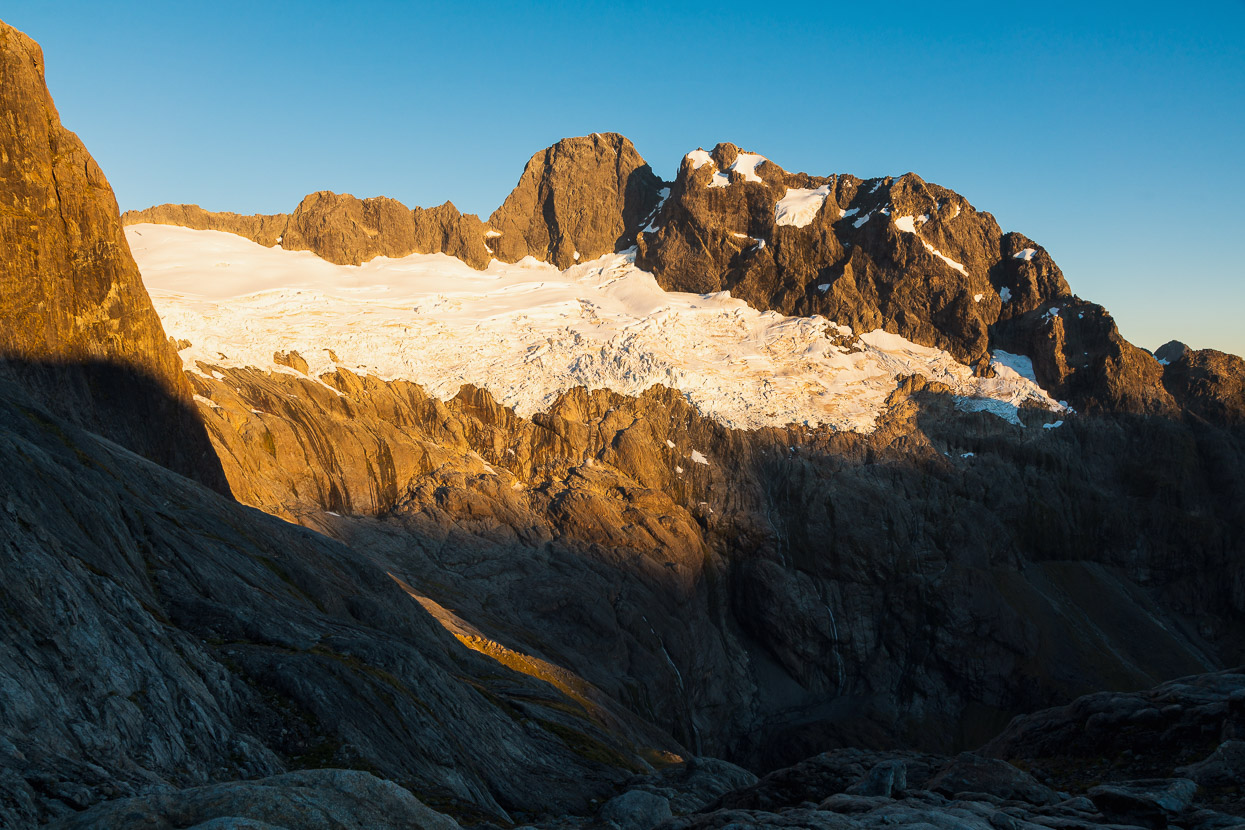
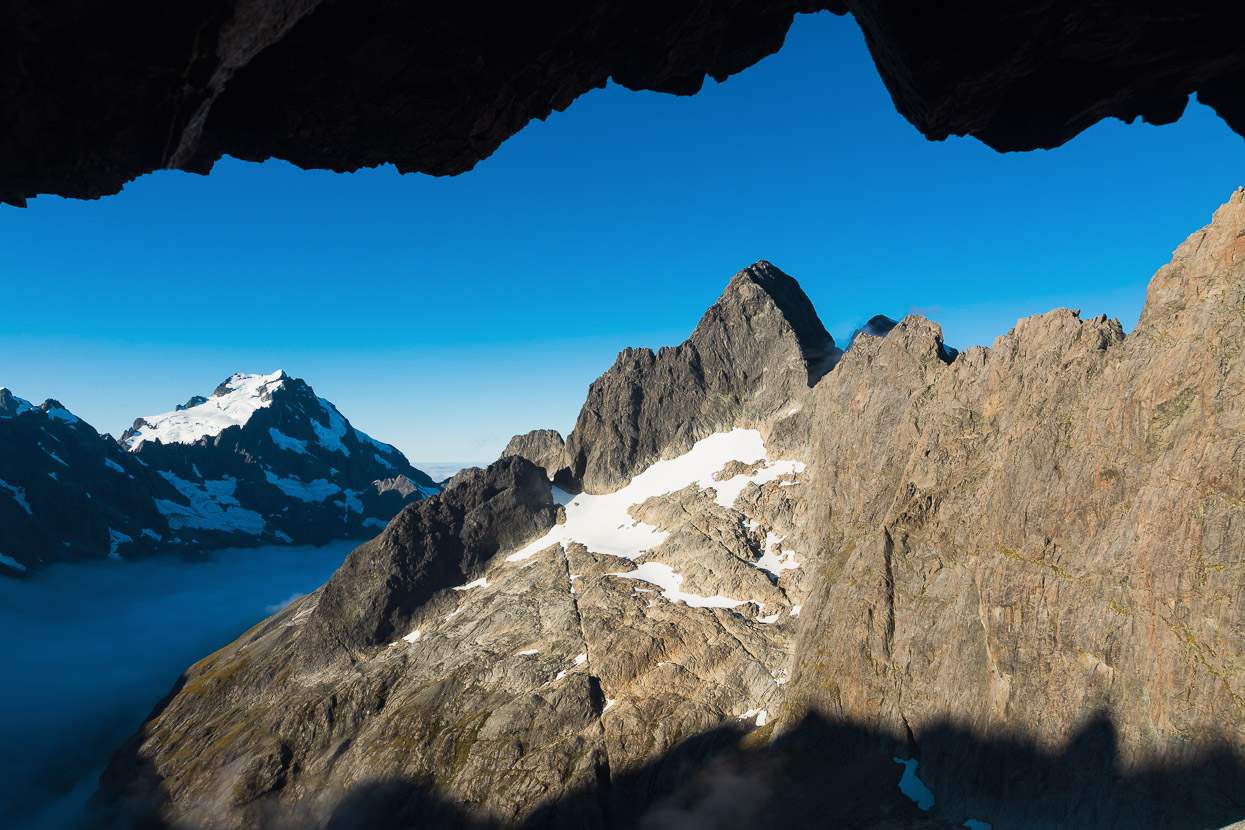
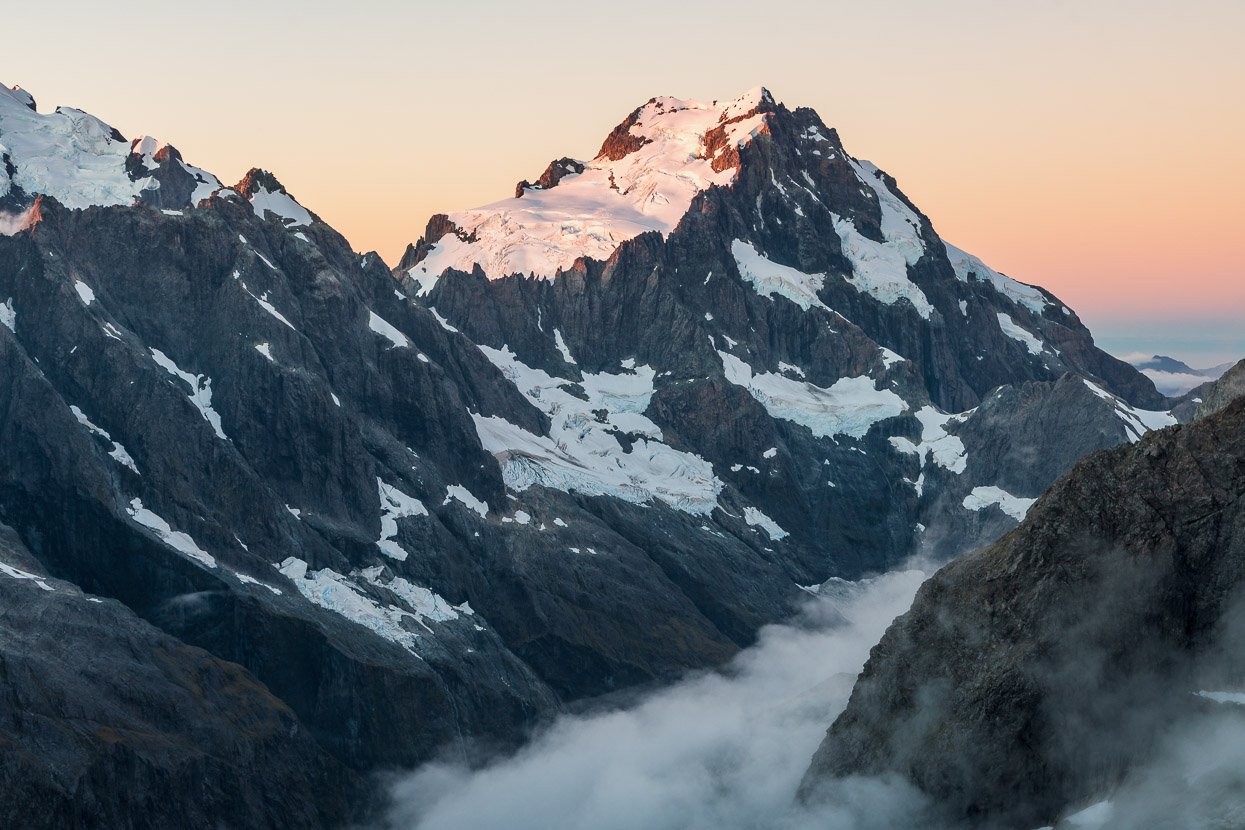
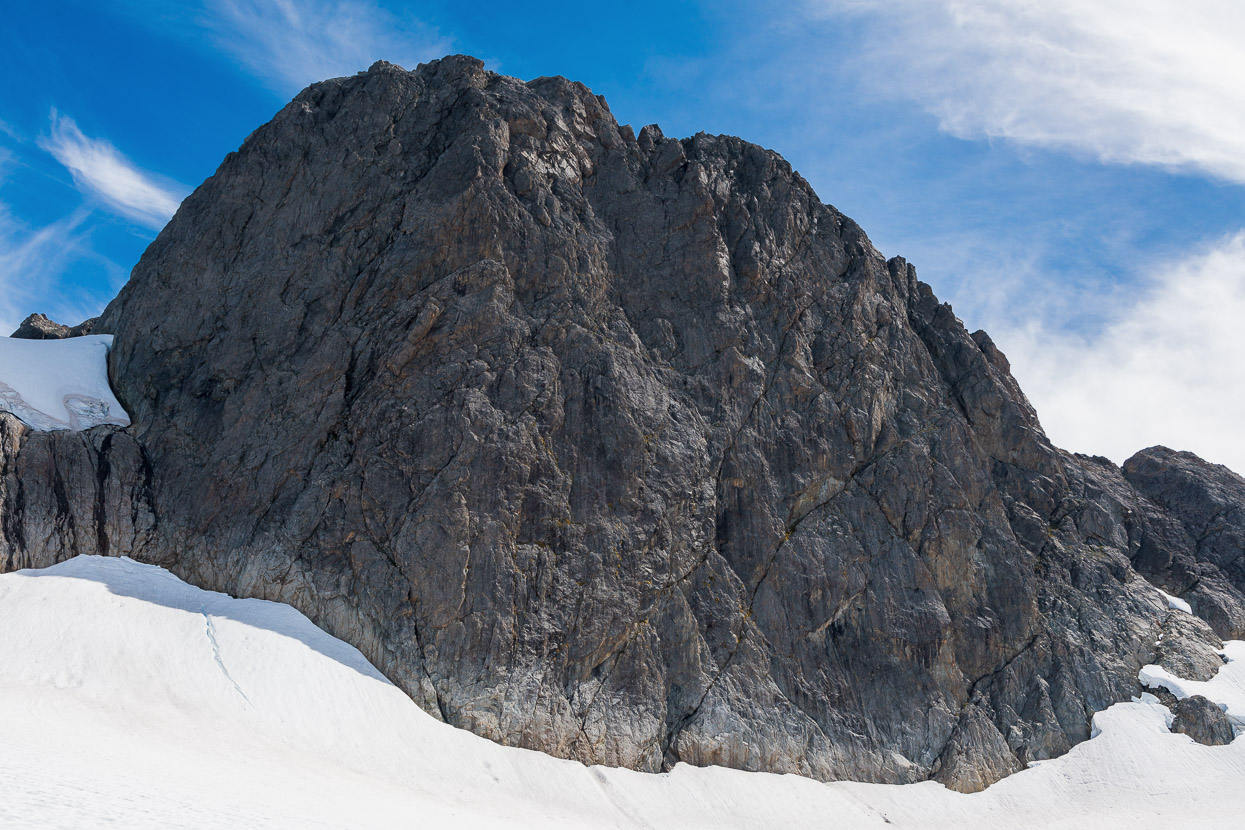
After a clear night and a good sleep we were up and away as the sun rose, warming the Te Puoho and the South East Face of Te Wera (upper centre of photo). This face has only two routes: a Harold Jacobs & Murray Jones line ‘up the guts’ from 1969 and another shorter route on the left, done in 1980. To the right is the South Face of Ngaitahu (pt 2224 on the topo map), which is unclimbed.
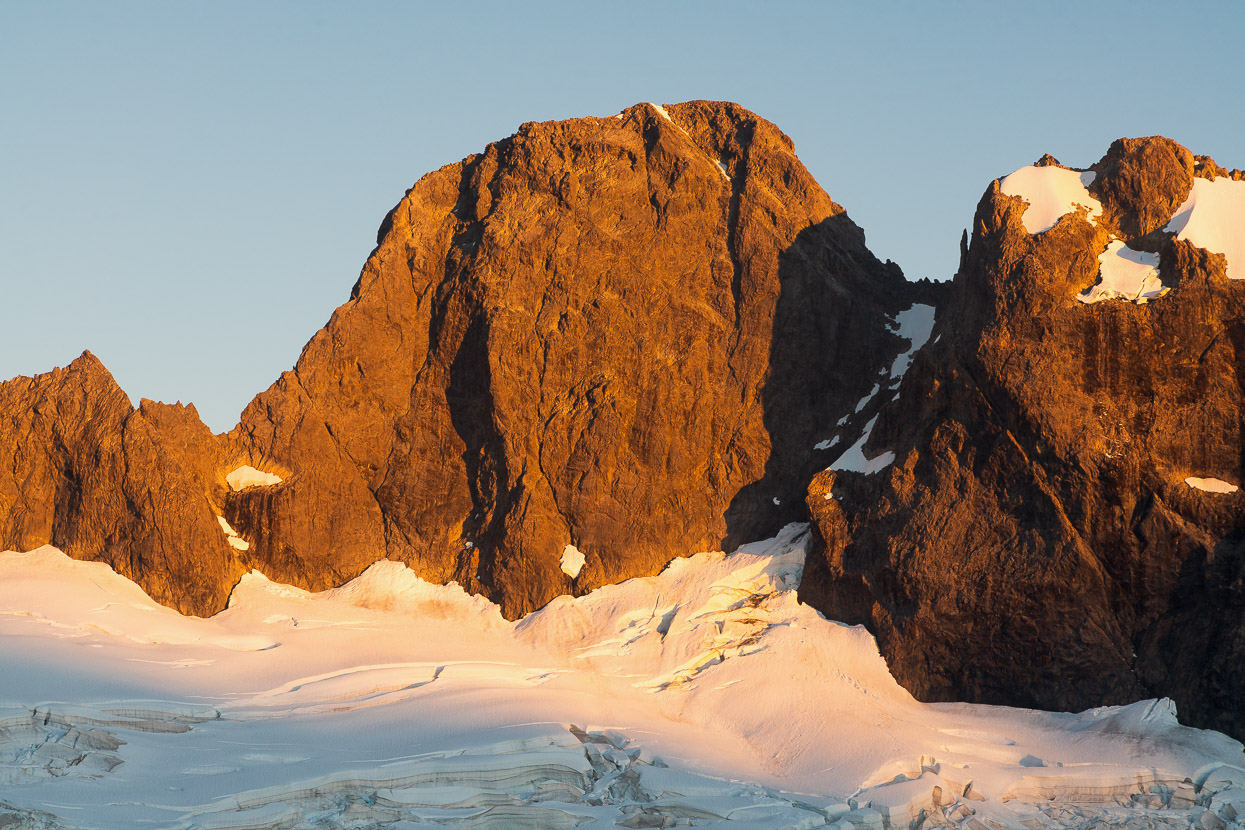
South East Face of Te Wera.
The Mighty Dur (centre) with East Face of Karetai behind.
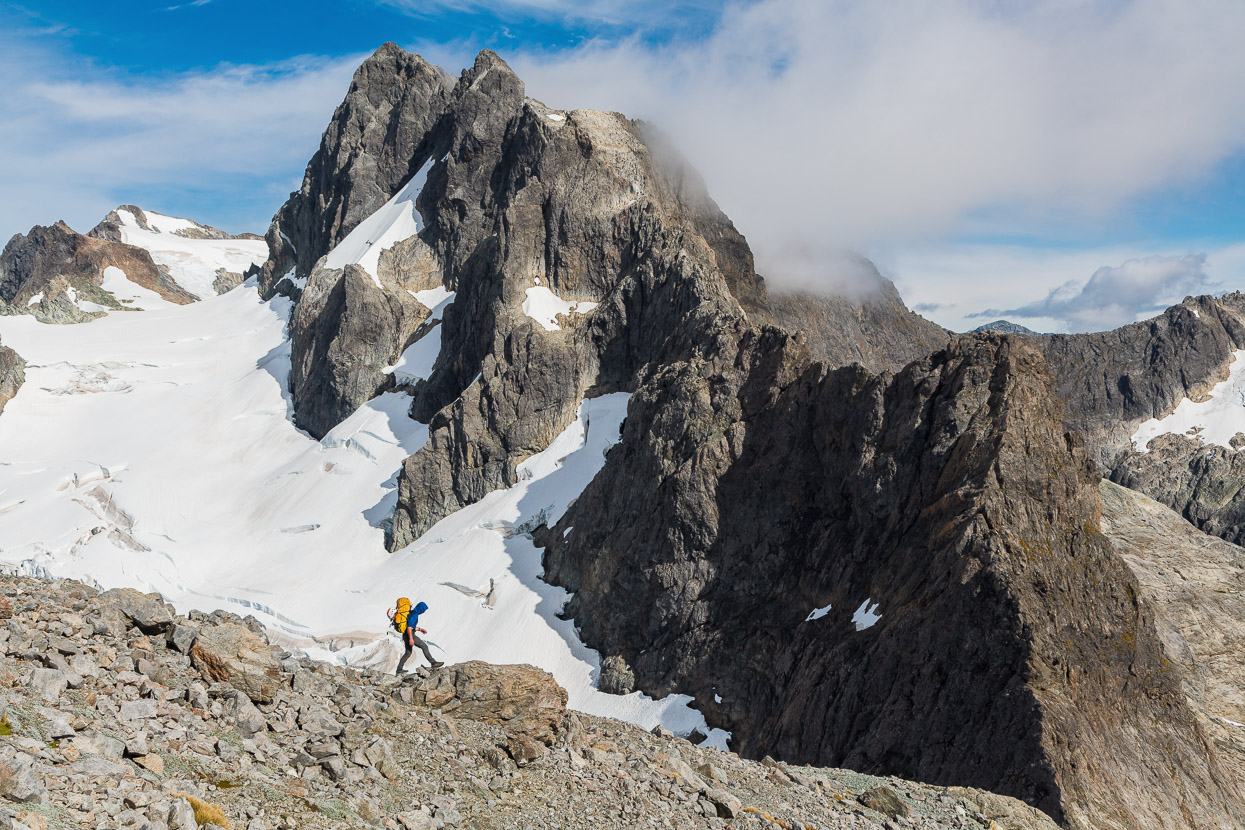
We worked our way up slabs between the aforementioned buttress and the North Ridge until past a loose looking gendarme and then joined the North Ridge of Tuhawaiki which we scrambled to the summit.
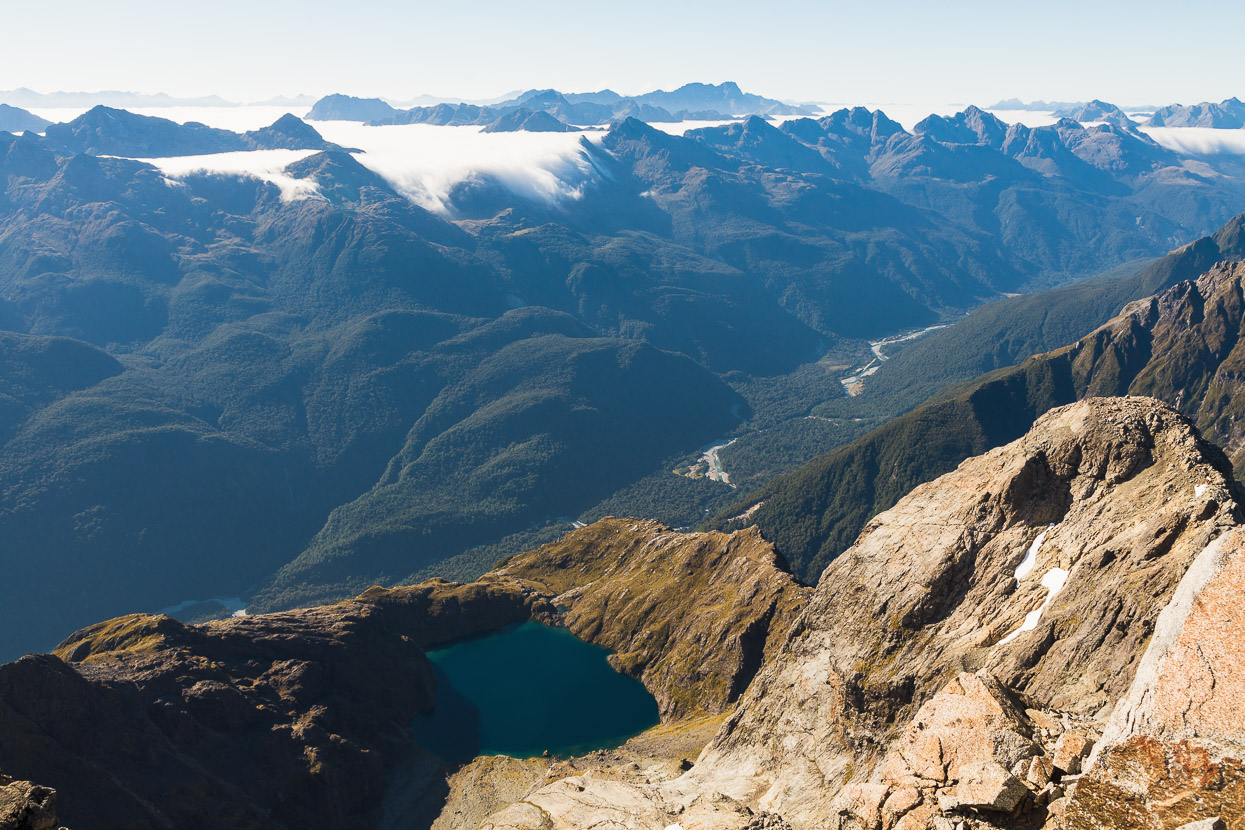
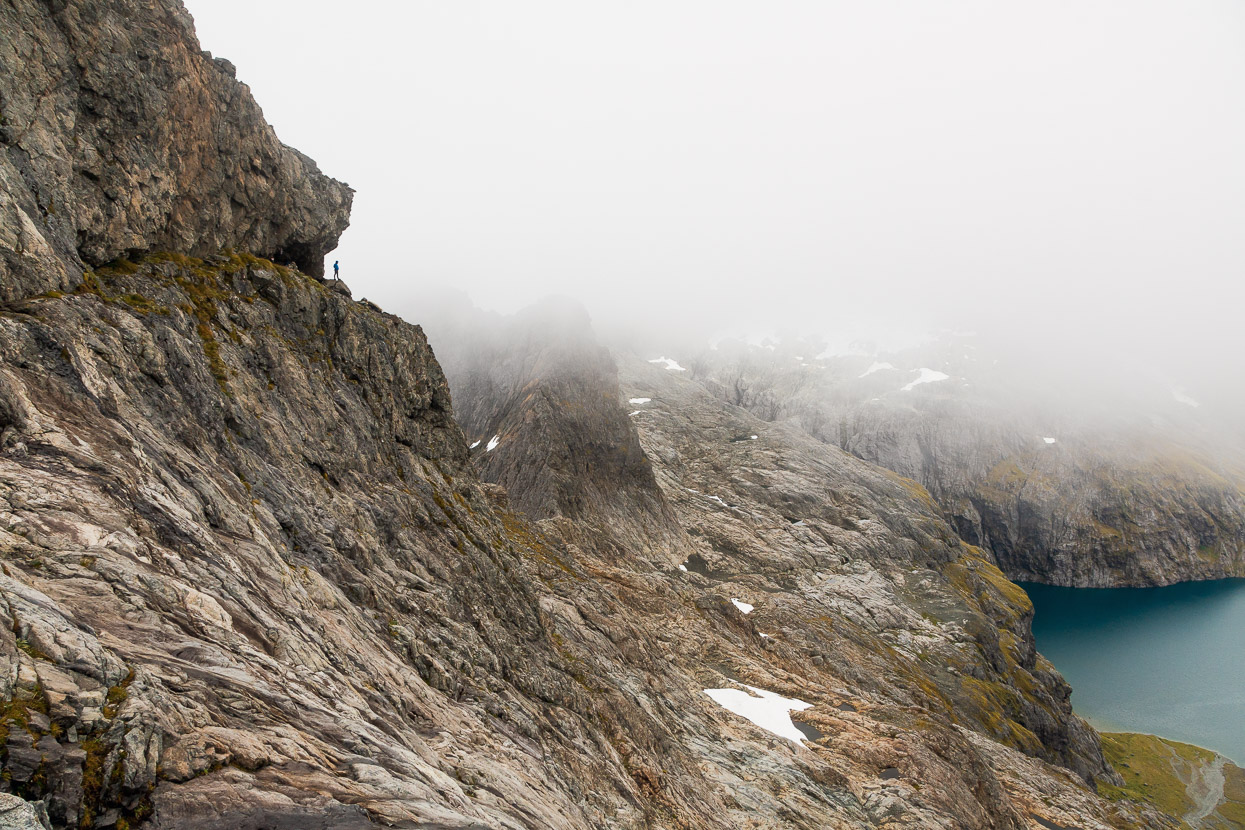
While Tom had visited Rainbow Lake a couple of times before, this view was a first for me. The lake sparkled in the sunshine, and below flowed the Hollyford, tomorrow’s destination.
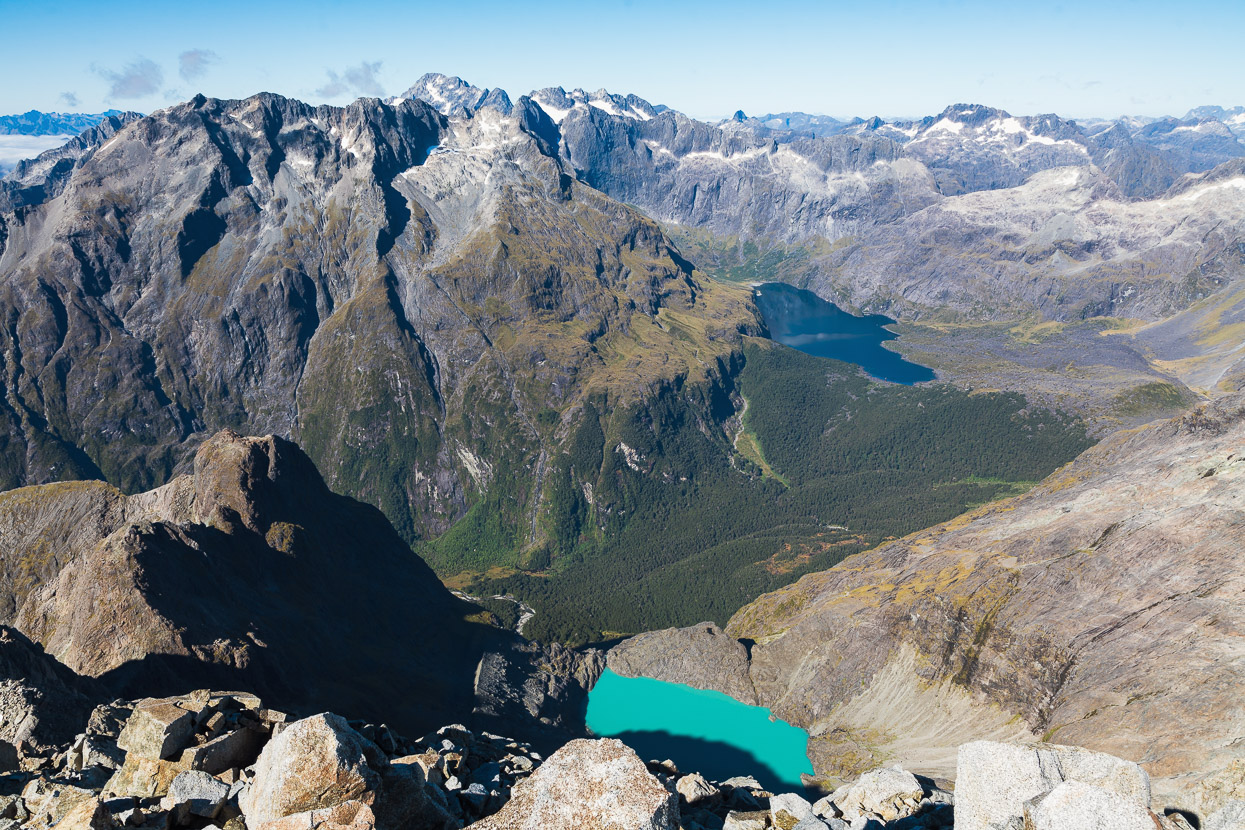
Many times over the years I have stood on Barrier Knob and looked across Moraine Creek towards the turquoise lake in the foreground. It’s the terminal lake of the Korako Glacier, which stretches across the lower southern slopes of Taiaroa and Tuhawaiki. I’ve also, of course, long looked at the summits of these two remote peaks and wanted to stand atop them, so it was a nice moment to be there on a warm, windless morning and soak up new views of Moraine Creek, Lake Adelaide and the peaks at its head, including Gifford (middle distance, left of lake), and Sabre, Marian and Barrier behind Lake Adelaide.
All that broke the silence was Tom singing a waiata, which seemed appropriate for a summit named after a Maori chief, as are many of the central Darrans peaks.
Purea nei e te hau
Horoia e te ua
Whitiwhitia e te ra
Mahea ake nga poraruraru
Makere ana nga here.
E rere wairua, e rere
Ki nga ao o te rangi
Whitiwhitia e te ra
Mahea ake nga poraruraru
Makere ana nga here,
Makere ana nga here.
Taiaroa, just 1.5km away as the crow flies, beckoned. From the summit of Tuhawaiki it was a short, scrambly descent to a col, and then we climbed slabs, a buttress, névé and a steeper wall on amazing rock, before a short scramble up to our second summit for the day.
A nice glissade sped up the descent, and soon we were zooming back around on the slabs, homing in on the waypoint that marked camp and our gear stash.
Access to Rainbow Lake is provided by a col in the North Ridge of Tuhawaiki, and from there the route finding got more involved again after easy walking on the slabs. Stiff kneed and tired we made our way down slabs, snowgrass and over talus to reach the final sidle and descent to the lake.
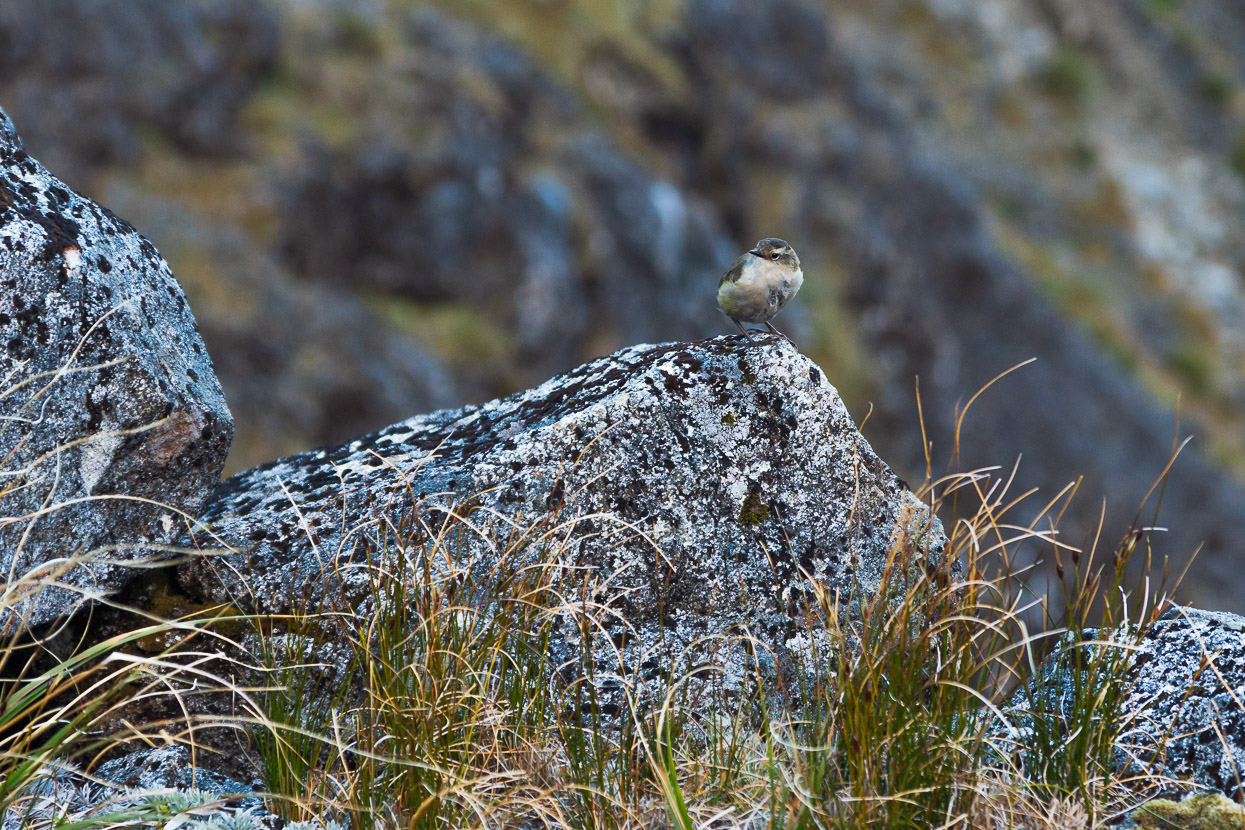
There were plenty of rock wrens around, and had been the whole trip. We stopped and watched three playfully flitting about on the rocks and chasing each other from perch to perch, never seeming to sit still.
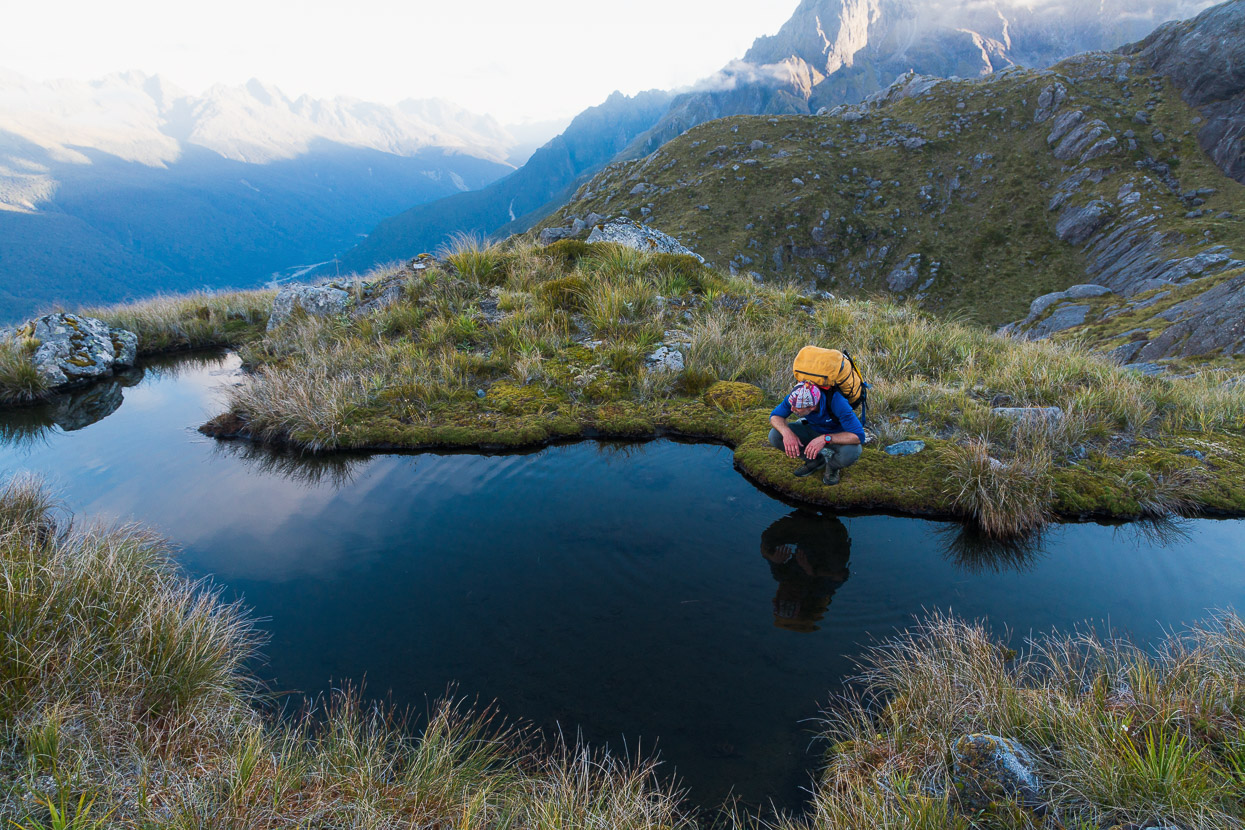
An irresistible tarn, just above the lake.
And finally, after three days of rock and snow, we could wash in the lake and kick back in the grass and contemplate another perspective of the mountains.
All that remained for our final day was to reach the Hollyford. It’s about half an hour from the Rainbow Lake outlet to the top of the cleft and gully system which forms the main descent to Moraine Creek. It was raining steadily as we descended the edge of the cleft (true left) down big boulders to the treeline and then slid and down climbed sturdy vegetation to get into the cleft itself, which was a steep, but secure enough, route. We reached the floor of the cleft just a few metres above the old bolt which is used to rappel a short cliff.
From there we picked our way down about 550 vertical metres of greasy gullies, thick scrub and steep riverbed to the Moraine Creek track.
Although the hard part was behind us, Moraine Creek is a mess after the 2020 storm, with a colossal amount of flooding and gravel inundation having killed trees and destroyed the track in many places, but the track has been remarked and was easy enough to follow back to the car.
Homer Hut, back in the Upper Hollyford, was a welcome spot after a challenging trip and we spent three lazy days there restoring our bodies and minds for the next adventure, which I’ll report on in the next blog.
Thanks for reading.
Say thanks with a one-off donation or a regular subscription
If you enjoy our content and find it informative or inspirational, you’re welcome to show us some love with a donation or subscription. The services we use to create our GPS tracks and host the site cost money, funds that we’d rather be spending on the road, creating bikepacking and tramping routes and content to share with you. Thanks for reading!


Great trip and fantastic images as usual, Mark! It’s been a good few years since I’ve made the pilgrimage to the Darrans but I’m feeling the call to get back down there next summer. This has definitely boosted my motivation.
Man you guys are cool. Would have liked to be standing alongside when Tom sang Purea Nei into the morning stillness. Agree Te Puoho shrinkage is visibly noticeable from 2016, and no one likes shrinkage. As usual, your skilled lens captures a bewilderingly impressive landscape. Thanks for the inspiration as always Mark. Look after than tendon au
De nada Justin – cheers 🙂
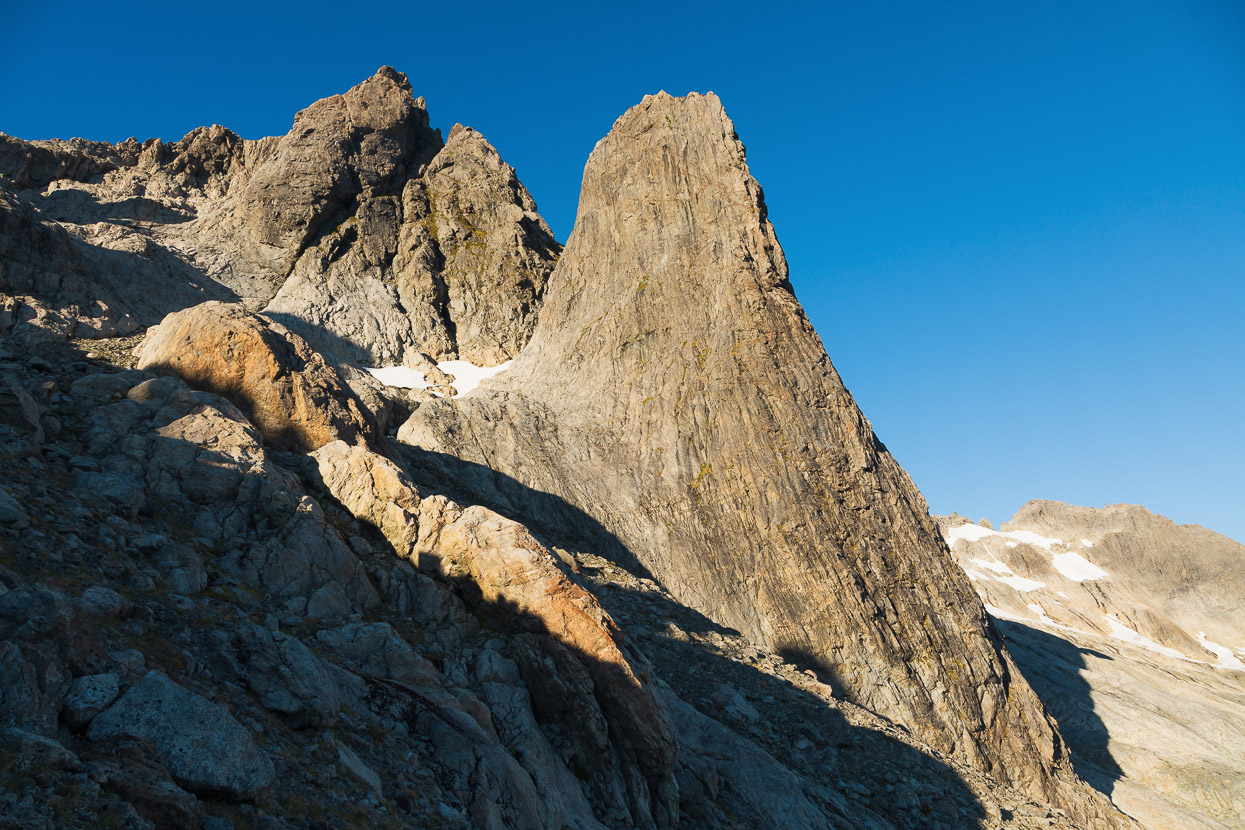
“I don’t think this feature has been climbed. It’s the next buttress west of Tuhawaiki’s north ridge.” – It has been. At least twice. 🙂
https://climbnz.org.nz/nz/si/fiordland/darran-mountains/mt-tuhawaiki/rothorn
Ah thanks Rich – I did wonder! Updated…