
camera equipment and photography workflow on a long cycle tour
I’m often asked what photography equipment I’m carrying on the road for a nearly three-year cycle tour, as well as how I manage workflow and backups.
What follows will be some detail about the gear I’m carrying, why, and how I use it. But I’ll kick off by admitting that it’s a heavy set up for what is mostly a bikepacking style ride and not one I’d necessarily recommend. So if in reading this you’re looking for the answer to ‘what camera should I buy for bikepacking?’, then proceed with caution. But what I hope people will take away from this is an understanding of the bases I’m trying to cover with the gear I carry, and recognise that this is applicable to a range of different camera systems and set ups. The gear I carry is selected because it’s what I need to get the results I seek on this particular journey.
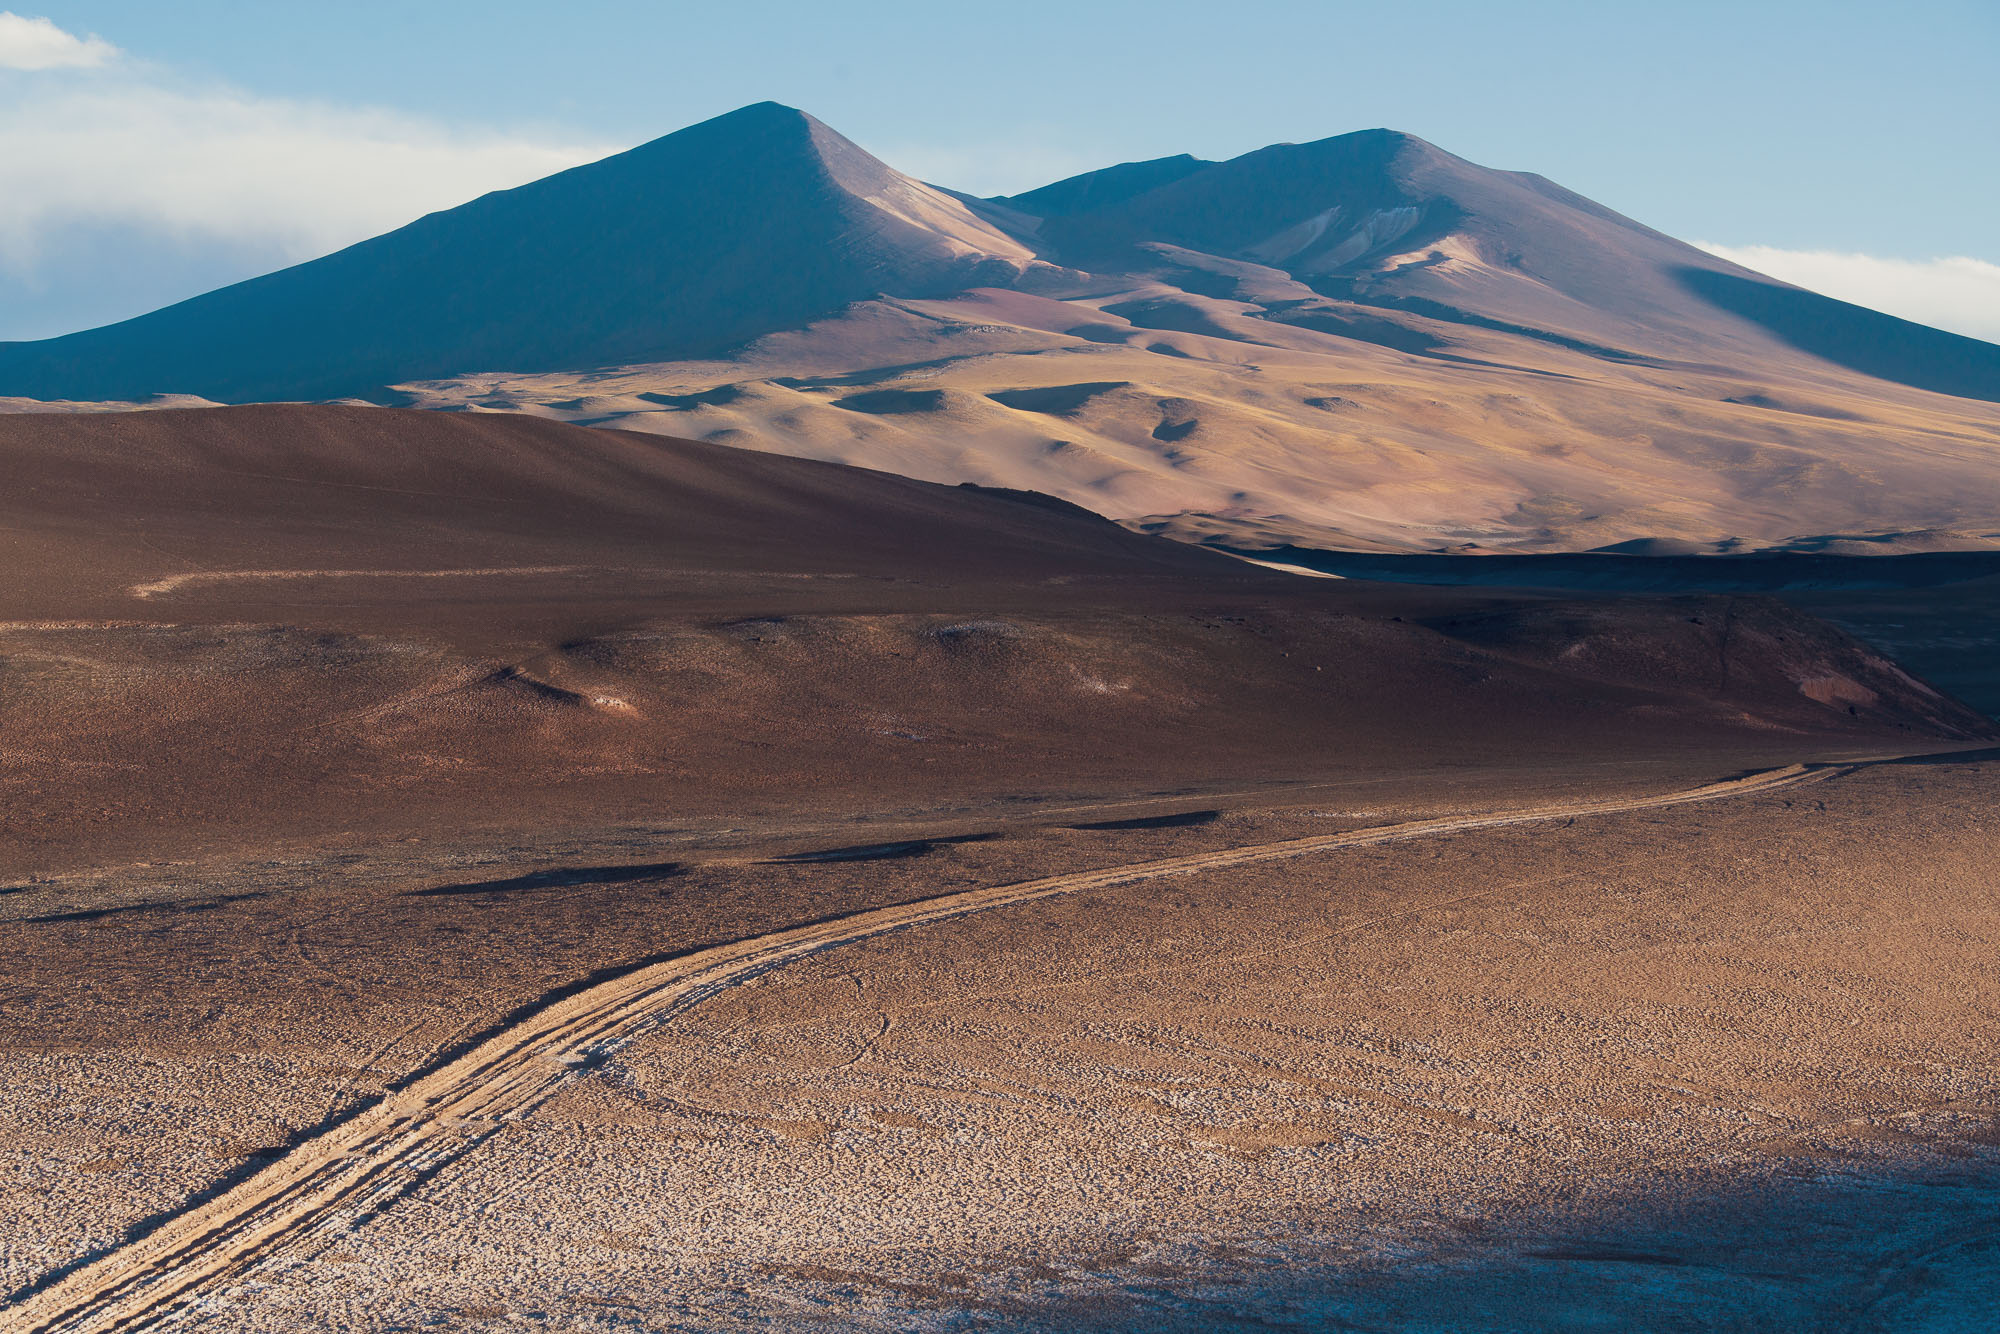
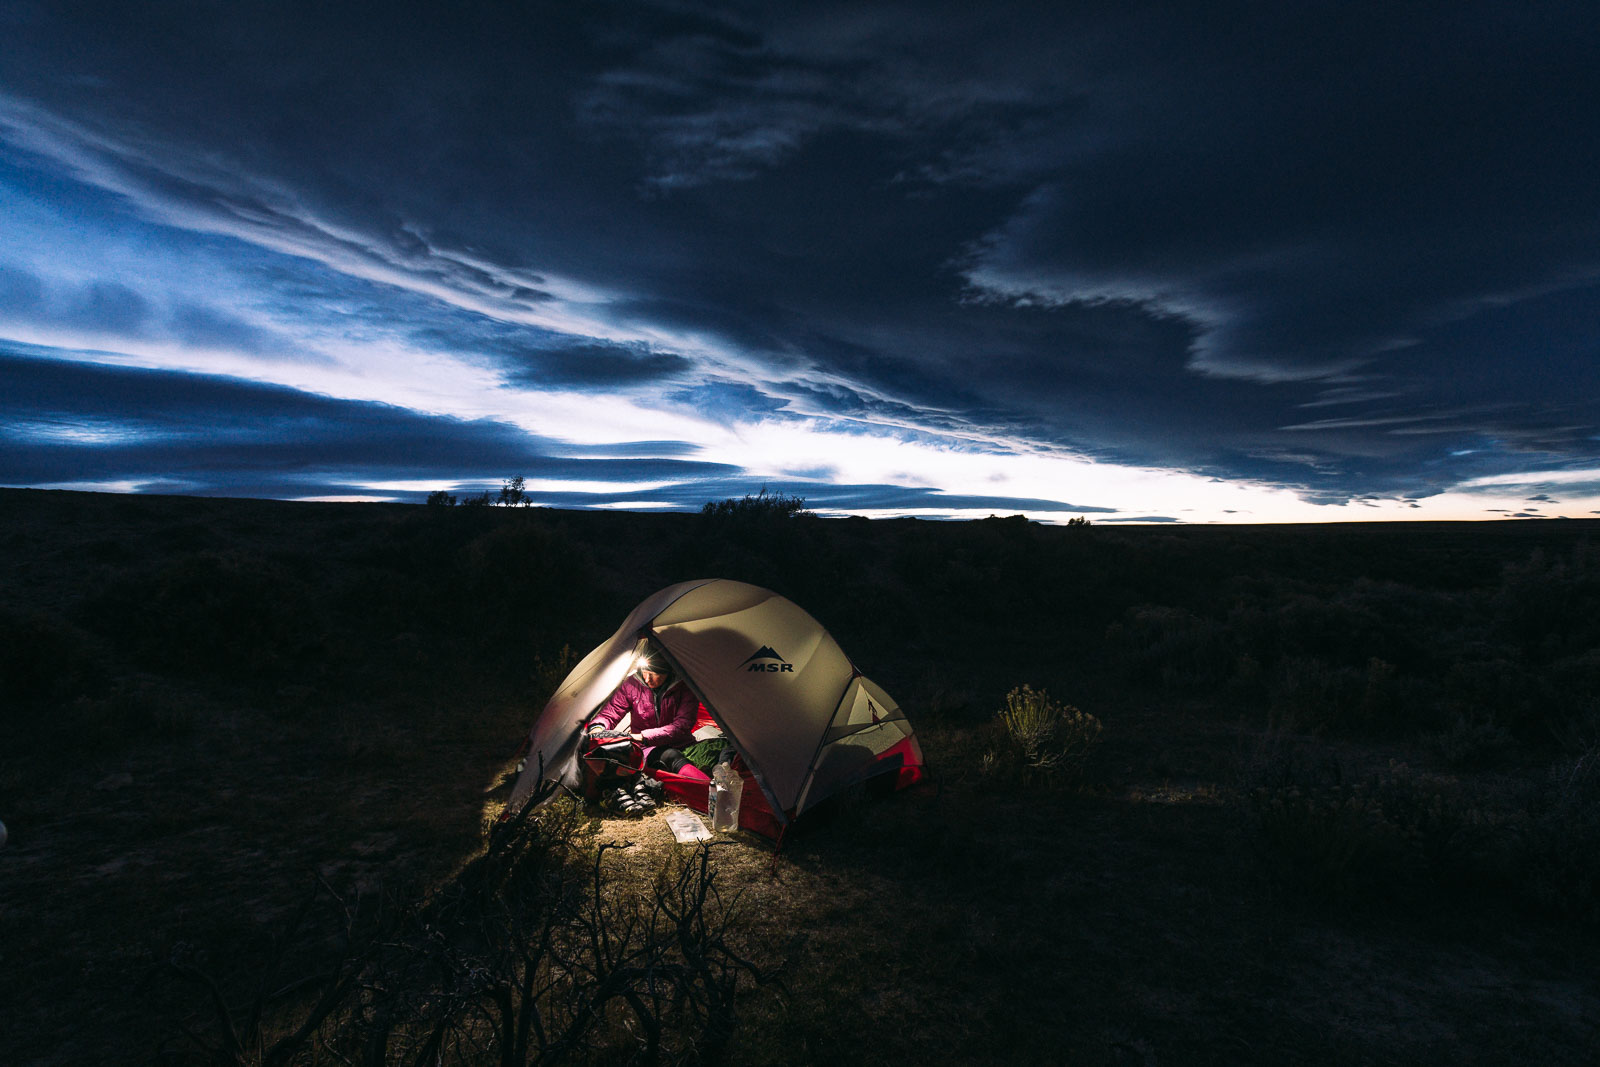
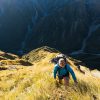
16mm | f11 | 1/640th sec | iso 400
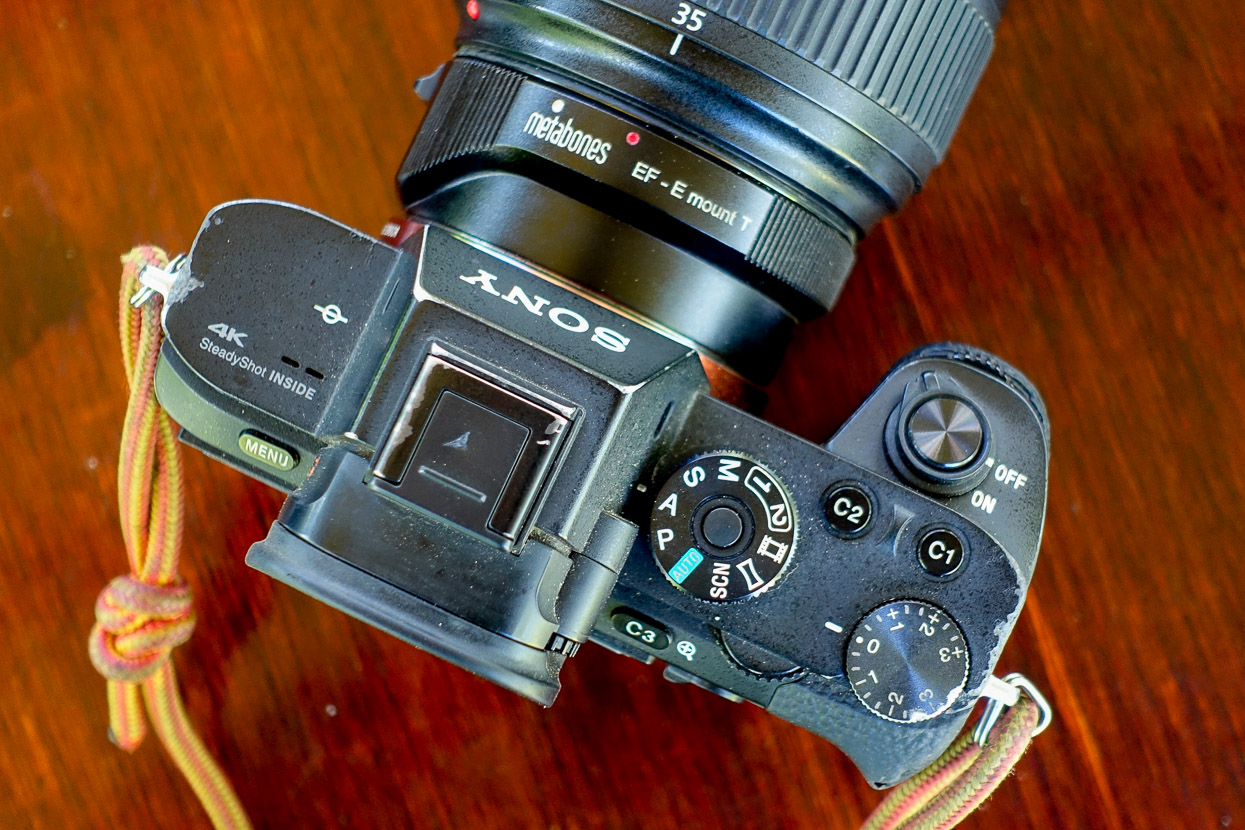
Camera Body
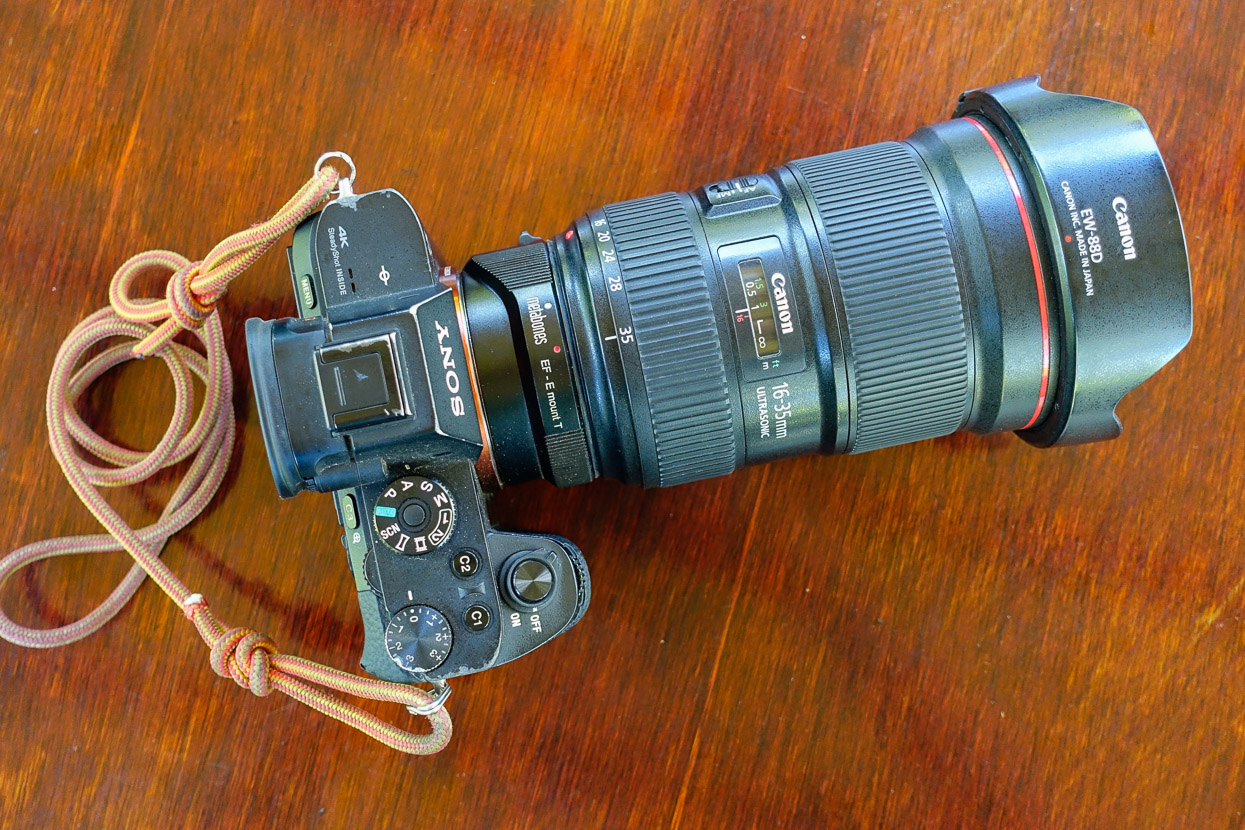
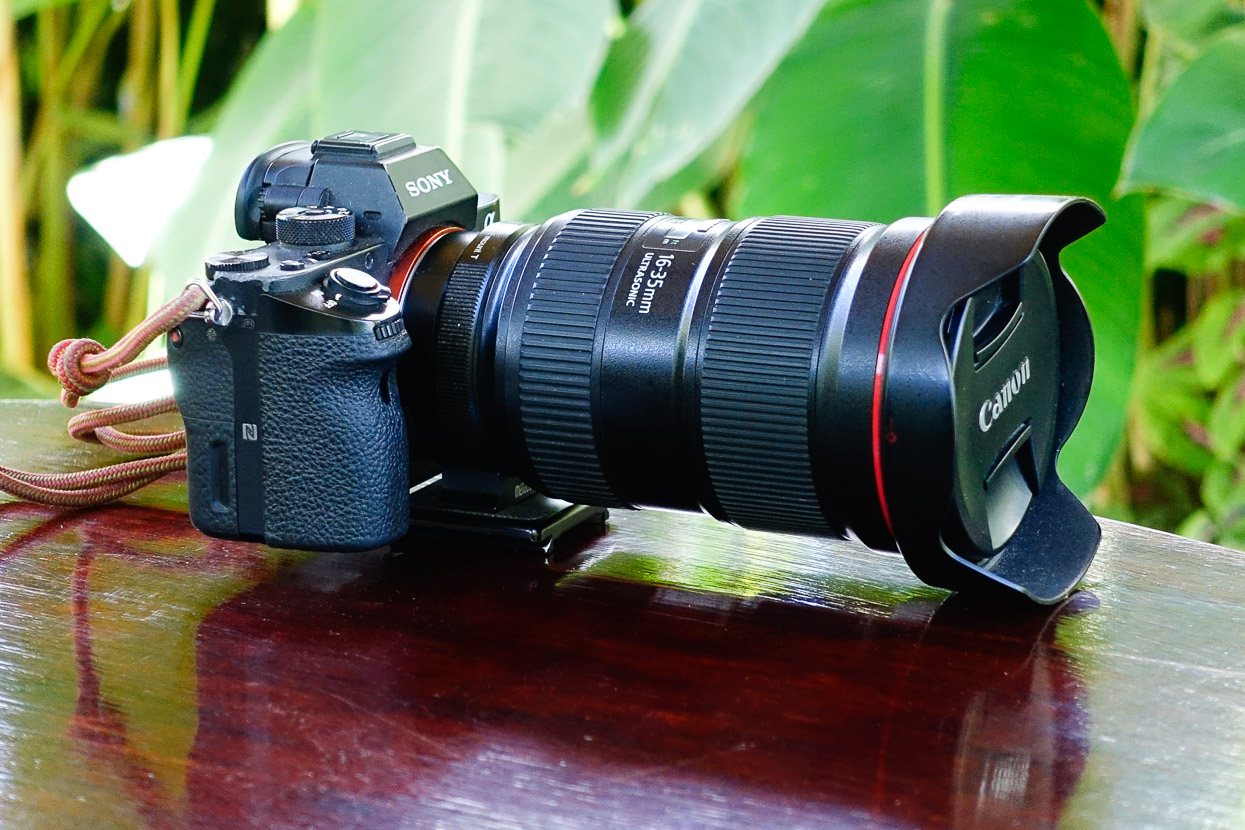
I’m shooting with a Sony A7R mkII (full frame, mirrorless body) with a Metabones mkIV adapter for mounting Canon lenses. Previously I’ve owned Canon 5D and 5D mkII bodies (hence the Canon glass), but I bought the Sony for the smaller form factor, slightly lighter weight, greater dynamic range, high ISO performance, resolution and image stabilisation. I’d spent a lot of money over the years on good Canon lenses and didn’t want to have to buy a whole new lens line up, hence the adapter.
The high dynamic range (DR) increases the amount of ‘stops’ (or ranges of brightness) the camera is capable of capturing. If you have been in a situation where you are trying to photograph a bright sky and a dark foreground (common in landscape photography) then the greater the DR the better your camera will cope and the less likely you are to end up with no detail in the shadows or blown out highlights.
High ISO performance equates to lower noise in images shot at ISOs of about 800 and above, meaning that noise will be less evident in photos where you have lifted the exposure in post processing, especially when recovering shadow detail. Likewise, if you have to push the ISO up to 2000 or even higher to capture an image inside or in low light, more detail and less noise will be present. High ISO capability is something I consider essential for street and travel photography, especially as I don’t carry any strobes, so it’s very useful to have an adaptable camera that can handle the ISO being pushed high in low light, especially indoors.
The camera’s 42 megapixel sensor might sound excessive, but for detailed two-page spreads in books and magazines it’s good to have the pixels, as well as for exhibition prints in the future. For now – and especially with wildlife photography – I find the extra pixels allow me to crop aggressively and still have an image that’s a decent resolution. It does make the camera files demand more storage and processing power, which I’ll talk about down the page.
Another very useful function of the Sony is the 5-axis image stabilisation. Lens stabilisation has been around for years, but it’s a relatively new thing in camera bodies. Essentially it allows you to shoot at much lower shutter speeds than normally possible, and increases your chance of a sharp shot when using a long lens, like a 70-200mm. Along with the ISO performance it’s another arrow in the quiver of this camera’s excellent low light ability.
The Sony has proved to be tough and capable. It’s been carried on my back or bike for over two years now, been dropped (to the extent that the lens snapped off it at the mount) and handled dust and drizzle without missing a beat. Compared with a Canon 5D mkII the buttons are fiddlier and the menus suck, but you soon get used to the UI and the feel of the camera. I’d be very reluctant to switch back to Canon now unless they made a mirrorless body with similar features.
17mm | f5.6 | 3.2 sec | iso 800 | tripod
Lenses
I carry the following:
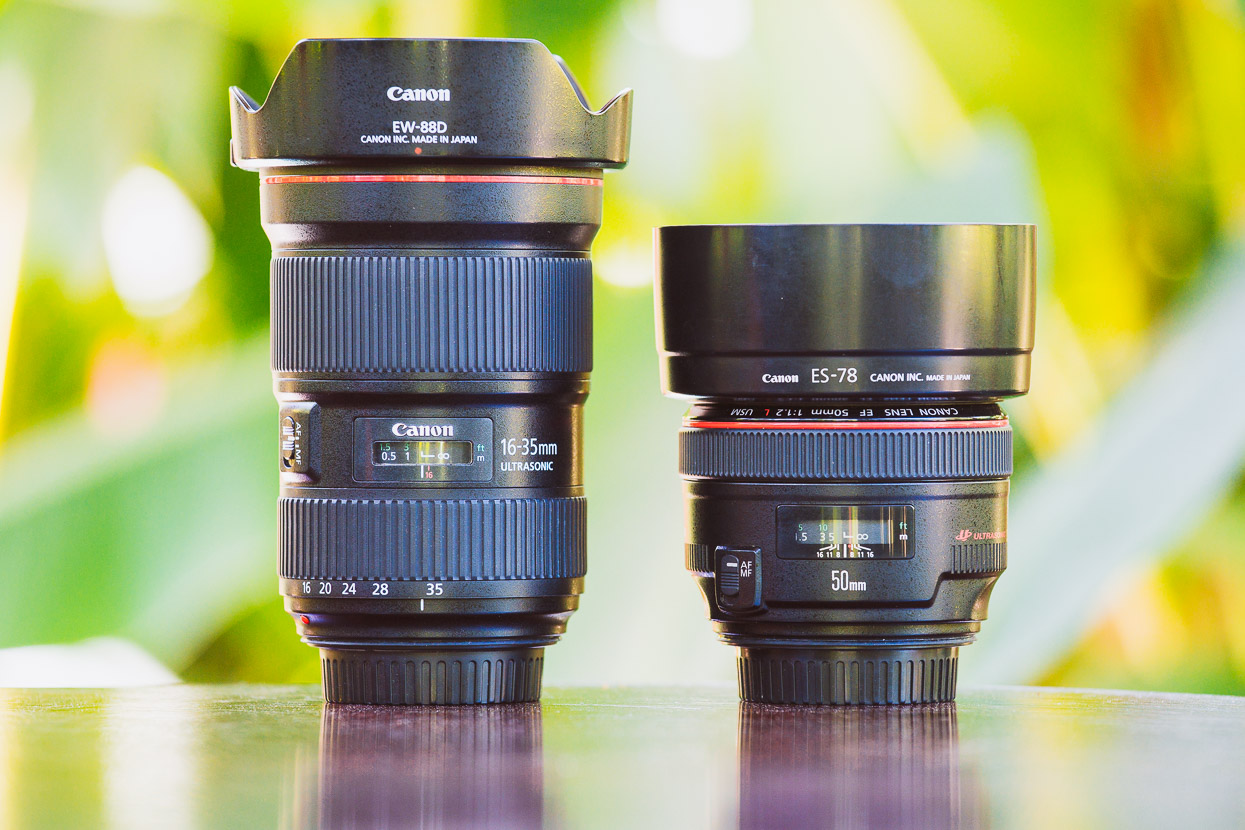
16-35mm f2.8L
This is my go to landscape lens and is also very useful for interiors, astrophotography and all round travel. By itself it’s not good as a do-it-all lens as it does not have enough tele range. But it covers the ‘wide’ end of the spectrum perfectly. The version I have is the mk III which is the sharpest version yet and gives prime-lens quality shots. It’s sharp in the corners even wide-open and the colour rendition is beautiful.
50mm f1.2L
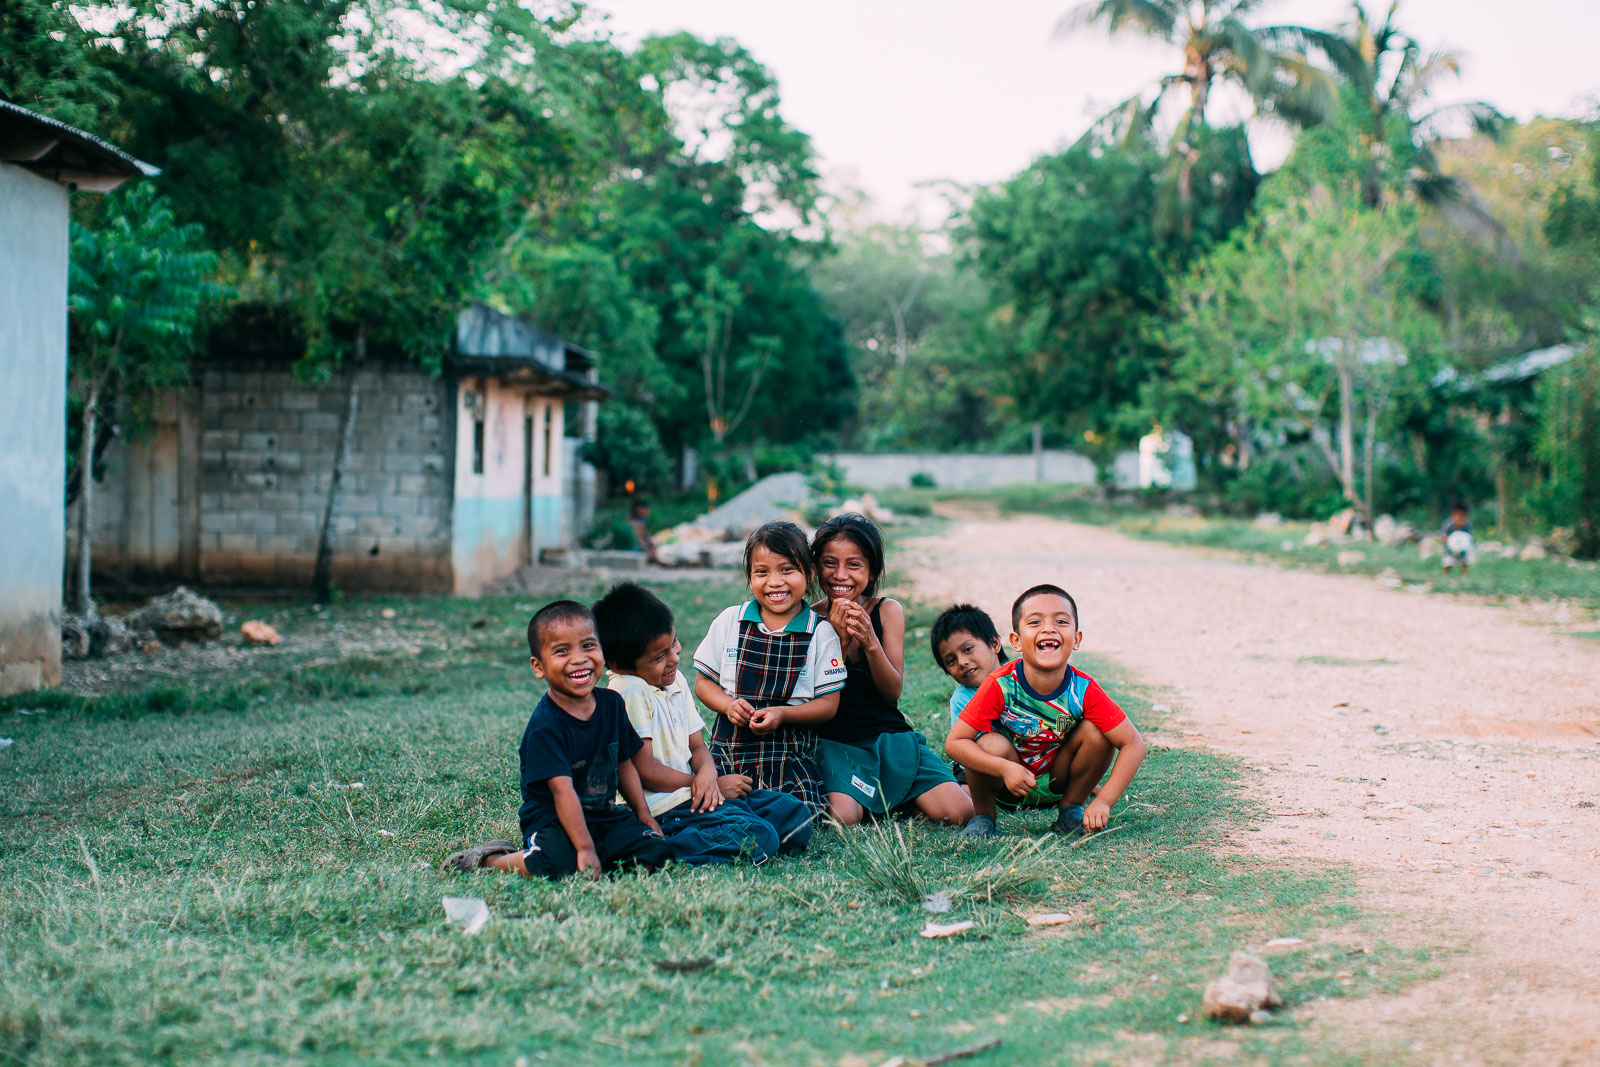
The 50mm focal length is a classic photography tool that gives a very ‘honest’ view of your subjects. The proportions and scale that this lens renders are supposed to be the closest camera focal length to what the human eye sees. It fills the gap nicely between the 35mm of my wide lens and the 70mm of my telephoto and I never feel a need for more range. If I go walkabout in a village or market, and I’m only taking one lens, this is the one. It’s also my favourite for portraits. Used well, the 50mm can appear as if it is covering a much wider range of focal lengths than it actually is. This f1.2 version also gives me some flexibility to still capture images (combined with high ISO) in very low light. Stopped down a little, say to f2, it’s incredibly sharp, and this is one of the advantages of a very fast prime: crisp photos with nice bokeh at wide apertures.
70-200mm f4L IS.
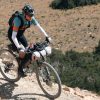
I hadn’t carried a 70-200mm lens on a biking trip until this one, but it’s quickly become my most used lens for capturing other people riding. I love the ‘scene compression’ (making the background look closer than it actually is) you can create with long lenses and with a rider in the photo this can create some strong images. It also works very well to create depth if part of the scene is very close to the lens. I also use this lens often to capture ‘slices’ of landscape, textures and details. It’s also useful for abstracts and candid portraits. With 70-200mm it’s easy be very selective about what you do and don’t include in the frame, allowing for some powerful compositions. The only thing I miss is a bit more at the 200mm end for wildlife photography, so next time I’d consider a 100-400mm instead.

50mm | f2 | 1/320th sec | iso 160
Carrying the Camera & Lenses
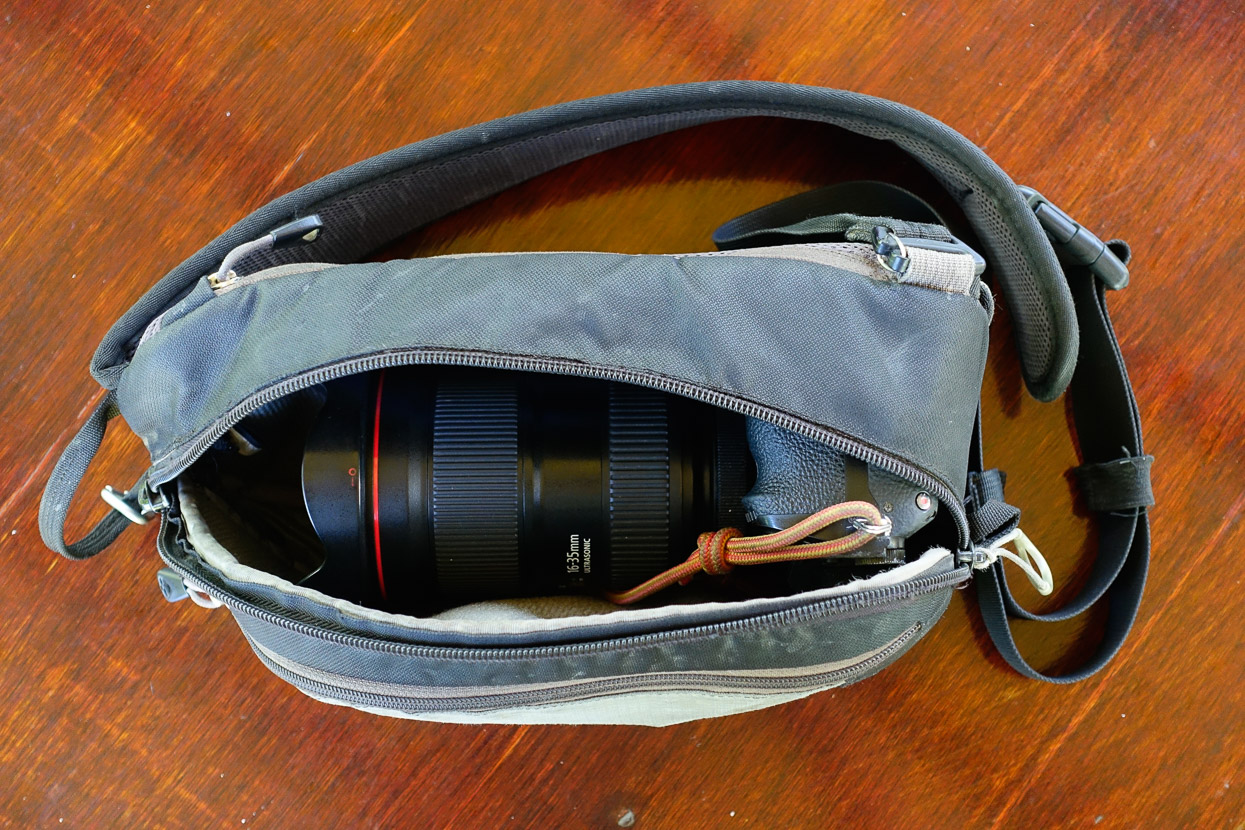
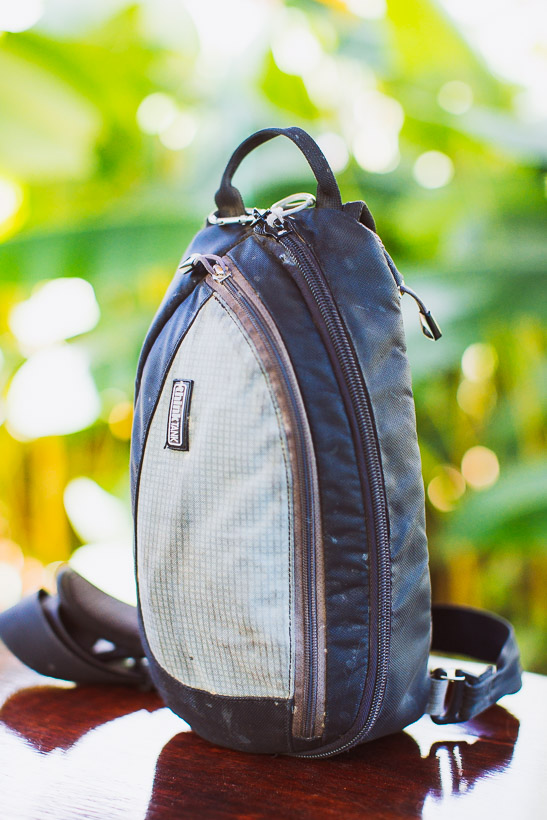
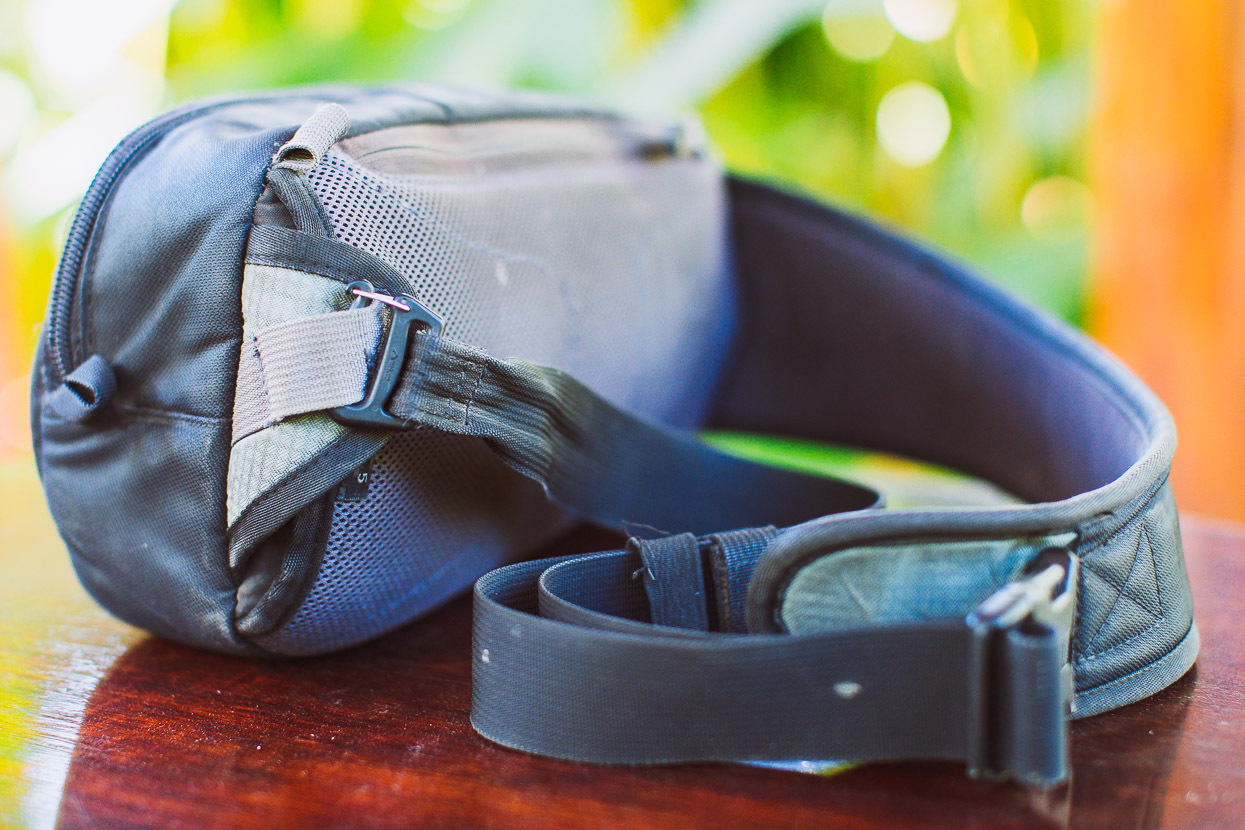
I carry the camera in a Thinktank Turnstyle 5 (V1), which is a brilliant sling-style bag that can also be worn as a bumbag. This keeps the camera always handy. Motivation to shoot can wane when you’re tired, so removing obstacles to access your camera is important. If it’s easy to reach you’re more likely to make the most of opportunities and not miss spontaneous shots. When I’m off the bike, it’s quick to throw over my shoulder for a walk and I can clip one of my other lens cases to the bag.
During heavy rain I just wear my rain shell over the top of the bag, and in light, showery rain the included rain cover is sufficient.
Also in the bag are my SD cards, two spare batteries, Lens Pen and small micro fibre cloth.
The lenses live in Thinktank Lens Changer bags which then go inside drybags (only when it’s wet) inside the Revelate Designs Ranger Frame Bag on my bike – making them always quickly accessible too. In dry conditions I can also velcro one Lens Changer bag to my handlebar for even faster lens changes. My main cleaning kit, SD cards, 4 extra spare batteries and filters live inside dry bags in my pannier and seat bag.
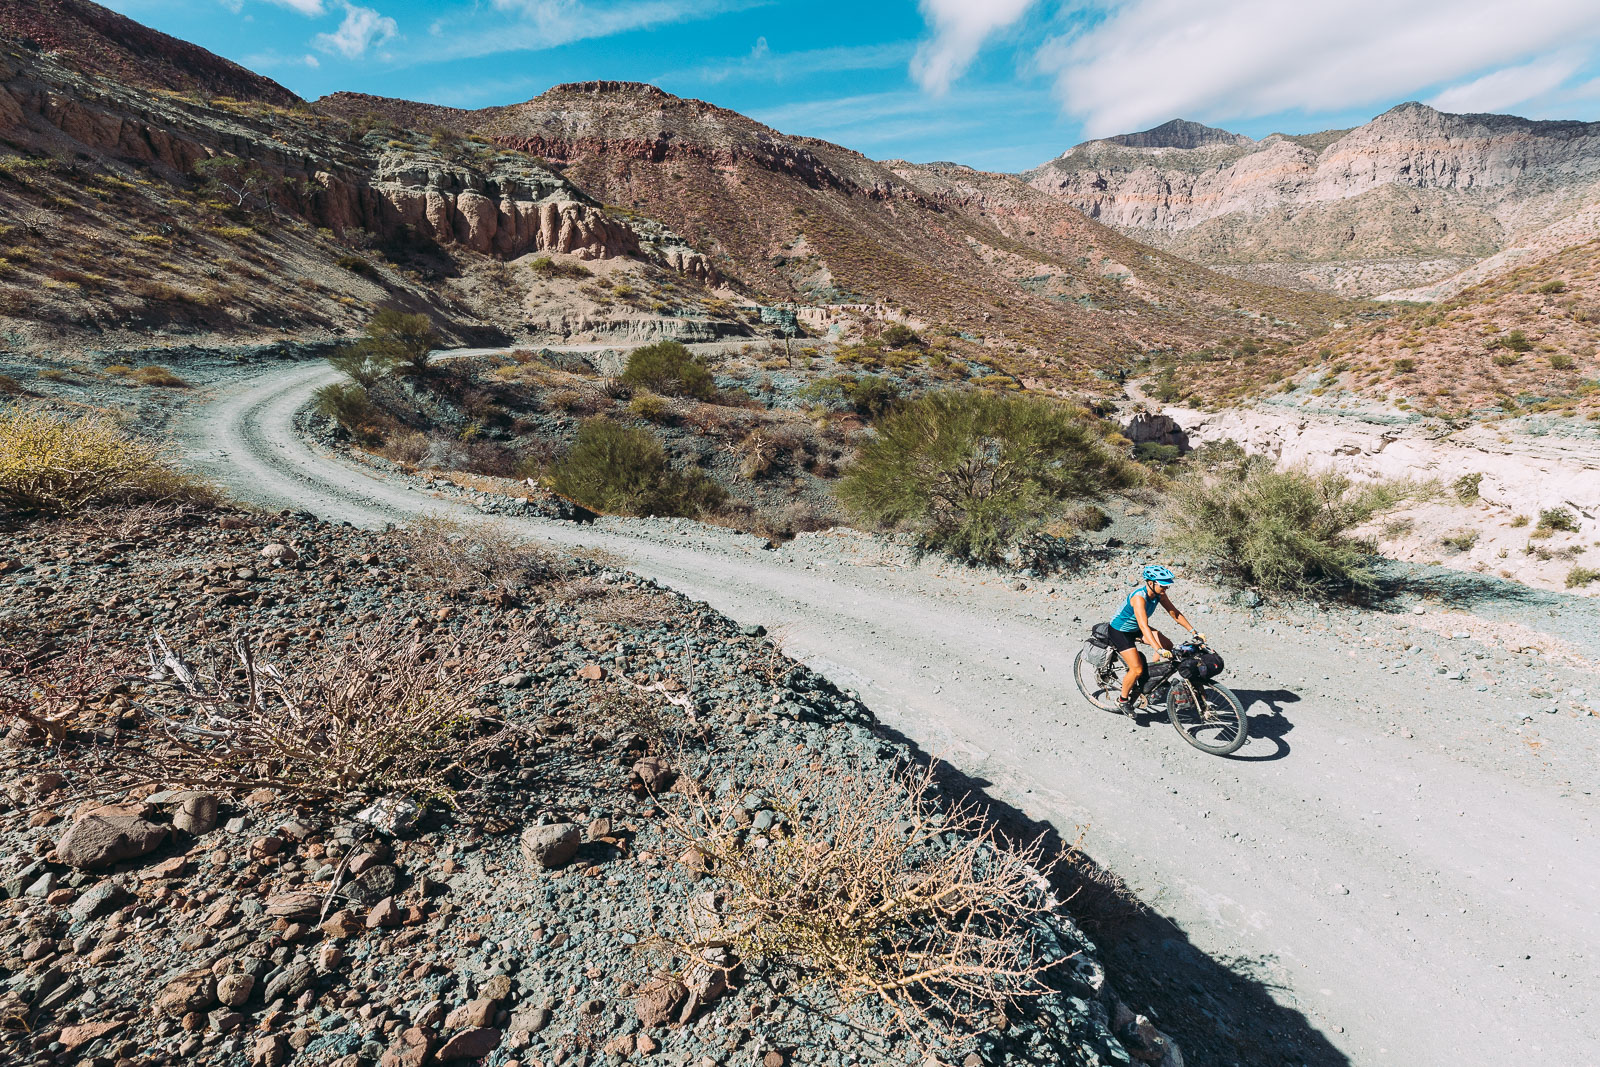
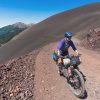
200mm | f8 | 1/800th sec | iso 600
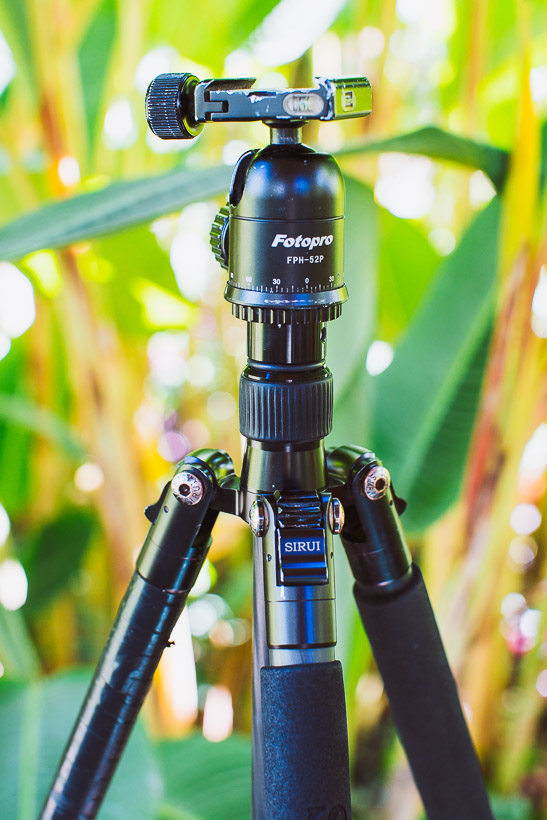
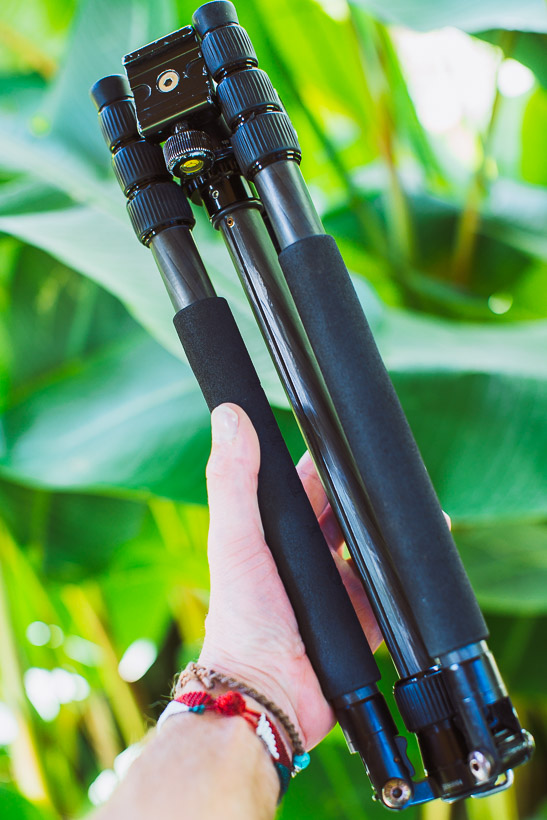
Tripod
The Sirui T-024X carbon fibre tripod has been a perfect compromise between weight and stiffness for a bike trip where weight savings are prudent. For a close-to full height (centre pole extended) tripod it’s very light, but stiff enough to support a full frame mirrorless body and fast lenses. In windy conditions it’s not possible to extend the centre pole, as it catches the wind and causes blurred photos, but otherwise it works well.
I started the trip with a heavier tripod and I’m glad I settled on something lighter for the start of the Great Divide and the rest of the ride. Note that the ball head is not the one included, but a slightly stiffer ProFoto version – necessary for my heavier lenses and smooth and simple to use.
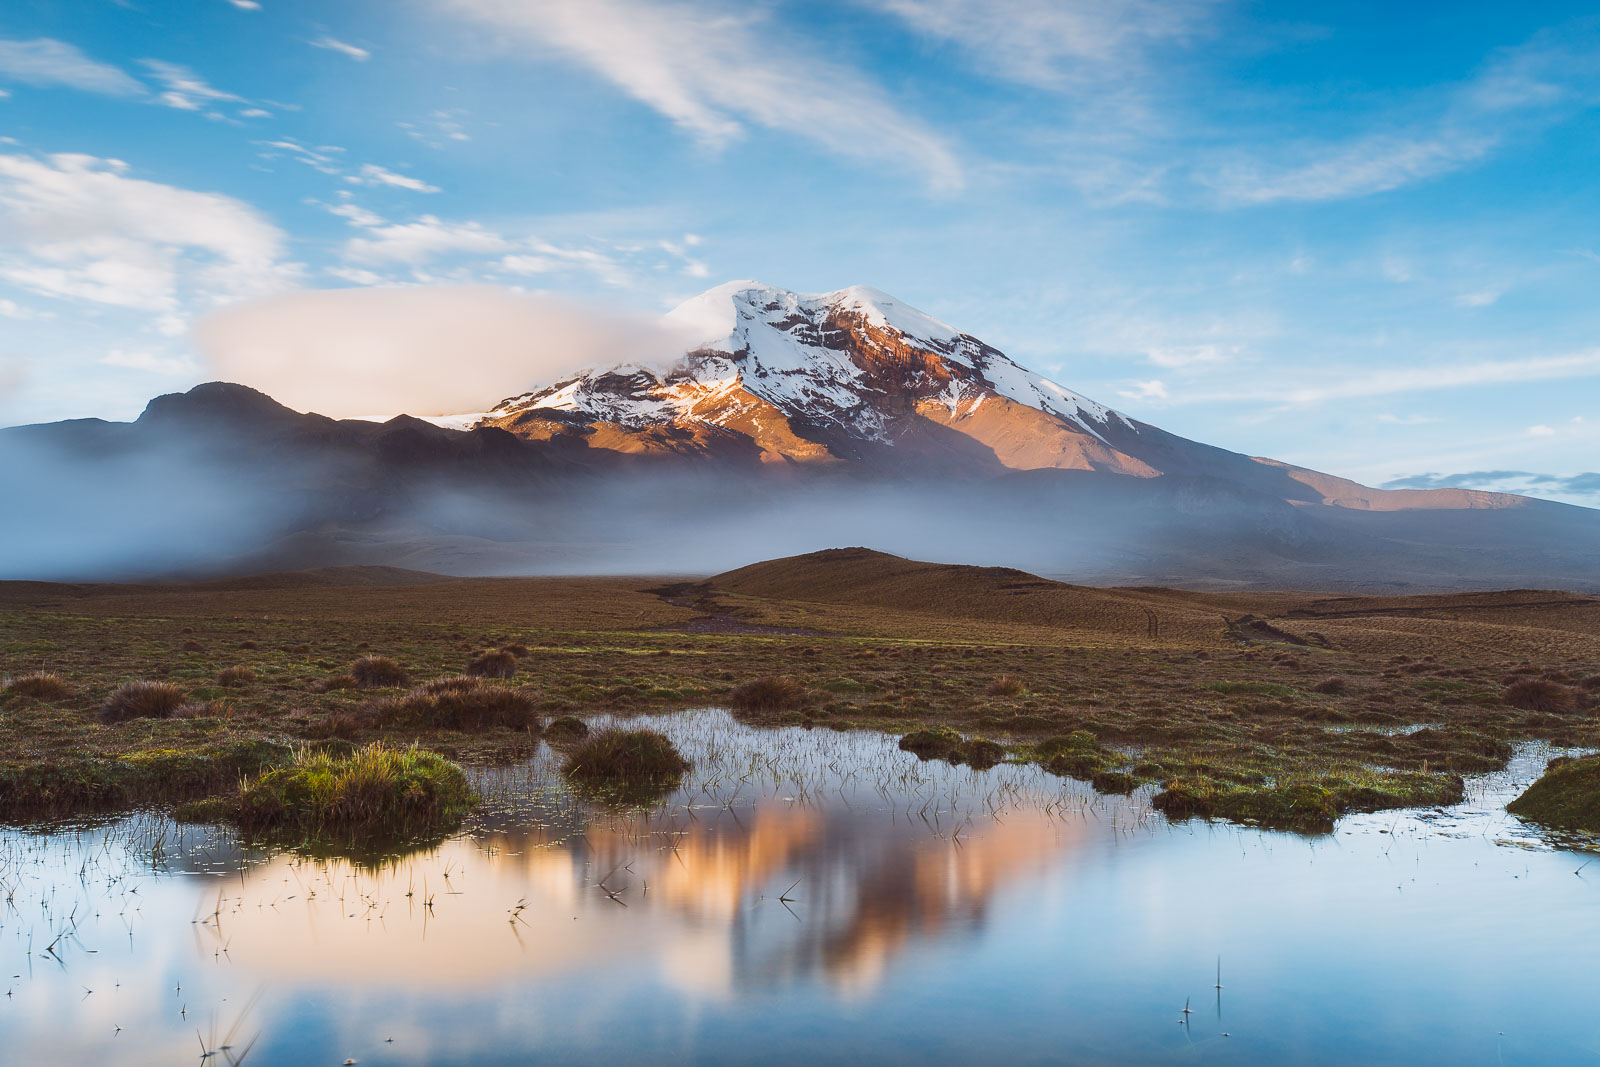
23mm | f14 | 10 sec | iso 50 | tripod
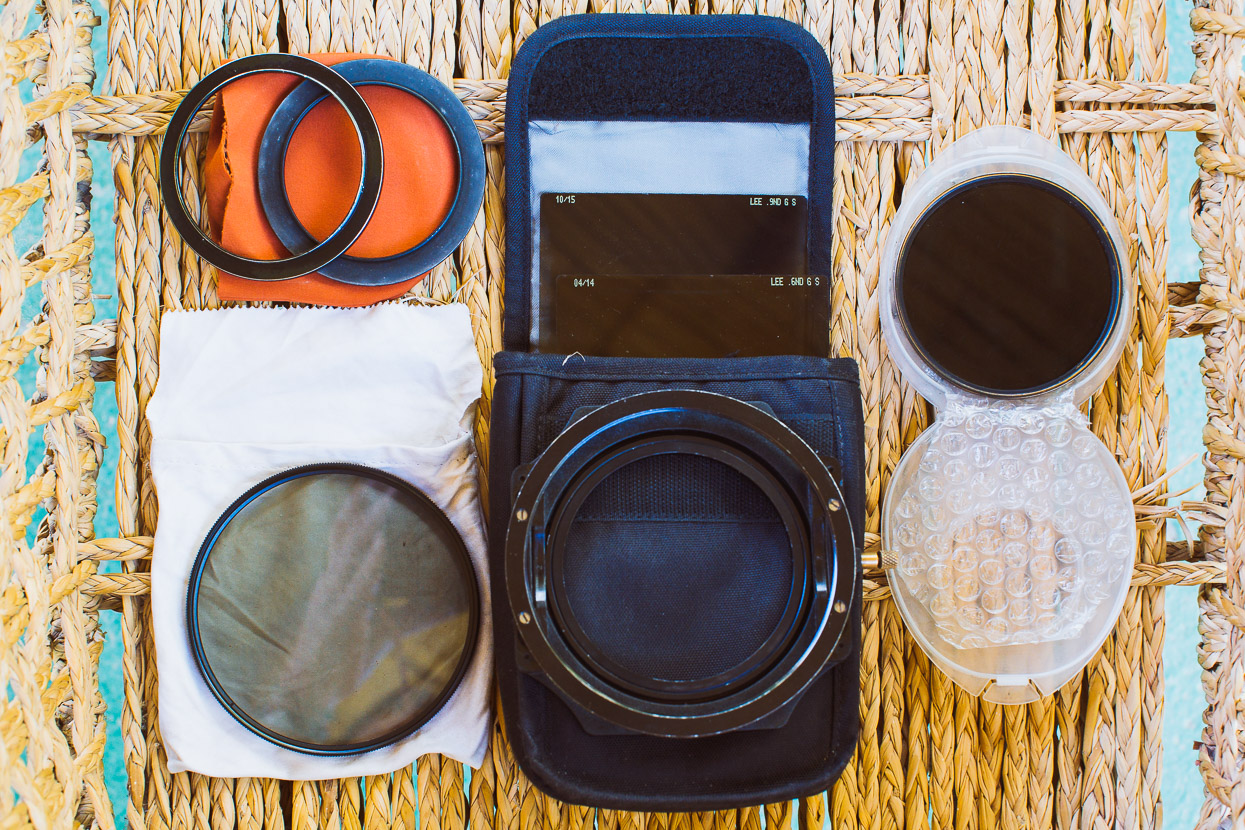
Filters
For tripod-based landscape photography I consider a few filters essential, but have pared down to the basics for this trip.
Neutral Density Graduated filters (soft) .6 and .9
These filters have a gentle graduation between clear and dark and are useful in situations when there is a big difference in brightness between the top and bottom of your composition (i.e. in a landscape photo with a foreground subject and a bright sky)
Three-stop Neutral Density filter
This is a 82mm wide circular filter that screws to the front of my wide angle lens, although I also carry adapters to fit it to my 50mm and 70-200mm. This is uniformly dark filter that allows long exposures when the light is too bright for standard camera settings. By reducing the amount of light transmission into the lens you have more control to create longer exposure times. Useful for that soft streaky cloud or mist look and making moving water soft or misty (i.e waterfalls, rivers).
Circular polariser
Another 82mm wide filter for my wide angle lens. I use this for reducing reflection off foliage in forest photographs and to increase or decrease reflections on water.
I keep the filters in a simple, padded Adorama case that I found in a thrift store in Montana. It can be velcroed to my belt or camera bag.
30mm | f8 | 1/125th sec | iso 250
21mm | f10 | 1/160th sec | iso 400
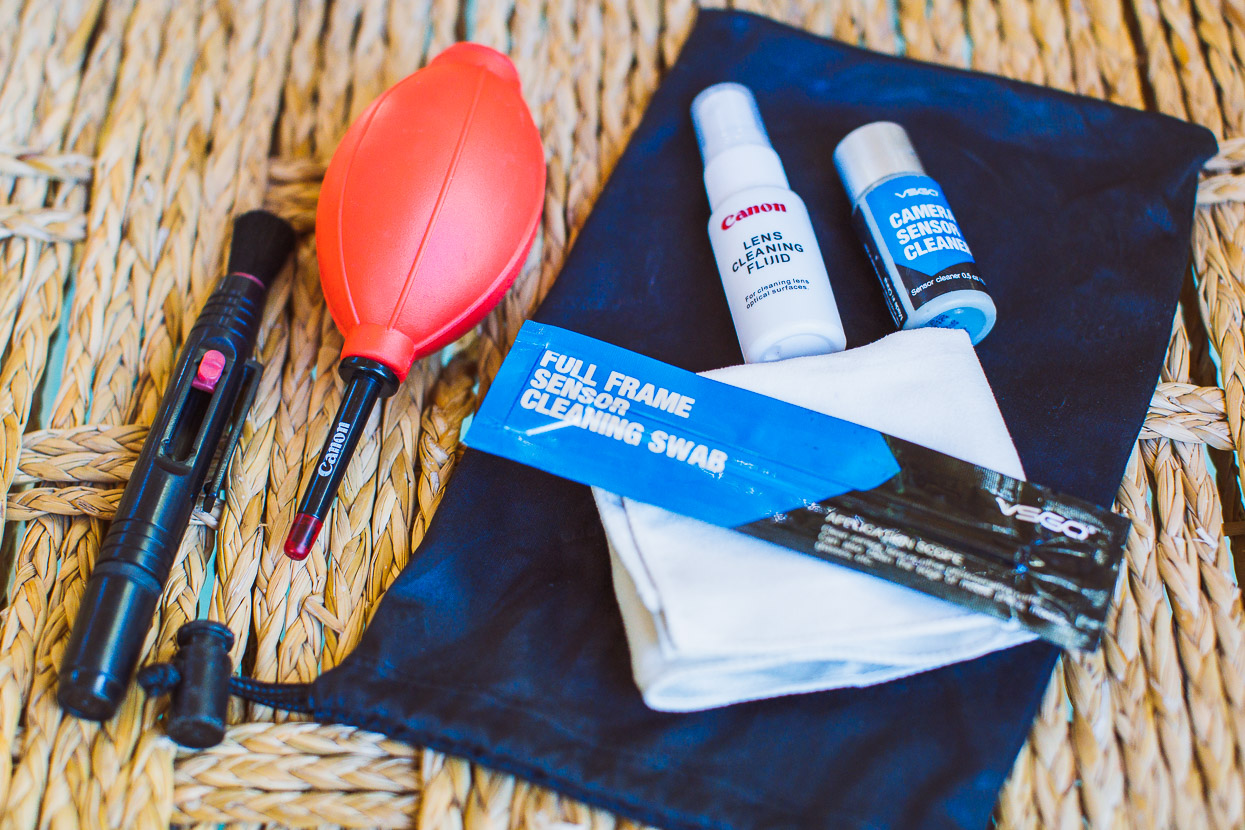
Cleaning & Accessories
• Microfibre lens cloth
• Lens pen (for lens spot cleaning + brush)
• Lens cleaning fluid
• Air blower (for removal of sensor dust)
• Sensor cleaning fluid
• Sensor swabs (for stubborn sensor dust/stains)
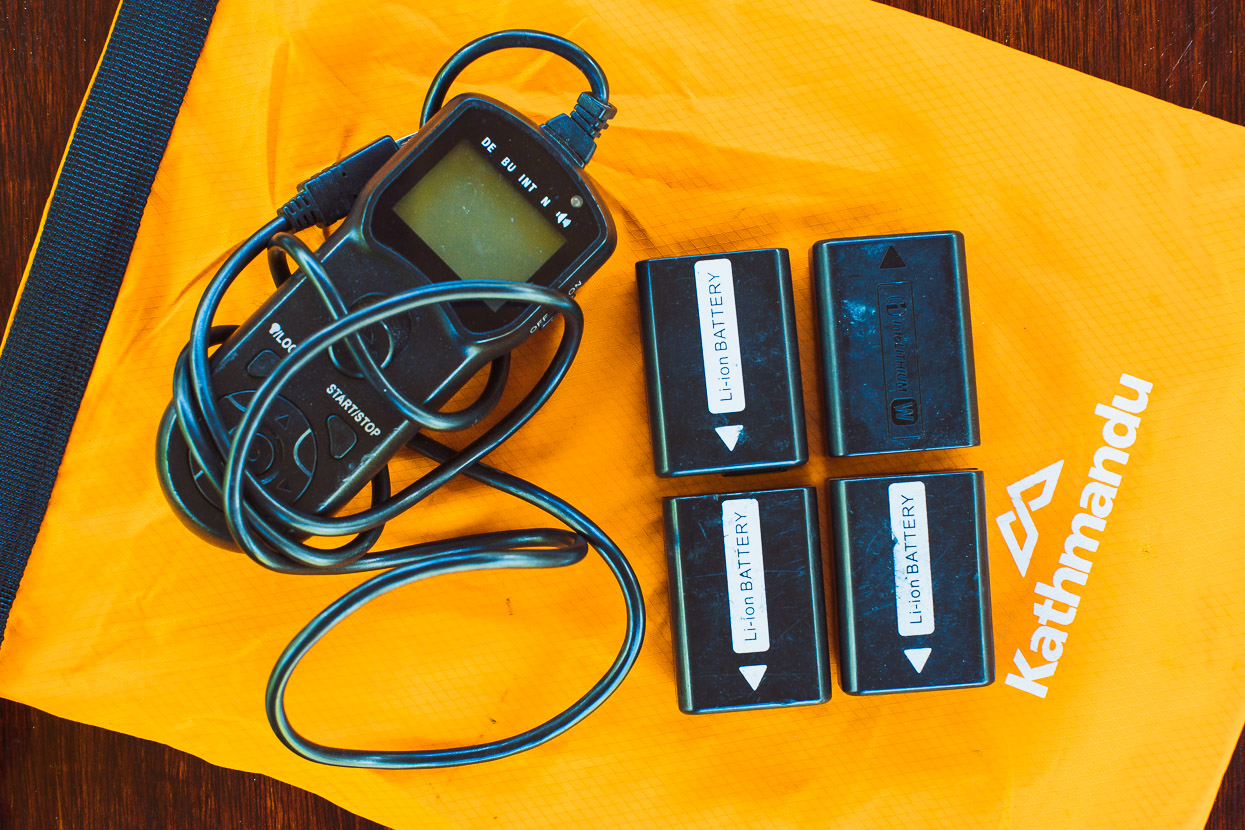
• Programmable electronic cable release
• 352 GB worth of SD cards (4 cards)
• 5 spare batteries

75mm | f10 | 1/320th sec | iso 800
Computer, Workflow & Backups
I started this trip with a 15 inch Macbook Air, but in a bid to save weight and space, and because the screen was starting to show signs of dying, switched to an 11 inch version after Panama. I bought this as a refurbished unit for a few hundred dollars from Mac of All Trades.
All editing and processing is done in Adobe Lightroom Classic CC. I upload cards (via Lightroom) to a Western Digital 4TB USB hard drive, which is cloned to a second 4TB hard drive. Considering the rigours of our ride, I’m amazed these HDs have lasted two years of travel, but so far no problems at all. I keep my Lightroom catalogue on the laptop (not the USB HD as is a common practice), for snappier processing.
About every 6 months I back up the last few months photos to a cheap USB drive that I send to a safe location/give to friends/family if meeting. It takes a long time to fill all my SD cards, so they serve as a third, temporary backup.
The 42 megapixel A7R mkII files and the small processor of the Macbook Air are not a particularly happy marriage, but if I leave the computer rendering 1:1 Previews in Lightroom overnight it’s easily fast enough for in-depth processing and the develop module sliders all work responsively. Occasionally I venture into Photoshop for exposure blending, but 99% of my processing is in Lightroom.
On import the RAW (I always shoot RAW) photos have a basic set of keywords and a ‘develop preset’ (a basic ‘look’) applied to them. My develop preset has varied a few times over the course of the trip, and is often inspired by the tones and colours of the regions we ride through.
As I edit my photos I pick my rejects (trashed immediately) and ‘selects’. For each blog post or section of the ride I create a new ‘collection’ and using the ‘set as target collection’ function, I can then hit the ‘B’ key to automatically add any selects to that collection.
I then re-edit the selects in the collection with the flag tool to pick out the best. I then process, crop and sometimes correct perspective. My processing is not extreme as the develop preset does most of the work, but I usually correct the exposure and tweak the shadows and highlights. Sometimes I’ll add a graduated filter to sky or water or make selective colour adjustments.
The processed shots are then backed up to Dropbox (as hi-res JPEGs), using the ‘Publish Services’ tool, whereby a ‘watched folder’ in Dropbox on the MacBook Air is automatically backed up (over wifi) when anything is added to it. It’s an efficient and simple system.
I like that having the photos in Dropbox them makes them easily available for sponsors, sharing with editors etc. Using the same Publish Services method I also save out to Dropbox the same set of photos as much smaller files for posting on Instagram or emailing. These days many people back up their entire RAW catalogues into the Cloud, but with Latin America’s wildly variable (and generally slow) internet, JPEGs are the best I can manage.
Comments and Questions are welcome. Thanks for reading!
Do you enjoy our blog content?
We love it when people shout us a beer or contribute to our ongoing expenses! Creating content for this site – as much as we love it – is time consuming and adds to travel costs, so every little bit helps.
Thanks to Biomaxa, Revelate Designs, Kathmandu, Hope Technology and Pureflow for supporting Alaska to Argentina.


Thanks for sharing that Mark.
What intervalometer are you using with your Sony? Do you find the tripod mount on the Metabones useful for balance? I’ve got the Sigma MC-11, and it’s working pretty well, but I think the balance would be better on a tripod if it had a tripod mount.
Pedal on… 😉
Thanks Conor. I’m using the JCC TM-F2. A relatively cheap Chinese unit but it works really well.
This one: http://www.jjc.cc/index.php/Product/product_info/id/188?l=de-de
Yes – I love the tripod mount on the Metabones. I have an arca-type plate on there and I find the position balances the camera really nicely; less camera shake for long exposures. Especially on a just-suitable tripod.
Great article! Is this what you need for Geotagging?
http://www.photoclubalpha.com/2017/11/09/sony-is-ready-to-launch-a-gps-module/
Great one! Thanks for this really practical set of informations.
Hi Mark,
thanks for this comprehensive article and your absolutely fantastic blog. I have been following along on your journey for a while now (via this blog and also Instagram), but, as you can see, am still quite a few posts behind. Being an enthusiastic amateur photographer myself, I especially enjoy your wonderful photography and the thoughts you share on your process.
Reading this article, I was wondering how often you actually use your ND-Grads, having a camera with such a reportedly great dynamic range. I own a Lee filter system myself, but since I treated myself to a Nikon D850 a little over half a year ago, which probably has a comparable dynamic range, I actually dont bother taking my filter pouch along with me anymore. I find the added noise I get in the underexposed shadows without the use of an ND-Grad is more or less a non-issue for me. On the flipside, when I did use ND-grads, I often found myself spending quite some time in post correcting the shadows above the grad-line until I obtained a natural looking result, although that may just be a lack of skills in post-processing 😉
Futhermore, I have actually had issues with my resin Lee-Grads permanently defoming in really hot conditions. I then had to stick them in the oven at 50°C between two heavy chopping boards to get them perfectly plane again. Have you ever experienced this, or are your’s made of glass?
I sincerely hope you will consider making a book of this journey. I have often wished I was not reading about your travels on a screen, but instead in a large coffee-table book.
Best wishes and safe travels to both of you,
Chris
Thanks Chris – really appreciate the comment and glad you like the blog! I use my grads reasonably often (enough to justify them). I definitely take your point re dynamic range and opening the shadows, but I still like to get the image as ‘correct’ as possible in-camera, and grads help with that. Being soft grads only I generally find the blending smooth enough (or not noticeable) to not require much in the way of correction. I use the Lee Grads, which are resin and after two years on the road they’re started to look a bit battered, but usable as long as I’m not pointing them right into the sun. There’s certainly a book planned, but we’ve got a bit more riding to do first 😉
Happy shooting…
Hi Mark, what type of knot din you use for the paracord strap? I’ll copy this. 😀
Hey, it’s basically one half of a double fisherman’s, tied on a bight. If that makes any sense. I’m not sure what the name is. Can explain further if you need 😉
Great ! Thanks for sharing.
So the Dropbox is not really a backup and you delete it from time to time ?
Thanks Thierry, no problem. I use Dropbox to back up both hi- and lo-res JPEGs of my ‘keepers’ (basically what has been on blog, plus a few extras). I don’t delete it, but I do use Dropbox’s ‘online only’ sync to stop my HD getting too congested.
Hi Mark, Hope you guys are well and enjoying your trip. I am enjoying the updates on your amazing travels. My wife and are are planning a few 20+ day trips around New Zealand (We live in Wellington – Kiwis) over the coming year. You have inspired me to look at taking my 5D + lenses on my trips to learn and try capture better photos rather than keep using my stupid iPhone.
I was hoping you could help me with a few questions. Do you carry the camera + lenses in your pannier bags or do you carry them on your back in the think tank turnstyle bag? Also how do you deal with security? My wife is worried about them getting stolen? I have only just recently brought the 5D Mk IV. I know its a wee bit large and heavy but it’s my only option as I can’t afford the Sony like you and I really want to start taking much better photos while traveling. Any advice, ideas and thoughts around this would be really appreciated. I would absolutly love to learn the trade from someone like you. I have time and the passion being semi retired with lots of adventures planned. Cheers Bryan (Website coming soon)